Shopify helps set up online stores for selling products. It offers website building and marketing tools. Also, it provides payment processing and shipping services. However, you might want to cancel your Shopify account.
This could be due to a change in strategy. Or, you may want to try a different platform. It could also be to save money. Whatever the reason, this guide can help. It explains how to cancel your Shopify subscription. You’ll learn the steps to take. Plus, you’ll find tips to avoid extra charges.
Considerations Before Canceling Shopify Subscription
Follow Shopify’s terms of service
- Visit Shopify’s website. Then navigate to the “Terms of Service” page.
- Read through the terms carefully so that you can understand the guidelines for canceling your subscription.
- Pay attention to any specific instructions. There are requirements outlined in the terms.
Note any actions you need to take or documents you need to provide when canceling.
Check for penalties or fees
- Log in to your Shopify account and access the billing or subscription settings.
- Look for information regarding cancellation fees or penalties in the terms or billing details.
- Take note of any applicable charges and the conditions under which they apply.
Consider reaching out to Shopify’s support team for clarification if needed.
Disconnect other logins
- Access your Shopify account settings. Then navigate to the “Connected Apps” or “Integrations” section.
- Review the list of third-party services or apps you have access to your Shopify account.
- Disconnect each service by following the provided instructions or contacting the respective service providers.
Ensure that all connections are successfully terminated to prevent unauthorized access after cancellation.
Log out of all devices
- Go to your Shopify account settings and locate the option to manage active sessions or logged-in devices.
- Review the list of devices currently logged into your Shopify account.
- Log out of each device individually by selecting the “Log Out” option next to each device.
- Alternatively, log out of all devices simultaneously for added security.
- Double-check to ensure that you are no longer logged in on any device to prevent unauthorized access.
By following these notes, you can ensure a thorough and secure process when canceling your Shopify subscription.
How to Cancel Shopify Subscription: Step-by-Step Guide
1. Log in to the Shopify admin panel and navigate to Settings
- Navigate to the login page of Shopify.
- Input your email address and password to sign in.
- Find the Settings section within your account.
- Look for the gear or cogwheel icon in the left-hand sidebar of the dashboard.
- Click it to open up the Settings menu.
On mobile: locate the menu icon (three horizontal lines), usually in the top-left or top-right corner.
2. Select Plan and choose between Pause or Cancel subscription
- In Settings, find the “Plan” or “Subscription” tab.
- You’ll see “Pause” or “Cancel” options.
- Pausing temporarily suspends billing and store activity.
- Canceling ends your subscription completely.
Consider the implications of each choice.
3. Review options for selling store or pausing subscription
- Selling your store can bring in a lump sum but you’ll lose control and it might take time.
- Pausing can save money temporarily but could slow down your progress.
Read more: SHOPIFY STORES FOR SALE: WHERE AND HOW TO FIND? [2024 GUIDE]
4. Select Cancel subscription and close the store
- Find the “Cancel subscription” button or link in Settings.
- Click it to start the cancellation process.
- Follow the on-screen guidance from Shopify.
- Confirm your identity and acknowledge the consequences.
- Back up any important data.
Make sure to settle any outstanding payments and complete any extra steps required by Shopify.
Before final action, consider alternatives:
- Switching to a Cheaper Plan: move to a more budget-friendly option.
- Exploring Different Payment Options: like monthly or yearly billing.
- Requesting Temporary Financial Assistance: Shopify may offer temporary relief.
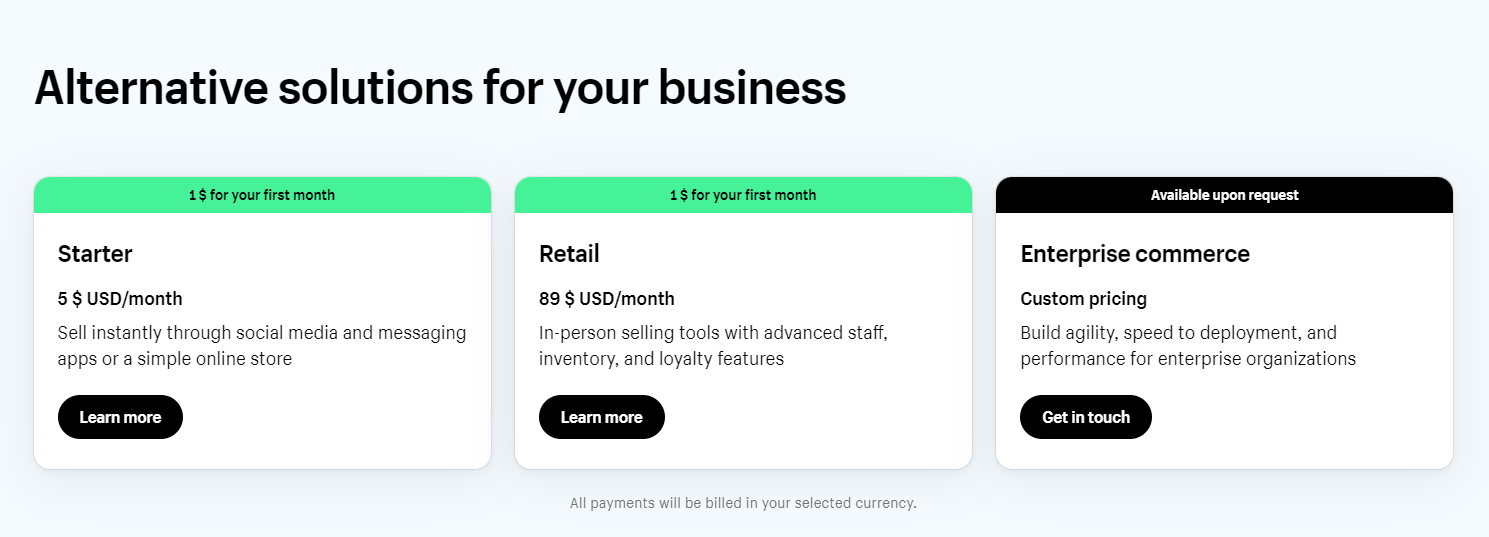
Cheaper Solutions for Your Business
Also, understand the impact on your store’s data:
- Data Retention Period: limited access after cancellation.
- Data Backup: back up product details, customers, sales data.
- Smooth Data Transition: plan data migration carefully.
5. Choose a reason for canceling and confirm with your password
- You may need to select a reason for canceling.
- Confirm your decision by entering your password.
By following these steps, you can confidently cancel your Shopify subscription.
Explore more: 7 Steps On How To Delete Shopify Account Permanently
When to Move Away from Shopify
Reasons why businesses consider moving:
- Customization Limits: limited compared to WooCommerce, Adobe Commerce.
- High Pricing: advanced features cost more.
- Blogging Issues: lacks flexibility and features.
- Transaction Fees: extra costs with third-party gateways.
- Data Control: data stored on Shopify servers; limited export options.
- Email Hosting: not included; must use external tools.
How to Cancel Shopify Subscription: FAQs
Can Shopify give me a refund?
Yes. Cancel during the trial or within 30 days to get a full refund. After 30 days, refunds usually aren’t available. Installed apps and transaction fees are non-refundable.
Original payment method receives refund in 3–5 days.
Read more: HOW TO WITHDRAW MONEY FROM SHOPIFY
Can you cancel the Shopify plan before the free trial ends?
Yes. Go to account settings → Billing section → follow cancellation steps.
After canceling, you lose access to paid features.
Can I reactivate my Shopify subscription after canceling it?
Yes. Choose a new plan and resume payments. Your store data is preserved.
What happens to the data after canceling?
Your data is typically accessible for 30 days. After that, access may be restricted.
Back up your data within this timeframe to avoid loss.
Wrap up
Canceling your Shopify subscription is straightforward but important. We’ve covered how to do it, refund policies, data backup, and key considerations.
With this knowledge, you can confidently manage your subscription and decide what’s best for your store.
Read more: