The significance of having a strong online presence is already apparent to you if you are using Shopify to operate your online store. Facebook is a site you can’t afford to ignore when it comes to social media, which is an essential part of that presence.
It’s essential to verify your Shopify domain on Facebook to build credibility and unlock useful features. In this blog post, we will walk you through the process to make sure you have a thorough knowledge of how to verify Shopify domain on Facebook, the biggest social media network worldwide.
What Is Shopify?

Shopify is an extensively utilized and adaptable e-commerce platform that offers enterprises and individuals the resources and tools required to design, develop, and oversee online stores.
It provides an all-inclusive and intuitive solution for establishing and managing e-commerce enterprises, enabling users to sell goods and services to clients online.
Shopify is widely recognized for its user-friendliness and accessibility, rendering it appropriate for entrepreneurs with varying levels of technical proficiency.
Key features include:
- Marketing tools
- Inventory management
- Order monitoring
- Secure payment processing
- Configurable website themes
One of Shopify’s main advantages is flexibility. It meets the needs of many industries and can handle companies of all sizes.
Why Should You Verify Your Shopify Domain On Facebook?

Verifying your Shopify domain on Facebook is a fast and efficient approach to increasing brand awareness and fostering client trust.
Benefits include:
- Increased credibility: Verified domains increase reliability for potential buyers.
- Access commerce features: Unlocks Facebook Shop, product tagging, and dynamic ads.
- Increased brand recognition: Higher chance of showing up in Facebook search and recommendations.
- Ad campaign efficiency: Easier ad tracking and attribution.
- Preventing abuse: Protects your brand from unauthorized use.
- Customization options: More control over Page and ad campaign appearance.
- Increased audience reach: Greater visibility in Facebook content and suggestions.
- Enhanced conversion rates: Builds trust, leading to higher sales.
How To Verify Shopify Domain On Facebook
If you want to integrate Facebook’s commerce and advertising services with your Shopify business, verifying your domain is a crucial step.
Required conditions:
- A Facebook Business Manager account
- Admin access to your Shopify store
- The meta-tag provided by Facebook
Step 1: Enter Your Domain Name Into Facebook Business Manager

Guide:
- Open Facebook Business Manager and log in.
- Click Business Settings (top right).
- Select Business Assets → Domains.
- Click Add and input your domain (e.g., www.yourstore.com).
- Select Add Domain.
Step 2: Verify Domain Ownership
After adding your domain, you need to prove ownership. Facebook offers multiple verification methods, but the Meta-tag option is common:
- Next to your domain, click Verify Domain.
- Choose Meta-tag verification.
- Copy the unique meta-tag code provided by Facebook.
Step 3: Put The Metatag On Your Shopify Store
At this point, you should update your Shopify store with the meta-tag. To do this, follow these steps:
- Log in to your Shopify admin panel.
- Choose the Themes option when you access the Online store.
- Select Actions and then Edit Code.
- Locate the
theme.liquidfile and paste the provided Facebook meta-tag directly section. - Save the modifications.
Step 4: Verify Shopify Domain On Facebook
When you are back in your Facebook Business Manager, select Verify Domain. Facebook will check to see if the meta-tag is present on your website. It will validate your domain if everything is configured properly. Establishing the legitimacy and ownership of your domain inside Facebook’s ecosystem depends on this verification process. Here’s how to go about it:
- Open Facebook Business Manager and log in.
- Then select Business Settings.
- Select Brand Safety from the menu on the left, and then Domains.
- To add your domain, click the Add button.
- Using the DNS records you added, Facebook will attempt to validate your domain. It might take some time for changes to propagate. A green checkmark will appear once validated.
- Once Facebook has authenticated your domain, go back to the Shopify admin dashboard.
- Go to the DNS settings area, choose the Facebook-validated domain, and then click Verify.
- Click Save or Publish Changes in Shopify admin.
Step 5: Configure Aggregated Event Measurement

Setting up Aggregated Event Measurement is crucial after confirming your domain. The process entails configuring event tracking and pixel management to collect vital data for your Facebook ad campaigns.
Steps:
- In the Facebook Business Manager, select Event Management.
- Select the Aggregated Event Measurement option.
- Determine the goals and priorities of your company when configuring your 8 conversion events.
Step 6: Test Your Pixel (Optional)
Consider evaluating your Facebook Pixel as a best practice to make sure events are being tracked accurately. You can utilize the Test Events tool in Events Manager or the Pixel Helper browser extension from Facebook.
Domain Verification On Facebook Failed: Common Reasons And Solutions
Gaining control over the material and guaranteeing a smooth user experience for users interacting with Facebook and Instagram assets requires businesses and website owners to verify their domain names on Facebook. Nevertheless, domain verification might not always succeed. Below are common reasons and solutions:
Incorrect Meta-Tag Placement
- Reason: The meta-tag wasn’t positioned correctly on your website.
- Solution:
- Double-check the meta-tag placement in the section.
- Ensure the code is free of errors, typos, and extra spaces.
DNS Configuration Issues

- Reason: Misconfigured DNS settings prevent Facebook from validating your domain.
- Solution:
- Double-check DNS settings and required records.
- Ensure records are published to the correct domain.
- Match DNS values exactly to Facebook’s requirements.
Incomplete Domain Verification Process
- Reason: You might not have completed all steps.
- Solution:
- Revisit Facebook’s domain verification process.
- Ensure you clicked the final confirmation button or link.
Cache Problems
- Reason: Browser cache may interfere with verification.
- Solution:
- Clear browser cache and retry verification.
- Cached data may block the process.
Third-Party Apps Or Plugins
- Reason: Some third-party apps or plugins may interfere with verification.
- Solution:
- Temporarily disable conflicting plugins.
- After successful verification, reactivate plugins one by one to identify the issue.
Domain Ownership Verification
- Reason: If you do not have legal control of the domain you are attempting to verify, domain verification may not succeed.
- Solution:
- Confirm that you are the legitimate owner of the disputed domain.
- If not, make the required adjustments by getting in touch with the domain owner or administrator.
Privacy And Security Settings
- Reason: If your website has overly severe privacy and security settings, Facebook may not be able to get the data it needs for verification.
- Solution:
- Check and change your website’s security and privacy settings to ensure Facebook can access the necessary data.
- Verify that no limitations or password safeguards prevent Facebook from accessing the content.
SSL Certificate Issues
- Reason: If the SSL certificate for your website is not installed correctly or has expired, domain verification may not succeed.
- Solution:
- Verify the authenticity of your SSL certificate and make sure your website has integrated it correctly.
- If needed, update or renew the SSL certificate.
Read more: What Is an SSL Certificate (Secure Sockets Layer)? Definition, Importance & More!
Delay in DNS Propagation
- Reason: Sometimes DNS updates do not fully propagate over the internet, and Facebook cannot get the updated information.
- Solution:
- Wait for DNS updates to take effect. It may require 48 hours or longer to complete.
- Utilize internet DNS lookup resources to verify the accuracy and timeliness of the DNS records.
Meta-Tag Errors
- Reason: Successful verification may not occur due to meta-tag code errors.
- Solution:
- Carefully examine the meta-tag code and make sure Facebook has been appropriately copied into it.
- Look through the code for any inconsistencies or errors.
Facebook’s System Issues
- Reason: Occasionally, Facebook-related issues could lead to domain verification troubles.
- Solution:
- Keep an eye out for any persistent technical troubles on Facebook’s status page or through its assistance channels.
- Let Facebook fix any issues with its system before continuing.
Considerations When Verifying Shopify Domain On Facebook

There are a few crucial things to bear in mind while confirming your Shopify domain on Facebook to make sure the procedure goes smoothly and successfully. These factors assist you in avoiding typical mistakes and guarantee that the platform has properly validated your domain:
- Ownership verification: Ascertain that the domain you are attempting to verify is registered with you. The verification process is only accessible to domain owners.
- Placement of the meta-tag: Take great care to position the meta-tag that Facebook has provided in the section of the HTML code for your website. When pasting the code, try not to make any mistakes or typos.
- Security of meta tags: Do not share or keep your meta-tag code publicly accessible. Your domain verification must be protected from unwanted access.
- DNS settings: Check that the DNS settings for your domain are set up correctly so that Facebook can access your website. If necessary for verification, double-check your DNS records, such as TXT and CNAME records.
- Cache clearing: Before confirming your domain, delete all cookies and cache from your browser. There are situations where the verification process is hampered by cached data.
- Third-party plugins and apps: Look for any on your website that might interfere with the verification procedure. If needed, temporarily deactivate them, then activate them again following a successful verification.
- Security settings: Check your website for any plugins or security settings that can prevent Facebook from accessing it. Disable them for a while if they interfere with verification.
- Appropriate domain format: Make sure that while adding your domain to Facebook Business Manager, you enter
it in the proper format (
www.yourstore.com, for example). - Facebook Business Manager access: Verify that you have admin access and the required permissions to the Facebook Business Manager account linked to your Shopify store.
- Testing the pixel: If your Facebook pixel was successfully verified, you might want to test it to ensure it appropriately records website event data. This is beneficial for analytics and future advertising.
- Regular monitoring: Monitor the progress of your domain verification regularly. Ensuring that your domain stays confirmed is crucial, particularly if you change your website or domain settings.
Find Your Ideal Shopify Developers At Shopplaza
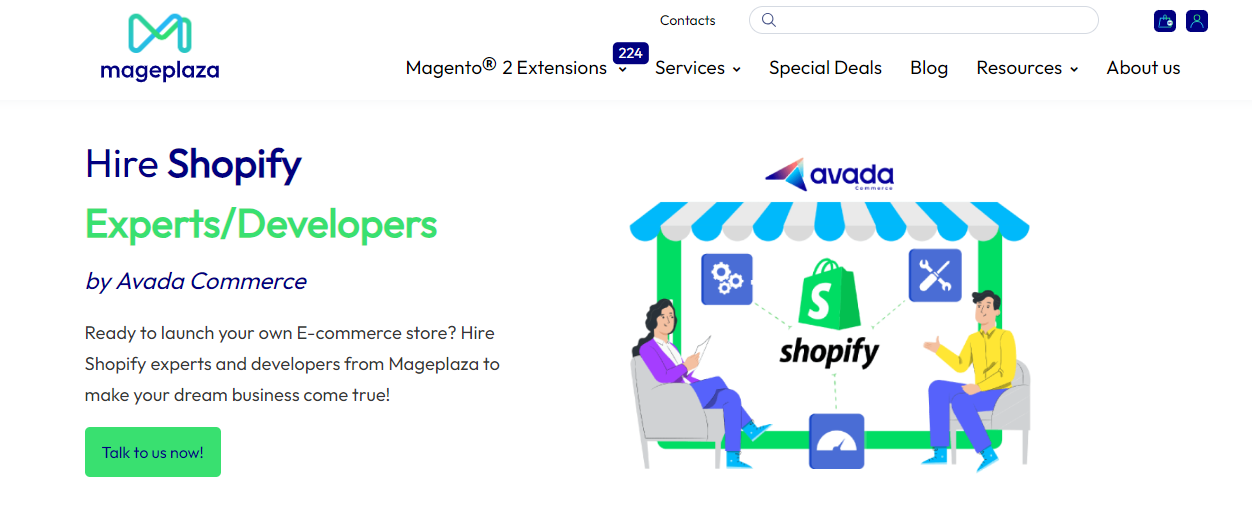
For companies and owners of online stores wishing to improve and personalize their Shopify stores, hiring Shopify developers at Shopplaza might be a wise decision. Shopplaza is a well-known business in the e-commerce sector that specializes in offering superior Shopify extensions and solutions.
They are a reliable choice for customizing and optimizing your e-commerce site, resulting in better user experiences and higher sales, thanks to their knowledge, experience, and dedication to providing high-quality solutions. Shopplaza’s Shopify developers might be hired for the following reasons:
- Shopify proficiency: They are experts on Shopify with a thorough understanding of the platform.
- Large experience: They have a great deal of experience working on e-commerce projects.
- Integration and customization: They are adept at effectively integrating and customizing your store.
- Huge app library: Shopplaza’s developers provide high-quality solutions to improve your store. View Shopplaza’s Shopify apps right here.
- SEO and performance optimization: They both enhance website performance and optimize for search engines.
- Dependable assistance: Post-launch assistance and upkeep are easily accessible.
- Cost-effective solutions: Shopplaza developers can be hired at a reasonable price.
- Time efficiency: They move quickly to finish development so that your store can open.
- Security and compliance: Shopplaza’s developers guarantee the security and compliance of your store.
Don’t Hesitate To Consult With Your Ideal Shopify Developers
Conclusion
To establish credibility, increase brand awareness, and enable commerce capabilities, you must be aware of how to verify Shopify domain on Facebook. These step-by-step instructions will help you ensure that Facebook has accepted your online store, which will pave the way for more sales and a more recognizable online presence. Don’t hesitate; use this chance to expand your company on the biggest social media network in the world.