Selling B2B on Shopify is no longer about workarounds or manual processes. Today, over 80,000 merchants run their businesses on Shopify Plus, relying on native features to manage wholesale pricing, company accounts, and payment terms directly inside Shopify.
This guide shows how to set up B2B on Shopify using only native features available on Shopify Plus. It’s a complete, A–Z walkthrough that follows the same structure Shopify uses internally: enabling B2B, creating companies and buyers, configuring catalogs and pricing, controlling access, and finishing with payment, shipping, and order logic.
Instead of theory or strategy, this article focuses on real setup steps inside Shopify Admin. By the end, you’ll have a fully functional Shopify B2B store—and a clear understanding of how the B2B and B2C experiences work together without causing pricing or checkout issues.
💡 Key Takeaways
- Shopify provides native B2B functionality exclusively for Shopify Plus merchants.
- You can manage wholesale pricing, company accounts, and payment terms directly in Shopify Admin.
- A structured Shopify B2B setup helps avoid common issues with pricing, access control, and checkout flows.
1. Start Your Shopify Plus Store
Shopify’s native B2B features are available only on Shopify Plus. Before continuing, confirm that your store is on Plus and that you have admin access in Shopify Admin.
If your store isn’t on Plus, follow a different approach using apps or custom development instead. See our guide on setting up Shopify B2B without Plus before moving on.
2. Enable Shopify B2B Features in Admin
On Shopify Plus, Shopify’s native B2B features are available by default, but they only become visible once you start working with B2B objects like Companies and price lists.
There’s no complex setup required at this stage. If your store is on Plus and you have admin access in Shopify Admin, you can proceed directly to creating companies and buyers.
3. Create B2B Customers: Companies, Locations, and Buyers
This is where your Shopify B2B setup truly begins.
In Shopify’s native B2B model, everything is built around companies, not individual customers. Pricing, payment terms, and access rules all depend on how companies, their locations, and their buyers are structured. If this foundation is wrong, nothing else in your Shopify B2B store will work as expected.
Create company profiles
A company represents a business customer you sell to, such as a retailer, distributor, or wholesale partner. This is the top-level entity Shopify uses to group buyers, pricing, and payment terms.
What to do:
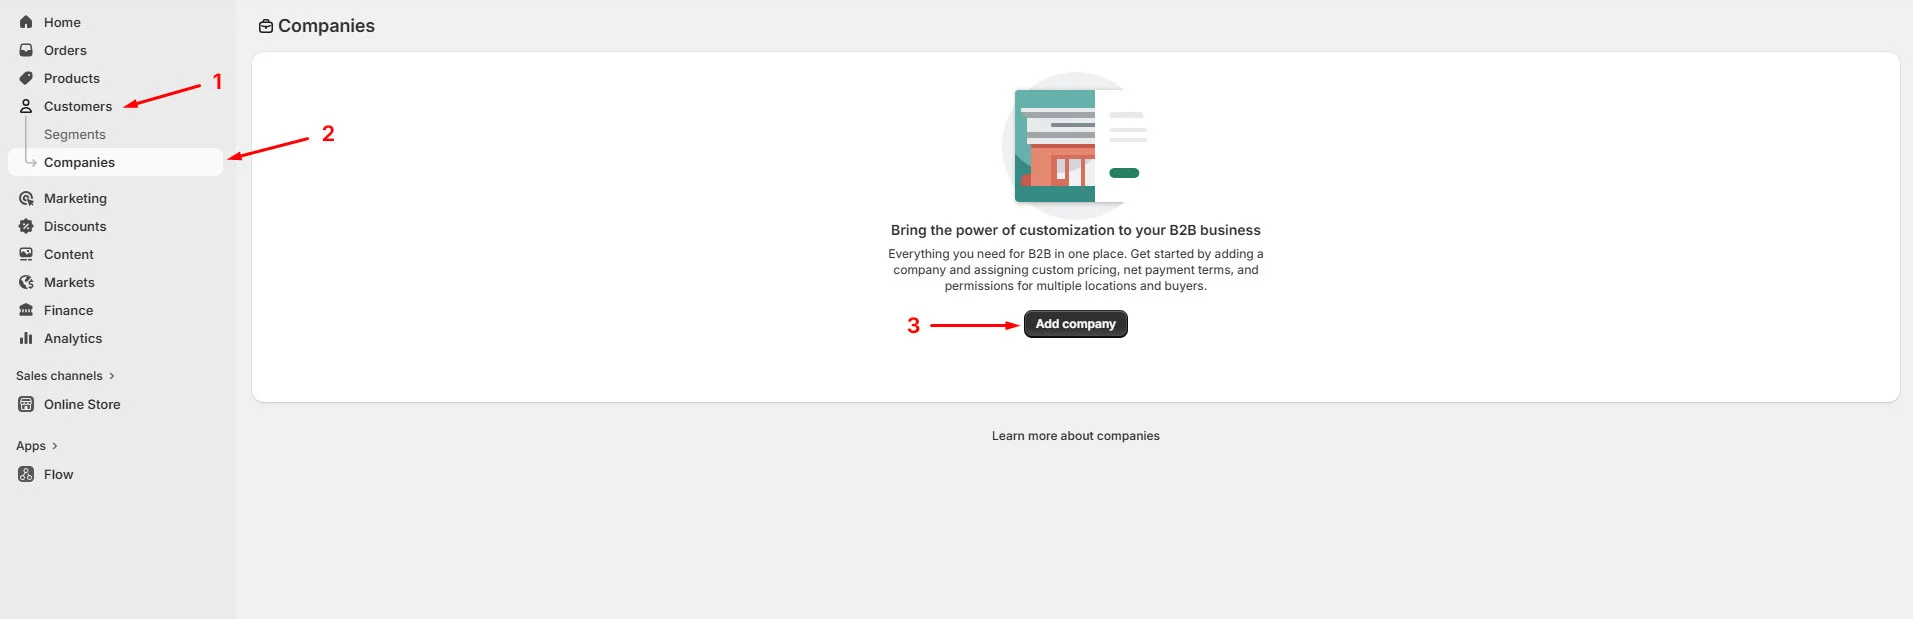
- Go to Shopify Admin > Customers > Companies
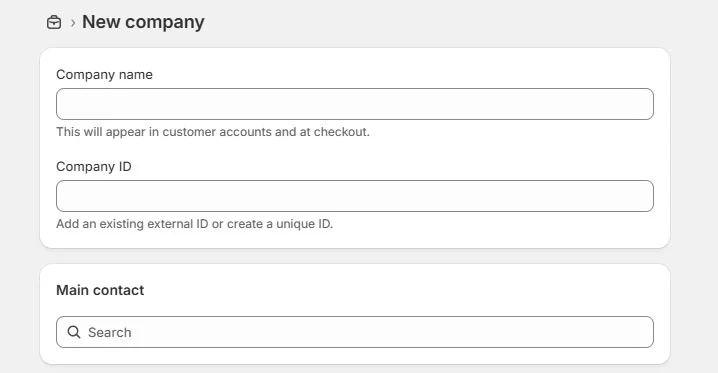
- Click Add company
- Enter basic company details including name and contact info (at this stage, you only need basic company information, you can refine settings later).
📌 Important notes:
- Every B2B customer must belong to a company.
- Pricing and payment terms cannot be applied without a company.
Define company locations
Company locations define where orders ship from and which rules apply.
What to do:
- Open a company profile
- Add one or more company locations
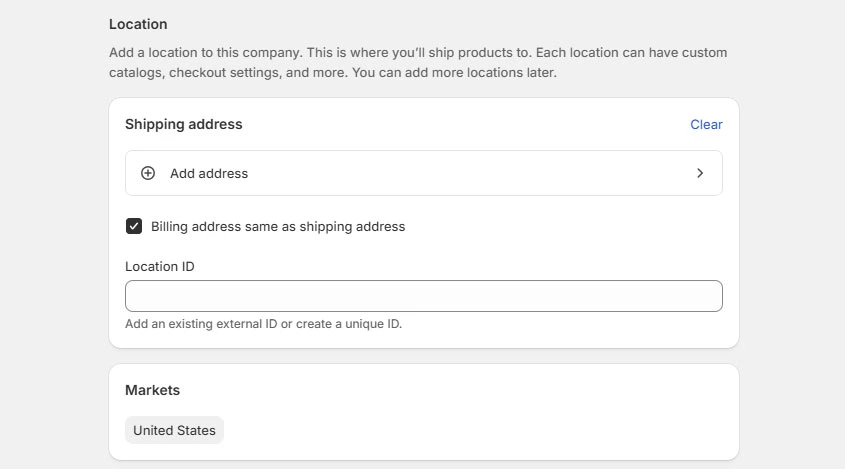
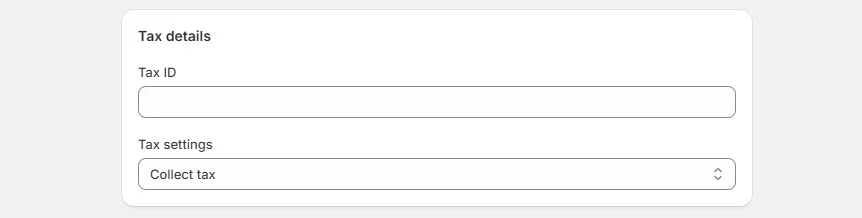
- Configure for each location:
- Shipping address
- Tax settings
- Payment terms (can be set later)
📌 Important notes:
- Buyers are assigned to locations, not just companies.
- Different locations can have different rules.
Assign buyers, permissions, and roles
Buyers are the user accounts that log in and place orders.
What to do:
- Open a company location
- Assign existing customers or create new buyers
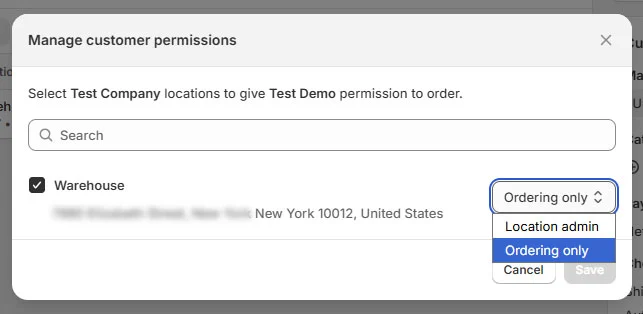
- Set buyer roles and permissions:
- Location admin: View all location-level orders and manage account details.
- Ordering only: Place orders and view their order history.
📌 Important notes:
- Buyers must be linked to a company location to see B2B pricing
- Incorrect assignment often causes buyers to see retail pricing
- This is one of the most common issues in a Shopify B2B shop
Once companies, locations, and buyers are in place, Shopify has the context it needs to apply catalogs, pricing, and checkout rules correctly. You can now move on to setting up B2B pricing and product visibility.
4. Set Up B2B Pricing and Product Visibility (Catalogs)
In Shopify B2B, pricing and product visibility are controlled by price lists, often referred to as B2B catalogs. Catalogs define which products a company can see and what prices they pay. If catalogs are misconfigured or not assigned correctly, buyers may see retail pricing—or no pricing at all.
This step ensures the right customers see the right products at the right prices.
Create custom B2B pricing
Shopify B2B uses native price lists to manage wholesale pricing. Each price list becomes a catalog once it’s assigned to a company or company location.
How to set up Shopify B2B pricing:
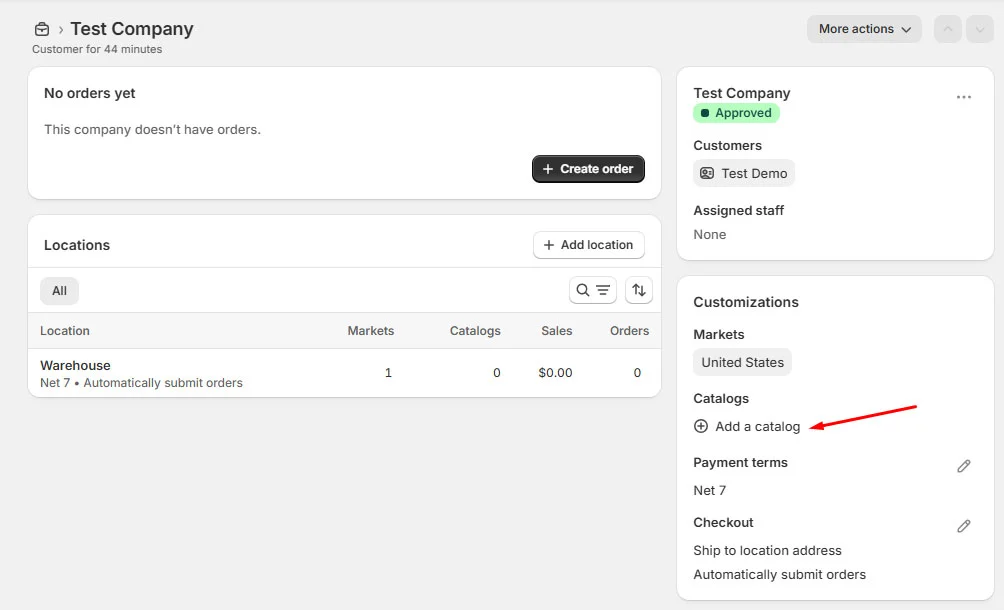
- Go to Shopify Admin > Customers > Companies
- Open a company
- Select a company location
- Create or edit a catalog for that location
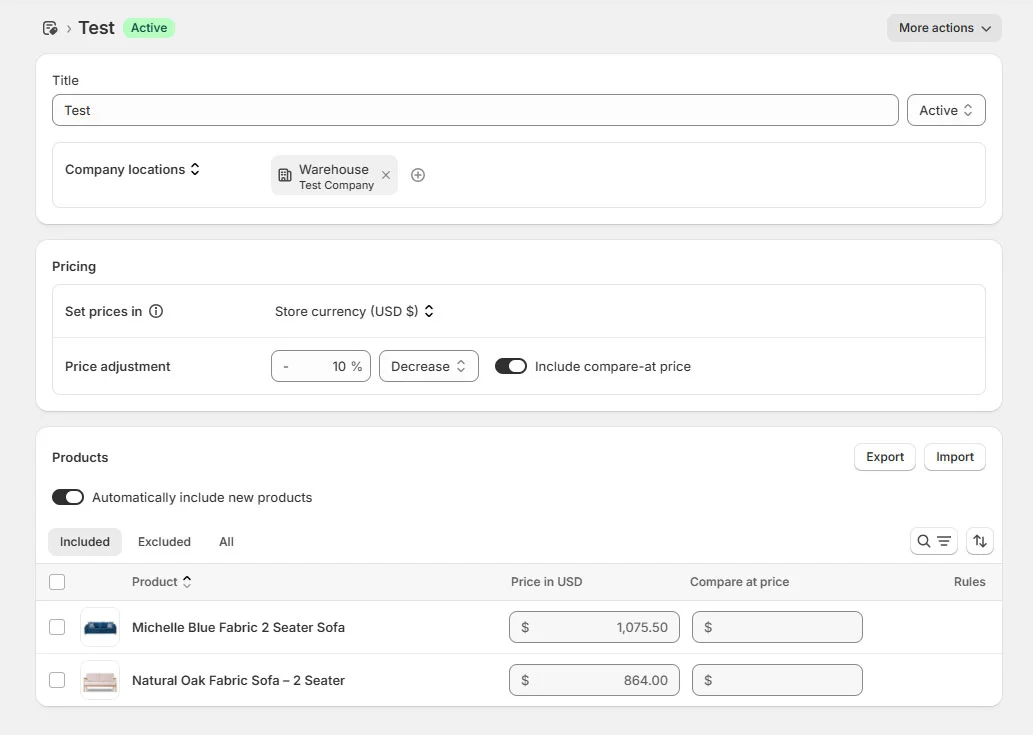
- Set prices in store currency
- Apply a price adjustment:
- Decrease (e.g. wholesale discount)
- Increase (special pricing cases)
- Optionally include compare-at price
💡 Best practices:
- Pricing is applied at the company or location level, not per buyer.
- Assign catalogs at the location level if pricing varies.
- Assign at the company level only if pricing is the same everywhere.
- A buyer without an assigned catalog will fall back to retail pricing.
- Avoid multiple catalogs on one location unless intentional.
Restrict access
In Shopify B2B, catalogs also control product visibility, not just pricing.
You can:
- Include products or variants
- Exclude products from B2B access
- Automatically include new products (optional)
- Import or export pricing in bulk
How it works:
- Included products → visible to B2B buyers
- Excluded products → hidden from them
- B2C customers are not affected
Avoid by default:
- Tag-based access rules
- Theme hacks
- Password-protecting the entire store
If your wholesale buyers often order across multiple sizes, colors, or product variants, you can extend the native B2B setup with a bulk order app like MultiVariants- Bulk Order. So customers can add variant quantities from a single table instead of selecting each variant one by one.
Once catalogs are working, move on to payment terms and checkout.
📌 Quick tip:
- Log in as a B2B buyer
- Confirm only catalog products are visible
- Verify prices match the assigned catalog
- Test quantity and volume pricing in the cart
5. Understand the B2B Order Flow
After pricing and catalogs are set, B2B orders can follow one of two flows in Shopify, depending on how you sell.
Default B2B order flow (direct ordering)
This is the most common setup.
- A B2B buyer logs in
- They see products and prices from their assigned catalog
- They place an order through checkout
- The order is created in Shopify with:
- Company and location details
- B2B pricing
- Payment terms (if configured)
This works best for repeat customers and fixed pricing.
Approval-based order flow (optional)
Some B2B businesses require review before an order is finalized.
Typical cases:
- Custom or negotiated pricing
- Large-volume orders
- Internal approval before fulfillment
In these scenarios, merchants often collect order intent first, review pricing, then convert approved requests into draft orders.
If you need a quote-to-order workflow, use apps like SP Request a Quote to support this without changing your core Shopify B2B setup.
6. Configure Payment Terms and Checkout for B2B
After pricing and catalogs are in place, the next step is configuring how B2B orders are paid and processed at checkout. Shopify B2B supports post-payment terms, which work differently from standard B2C checkout.
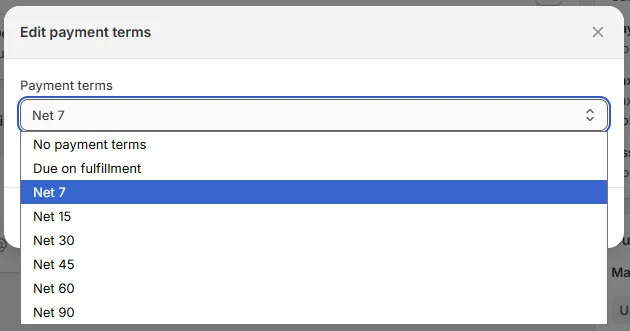
Set payment terms
Where to set this:
- Go to Shopify Admin > Customers > Companies
- Open a company
- Select a company location
- Set payment terms
Common options:
- Due on fulfillment
- Net 7, Net 15, Net 30 (or custom terms)
Payment terms apply to all buyers assigned to that location.
Understand B2B checkout behavior
With payment terms:
- Buyers can place orders without paying immediately
- Orders are created with a payment due date
Without payment terms: Checkout requires immediate payment (same as B2C)
Pricing at checkout always follows the assigned catalog.
📌 Note
Remember to go back to your storefront and test the checkout to confirm:
- Correct pricing
- Correct payment terms
- No unexpected payment blockers
7. Set Up Shipping and Fulfillment for B2B
B2B orders are usually larger and more complex than B2C, so shipping should be reviewed specifically for wholesale buyers.
What to check first:
- Shipping zones cover all B2B delivery regions
- Rates make sense for bulk or high-value orders
- Company location addresses are correct (they affect checkout options)
- Use Shopify Flow to automate order tagging and fulfillment rules.
By default, Shopify uses the same shipping rate system for B2B and B2C. If your wholesale orders follow simple rules, this may be enough.
If you need to:
- Group multiple B2B orders into one shipment
- Batch orders by destination, warehouse, or delivery date
- Apply different logic for freight vs parcel shipping
A shipping automation tool like SP Smart Shipping and Batching can help streamline fulfillment without manual work.
8. Set Up B2B Customer Registration (Optional)
By default, Shopify B2B buyers are created manually and assigned to companies in Shopify Admin. However, you can also allow new B2B customers to request access through a registration form.
This is useful if you want to onboard wholesale customers at scale.
How B2B registration works in Shopify
Shopify does not automatically approve B2B accounts. Instead:
- Customers submit a registration request
- You review and approve them
- Approved customers are then assigned to a company and location
Only after approval will they see B2B pricing and checkout options.
How to set it up
- Create a B2B registration form (using Shopify forms, custom pages, or your existing workflow)
- Collect key business details (company name, email, tax ID, etc.)
- Review submissions in Shopify Admin
- Assign approved customers to:
- A company
- A company location
- The correct catalog
📌 Notes
- Registration alone does not grant B2B access
-
B2B pricing appears only after:
- The customer is approved
- The customer is linked to a company location
- This keeps pricing private and controlled
When to skip this step:
You may not need B2B registration if:
- You work with a small number of known wholesale customers
- All B2B buyers are created manually
- Access is handled through sales or account managers
📌 Pro tip: When native features aren’t enough, many merchants extend their setup with third-party apps while keeping the core Shopify B2B structure native.
Common Setup Mistakes That Break Shopify B2B Stores
Even with Shopify’s native B2B features, small setup mistakes can cause pricing, access, or checkout issues. These are the most common problems to watch out for before launch.
Mixing B2B and B2C pricing incorrectly
This usually happens when catalogs are not assigned properly.
- B2B buyers see retail prices instead of wholesale rates
- Retail customers accidentally see B2B pricing
How to avoid it: Always check that each B2B buyer is assigned to the correct company location with the right catalog.
Assigning the wrong catalogs
Creating catalogs is not enough — they must be assigned correctly.
- Catalog assigned to the wrong company or location
- Multiple catalogs assigned unintentionally
- Catalog created but not assigned at all
How to avoid it: Assign catalogs deliberately and keep pricing logic simple, especially at the beginning.
Forgetting to test as a buyer
Many issues only appear after logging in as a B2B buyer.
- Prices look correct in Admin but wrong on the storefront
- Products are missing or hidden
- Checkout behaves like B2C
How to avoid it: Always test the full flow by logging in as a B2B buyer before launch.
Overcomplicating the Shopify B2B setup too early
Trying to solve every edge case from day one often causes conflicts.
- Too many catalogs
- Complex pricing rules
- Custom logic before the basics work
How to avoid it: Start with a simple setup. Add complexity only after your core B2B flow is stable.
Quick Pre-Launch Checklist for Shopify B2B
Companies & Structure
- Companies are created
- Company locations are set up correctly
- Locations reflect correct shipping and tax context
Buyers & Access
- B2B buyers are assigned to the correct company locations
- Buyers can log in successfully
- Buyer roles and permissions are set correctly
Pricing & Catalogs
- Catalogs are created and assigned correctly
- Only approved products are included in B2B catalogs
- B2B buyers see wholesale pricing
- B2C customers still see retail pricing
Orders, Checkout & Payment
- Order flow works as expected (direct order or approval-based)
- Payment terms are set correctly (Net terms or due on fulfillment)
- Checkout shows correct pricing and payment behavior
Shipping & Fulfillment
- Shipping zones cover all B2B delivery regions
- Shipping rates make sense for bulk or high-value orders
- Shipping options display correctly at checkout
Final Testing
- Log in as a B2B buyer and place a test order
- Review the order in Shopify Admin
- Confirm pricing, payment terms, and shipping are correct
Conclusion
By following this step-by-step setup guide, you’ve built a solid B2B foundation: companies and buyers are structured correctly, catalogs control pricing and visibility, payment and shipping logic are aligned, and the full order flow has been tested before launch. This approach keeps your B2B and B2C experiences clean, scalable, and easy to manage in a single store.
If you need more advanced workflows—such as quote approvals, order batching, or automated fulfillment—you can layer those in later without changing your core setup. Start simple, validate often, and expand only when your B2B operation is ready.