Configure app settings
Open Settings to control storefront availability, approval behavior, form fields, Wholesale tags, language, email delivery, and notification templates.
Settings are organized into 4 tabs:
- General
- Wholesale
- Company
- Email templates
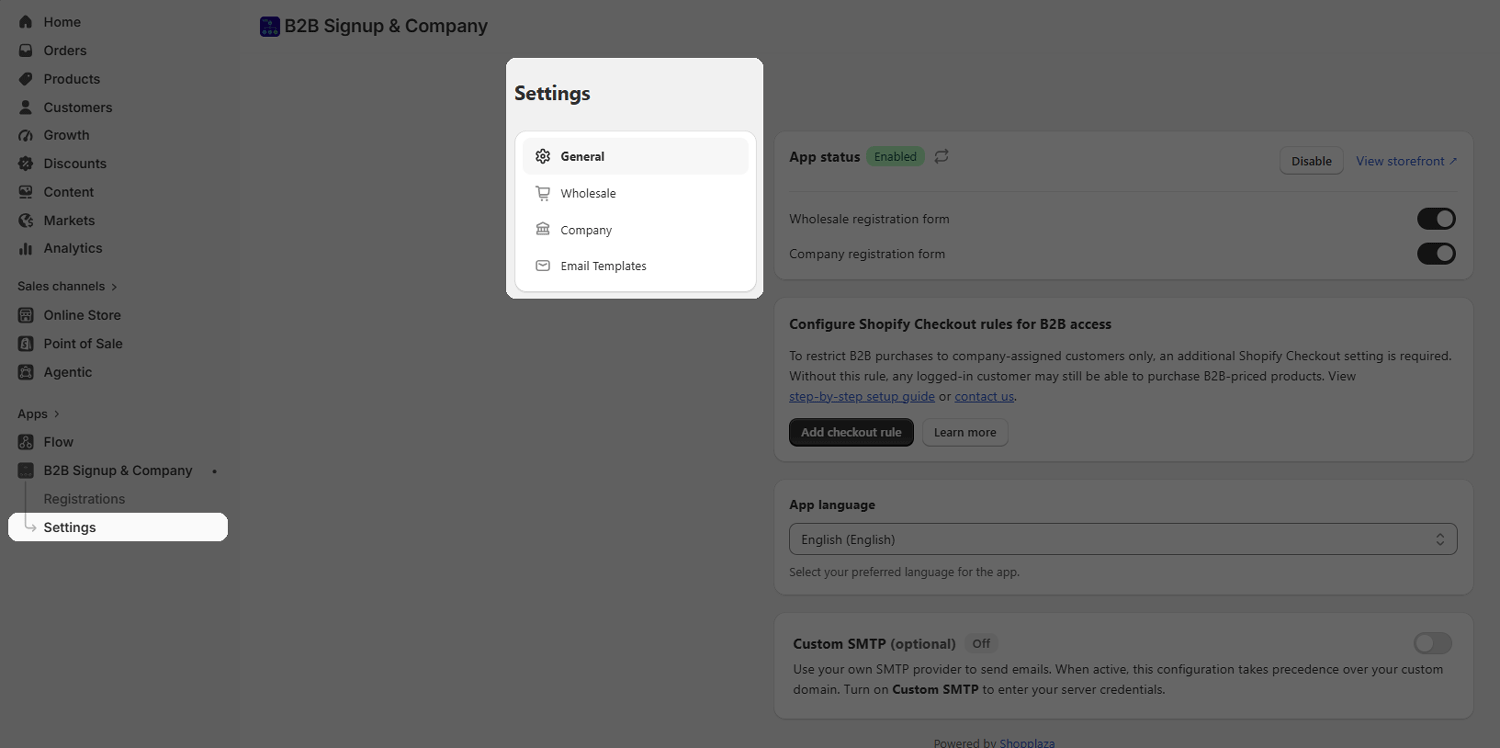
General settings
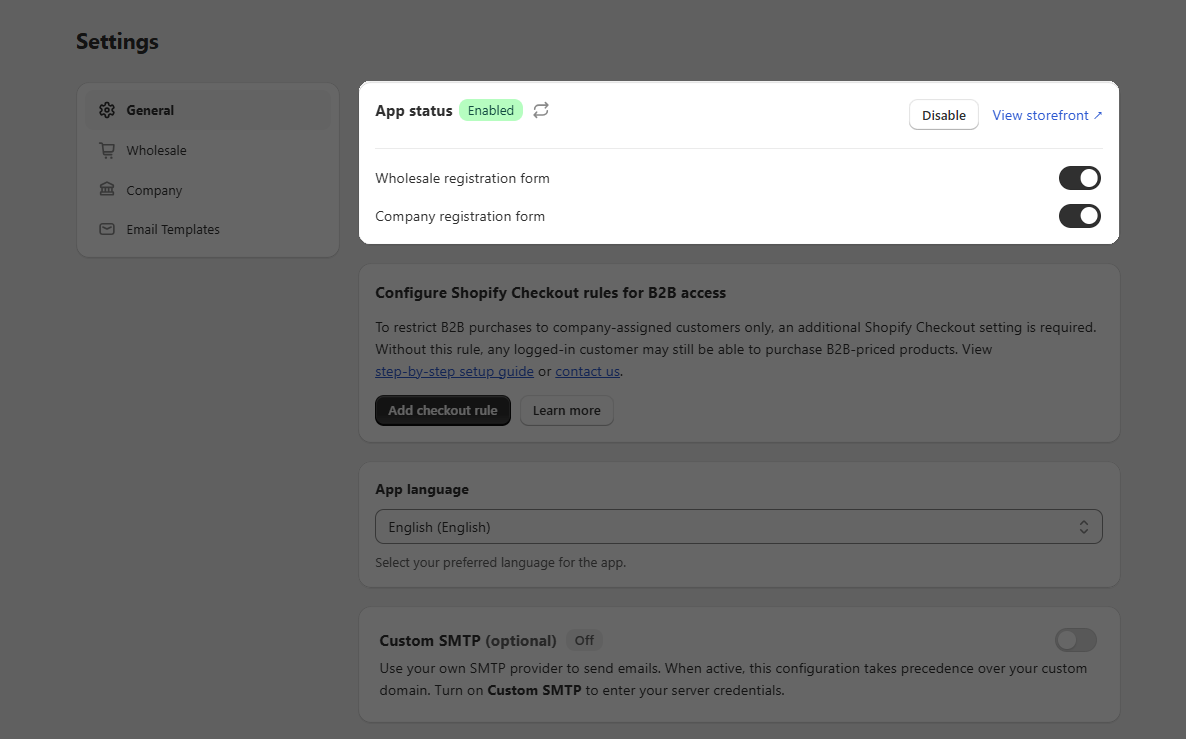
App status
Use Enable app to enable or disable all storefront features provided by B2B Signup & Company Profiles.
You can also control each registration form separately (Wholesale registration form, Company registration form).
If the main app is disabled, both forms and the Company portal remain hidden even if an individual form was previously enabled.
Disabling the app or a form does not delete existing registrations, customers, companies, or settings.
Configure Shopify Checkout rules for B2B access
This card helps you configure Shopify Checkout rules for your B2B access model. For example, you may want to prevent a logged-in customer who is not assigned to an eligible company from completing a B2B checkout.
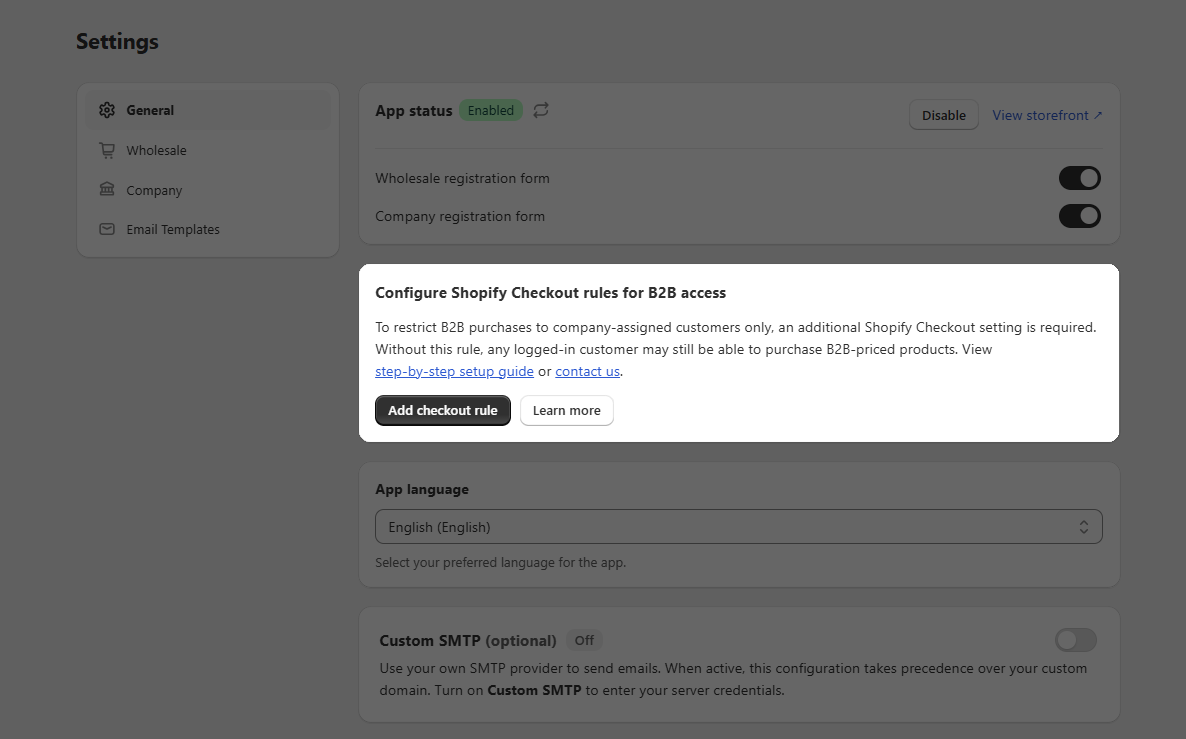
Follow the instructions shown in the app to create and activate the rule in Shopify Admin.
Before enabling a restrictive rule on your live store, test it with:
- An approved company customer.
- A Wholesale customer who is not assigned to a company.
- A regular retail customer.
- A logged-out visitor if your store supports guest checkout.
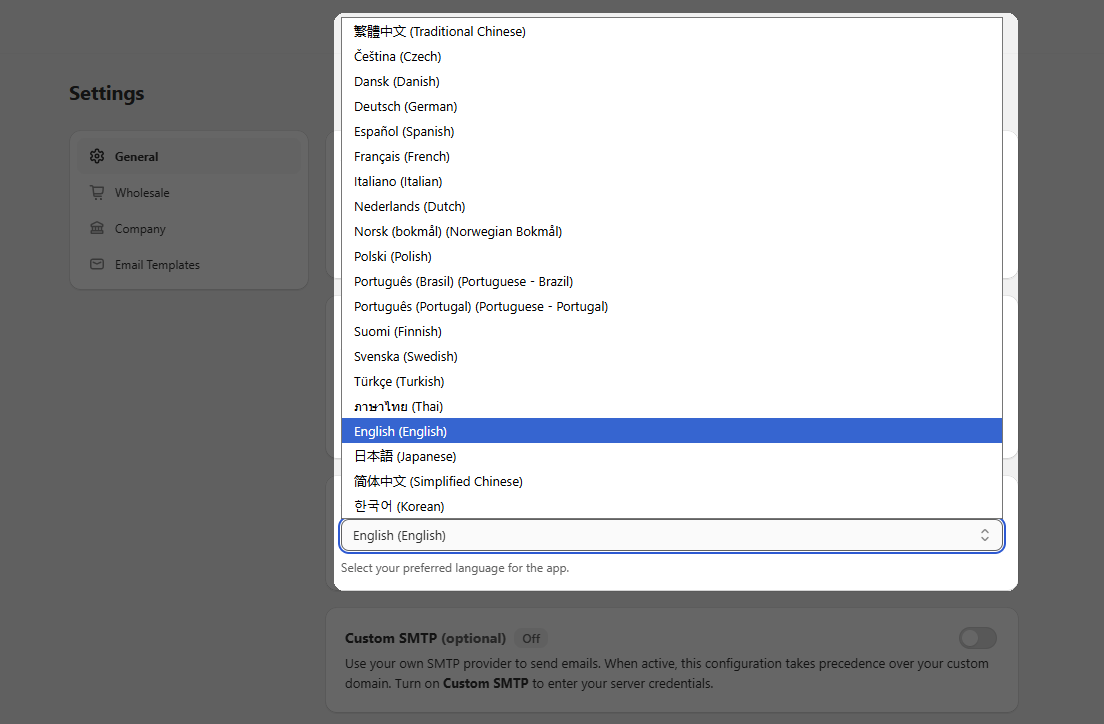
App language
Choose the language used by supported storefront and app content. The default language is English.
After changing the language, review both registration forms, the Company portal, and your customized email templates for consistency.
Custom SMTP
Custom SMTP allows the app to send registration and company account emails through your own email address.
Note: Google requires an app password for this connection. Do not enter your regular Google Account password.
Create a Google app password
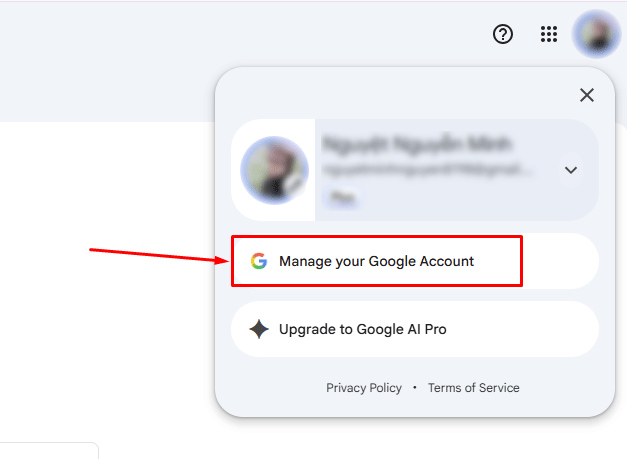
- Go to Manage your Google Account.
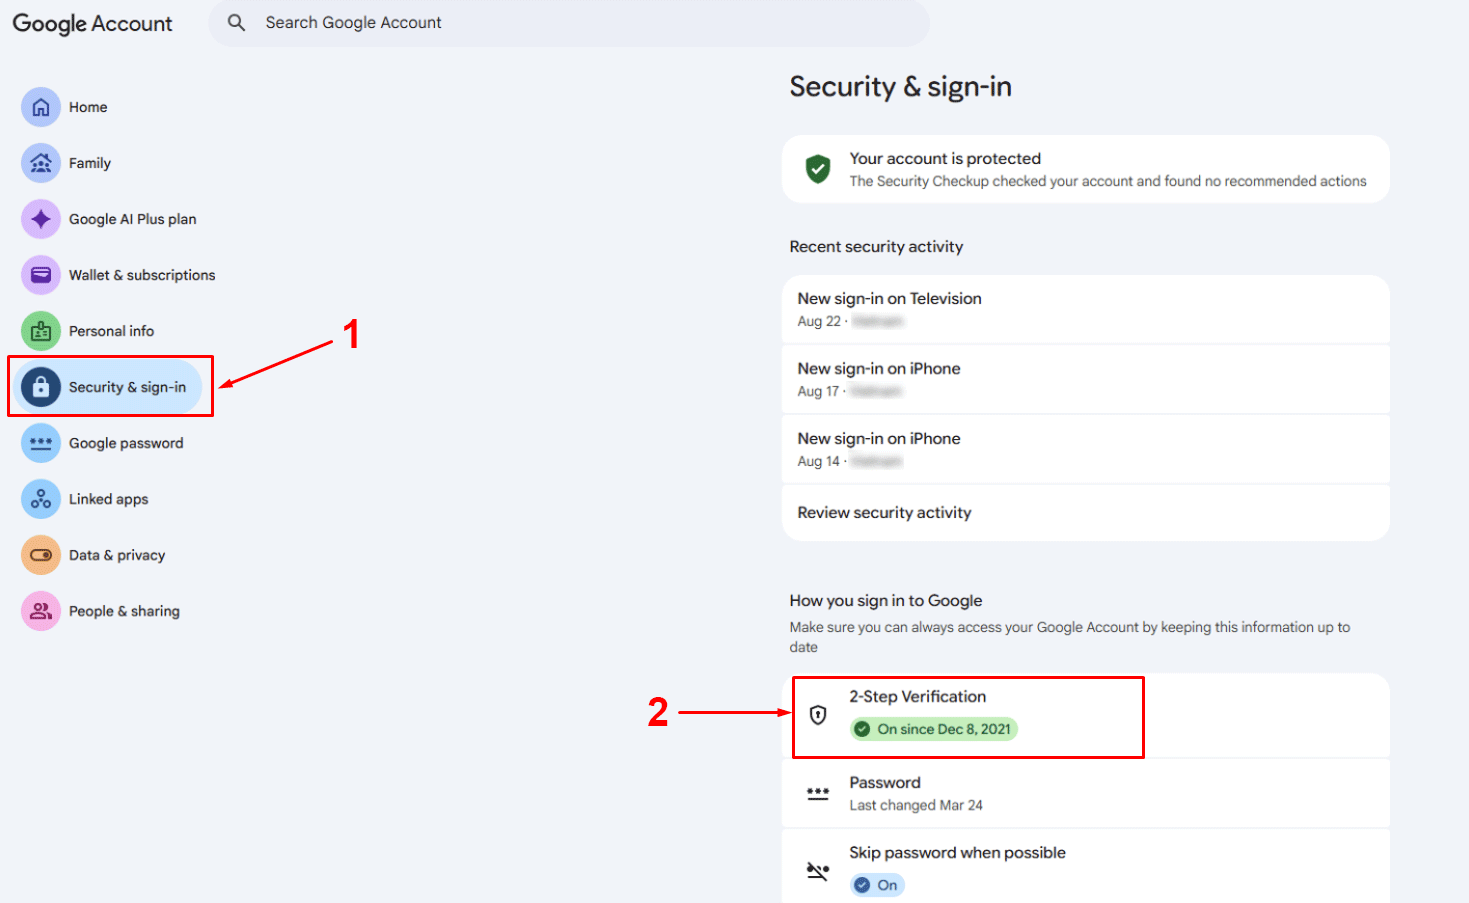
- Select Security & sign-in, then open 2-Step Verification (enable it if needed).
-
Select App passwords. If you cannot find it, open Google App Passwords.
-
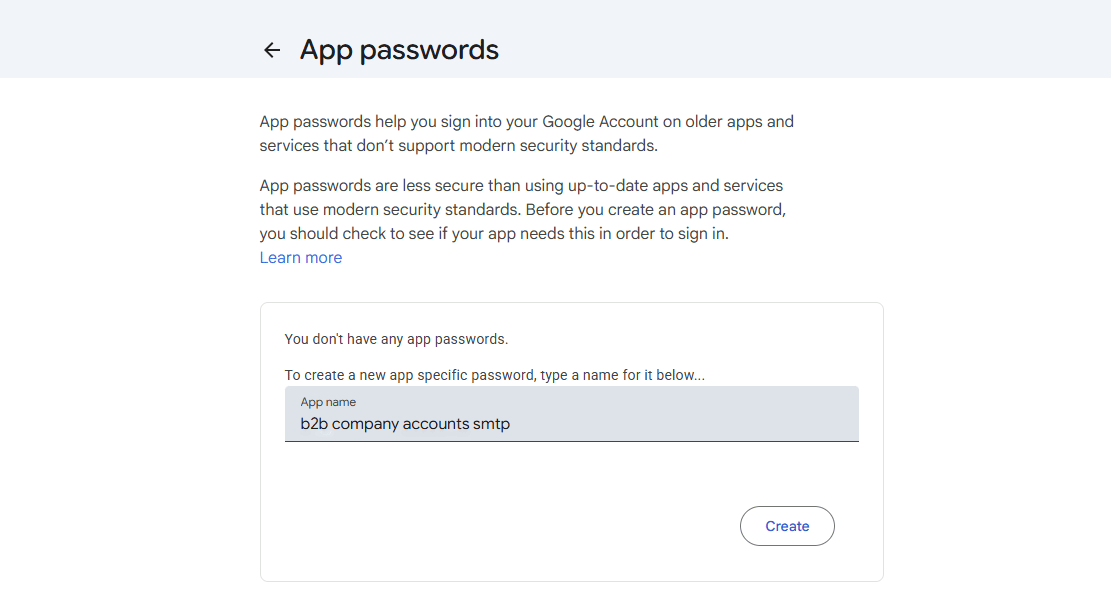
Enter an app name, such as B2B Company Accounts SMTP, and click Create.
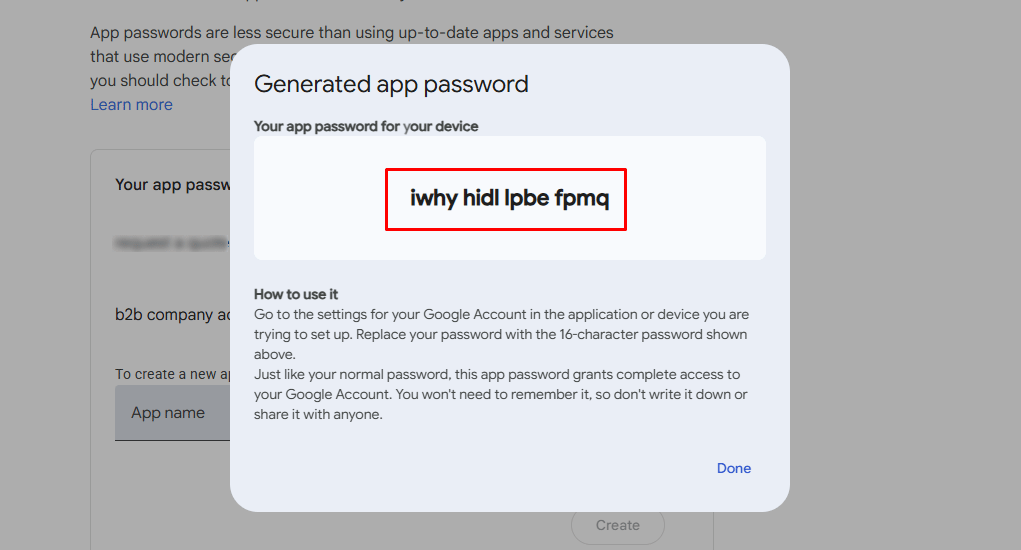
- Copy the generated 16-digit app password.
Connect SMTP
-
From Shopify Admin, open B2B Signup & Company Accounts → Settings → Custom SMTP.
-
Turn on Custom SMTP → Click Load settings.
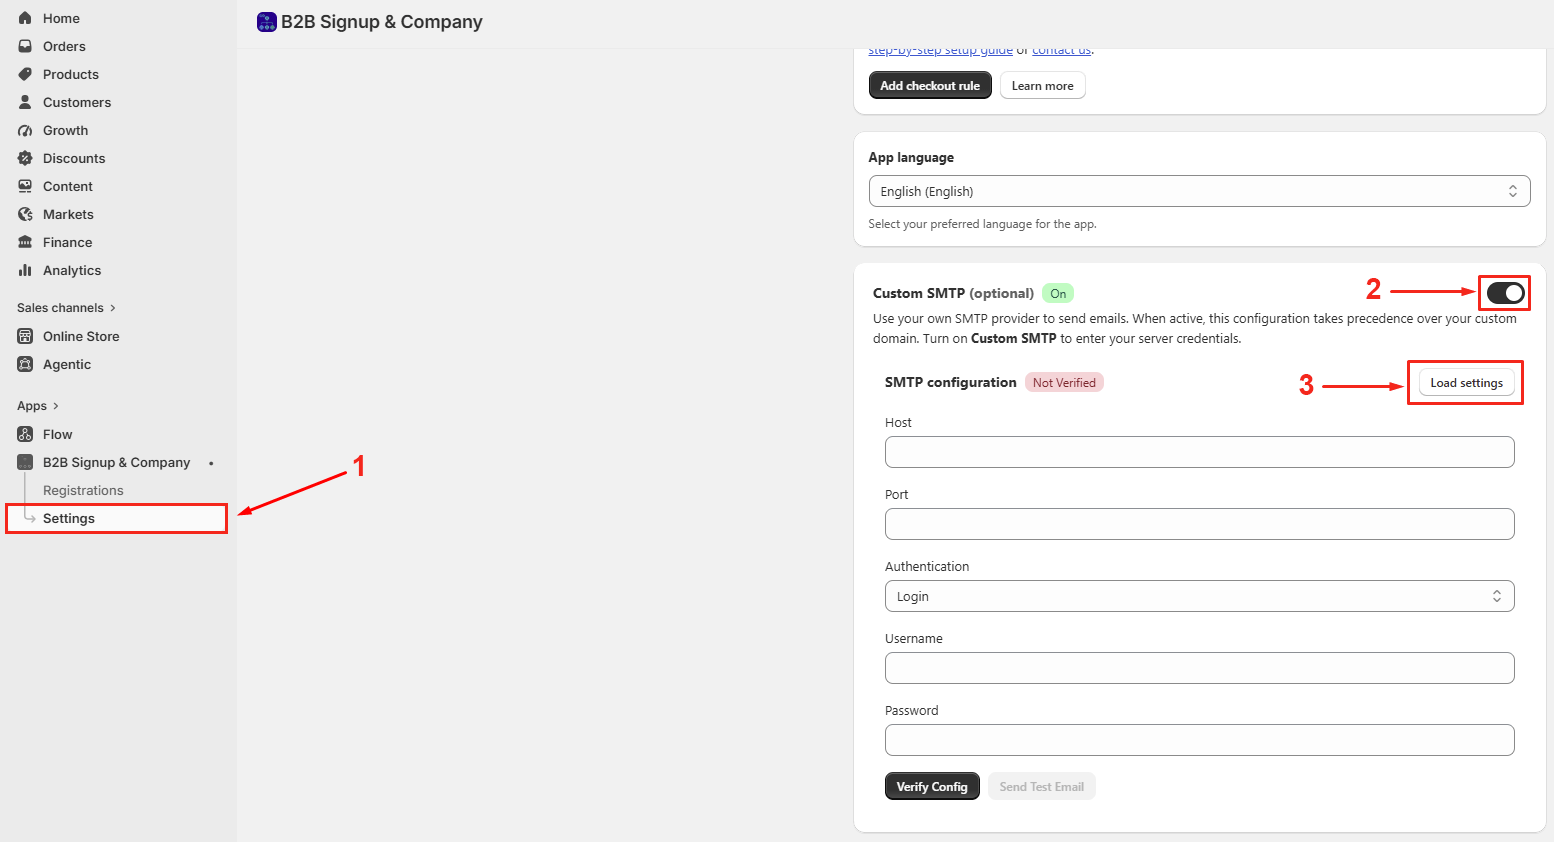
-
Enter your Gmail address and the generated app password.
-
Click Verify config.
-
Wait for the Verified label to appear, click Save and send a test email.
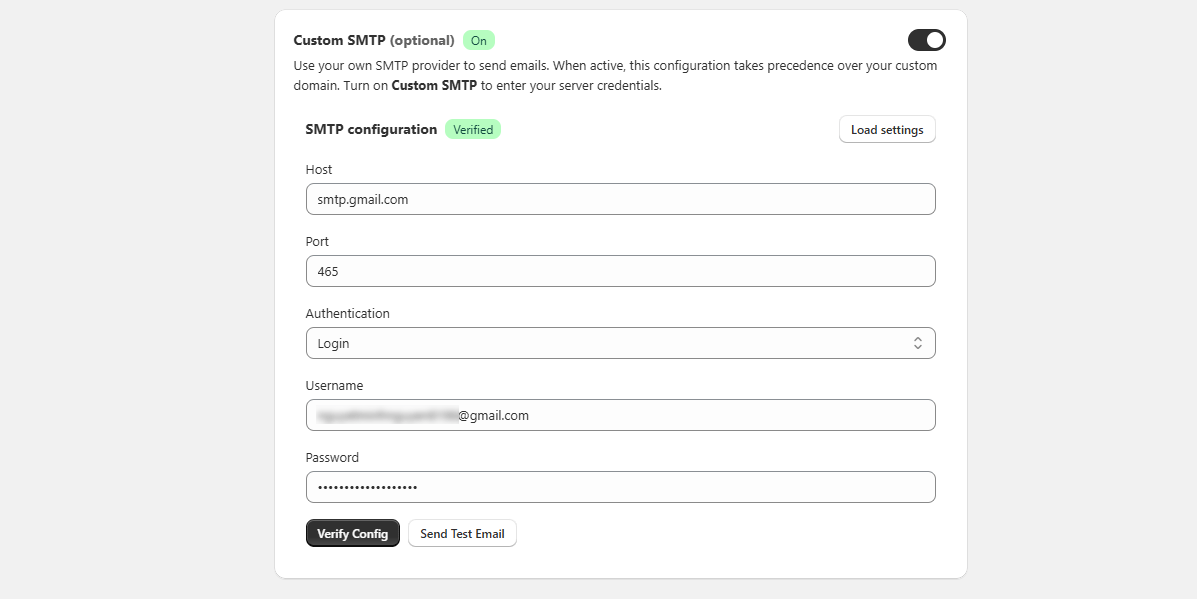
If Custom SMTP is disabled, the app uses its default email-delivery configuration.
Wholesale settings
Auto Approve Wholesale
This setting is disabled by default.
- Turn it on to approve new Wholesale registrations automatically.
- Keep it off when your team needs to review applicants before approval.
Customer creation or matching and tag assignment still follow the Wholesale registration workflow.
Form fields
Use Form fields to control the information requested in the Wholesale registration form.
- Required fields remain visible.
- Optional fields display an eye icon.
- Click the eye icon to show or hide an optional field.
- Click Preview to open the current form in a preview modal.
Before hiding a field, consider whether your team needs that information to review the applicant or create a company later.
Keep Company name visible if you plan to create companies from Wholesale registrations. The Create company action is unavailable when a registration has no company name.
Wholesale customer tags
Tags in this card are automatically added to every customer who submits the Wholesale form.
- The default configuration contains the tag
wholesale. - You can add additional tags to support your customer-management workflow.
- Tags are also added when the registration email belongs to an existing Shopify customer.
- At least one tag must remain. You cannot delete the final remaining tag.
Use clear, reusable tags and avoid adding several tags with the same meaning.
Company settings
Auto Approve Company
This setting is disabled by default.
- Turn it on to approve new Company registrations automatically.
- Keep it off when your team needs to review each business in Shopify Admin before approval.
Manual approval is useful when you need to validate business information, customer eligibility, tax details, payment terms, or catalog access.
Form fields
Use Form fields to control the information collected through the Company registration form.
- Required fields remain visible.
- Optional fields display an eye icon.
- Click the eye icon to show or hide an optional field.
- Click Preview to review the current Company registration form.
Keep enough information on the form for your team to review the company and configure its Shopify profile and locations.
Email templates
The Email templates tab contains two subtabs:
- Wholesale: Three templates for Wholesale registration and upgrade events.
- Company: Six templates for Company registration, approval, invitations, and portal-related events.
Follow these steps to edit an email template:
- Open Settings > Email templates.
- Select Wholesale or Company.
- Select the template you want to edit.
- Update the subject and message body.
- Insert supported variables where needed.
- Preview the email.
- Save your changes.
The Wholesale templates include Wholesale Upgraded to Company, which is sent after a merchant successfully creates a company from a Wholesale registration.
When editing a template:
- Use a clear subject that identifies the registration event.
- Explain whether the customer must wait, sign in, or take another action.
- Keep required links and variables unless you provide an equivalent.
- Preview the email before saving.
- Test delivery after configuring Custom SMTP.