For B2B Customers (Storefront Portal)
IMPORTANT: This app is available only on Shopify Plus stores with Customer Accounts enabled (Legacy not supported). Please make sure to review this before installing.
This section helps you understand how your B2B customers will use the portal, so you can guide them when needed. Everything below reflects the customer experience on your storefront.
3.1. How customers access the portal
Your B2B customers will access the portal through your store’s normal login flow.
How it works:
- They go to your store’s Account Login page.
- They log in with their customer account.
- If their company is approved, they can open the Company Dashboard and use all B2B features.
- If their company is still pending or the app is disabled, the portal will be hidden.
Tip for merchants: If a customer says they can’t see the portal, check:
- Whether the app is enabled
- Whether their company is approved in Shopify Admin
- Whether they are logged in with the correct email
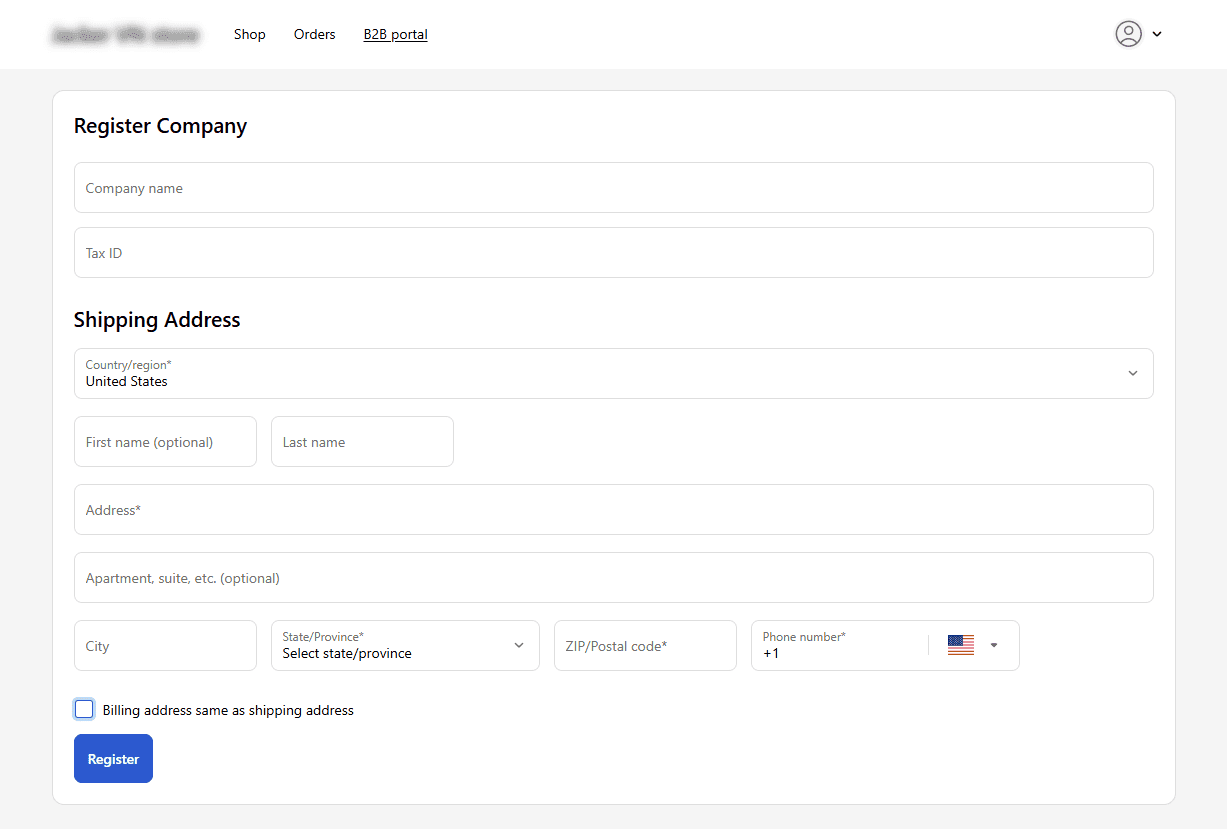
3.2. How customers register their company
Before customers can use the portal, they need to register their company (unless you create the company for them inside Shopify Admin).
What your customers will do:
- Log in to their customer account.
- Click Register Company.
- Fill in company details (name, optional tax ID).
- Enter shipping and billing addresses.
- Submit the form.
The submit button only becomes active when all required fields are valid.
What happens next:
- If Auto-Approve is ON → the company is approved instantly and your customer can use the portal immediately.
- If Auto-Approve is OFF → the company will appear as Not approved in your Shopify Admin → Customers → Companies. When you approve it, they will receive the “Company Approved” email and gain access.
Tip for merchants: If a customer tries to register the same company after being rejected, the app will block it. You’ll need to manage their company manually inside Shopify Admin.
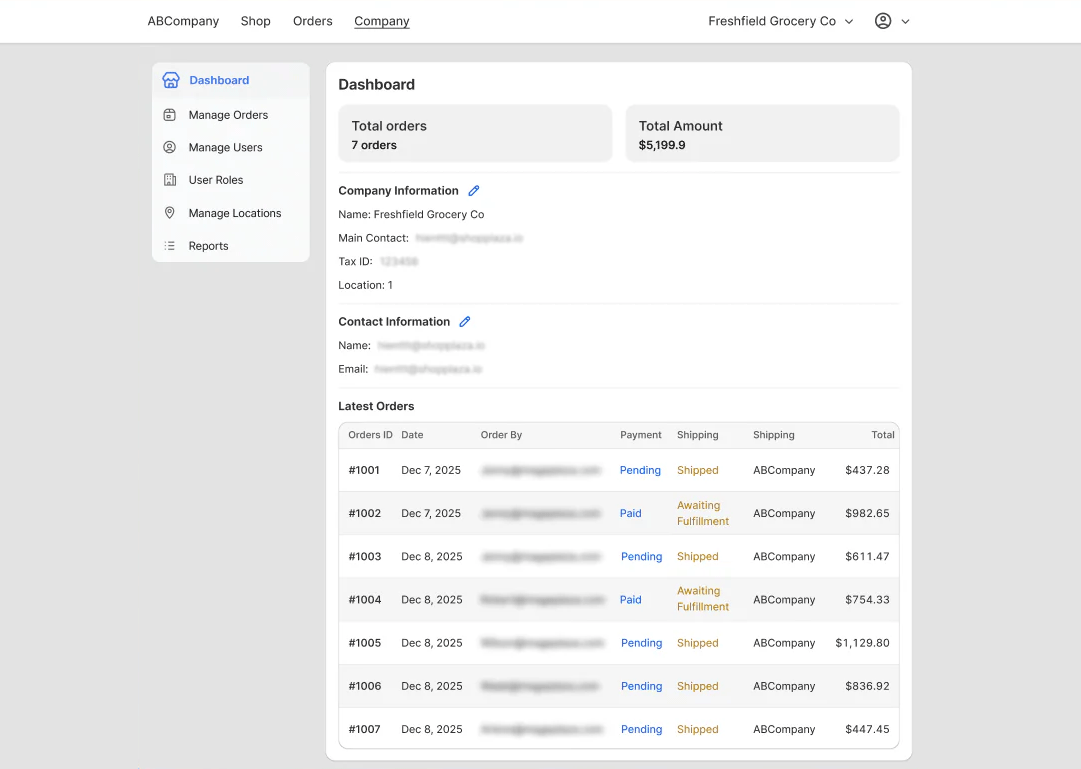
3.3. What customers see in the Company Dashboard
Once approved, customers can access their Company Dashboard. This is their central hub for company information, locations, users, and orders.
Here’s what your customers can do:
3.3.1. View company summary
They see:
- Total orders and total spending
- Company name, tax ID
- Assigned staff
- Number of locations
- Last updated time
3.3.2. Update company information
- Only the company owner (the person who submitted the registration) can request changes.
- When they update the company name or tax ID, you will receive a Company Info Update Request email.
- Their dashboard will show “Pending approval” until you approve the changes in Shopify Admin.
3.3.3. View their own contact information
Customers can update their own display name.
This change syncs directly to Shopify Admin → Customers.
3.3.4. See their latest orders
A section displays the 5 newest orders with:
- Order ID
- Date
- Customer who placed it
- Order status
- Location
- Total amount
If no orders exist yet, the section simply shows a friendly empty state.
3.4. How customers manage orders
The portal allows customers to view and manage orders based on their role and assigned locations.
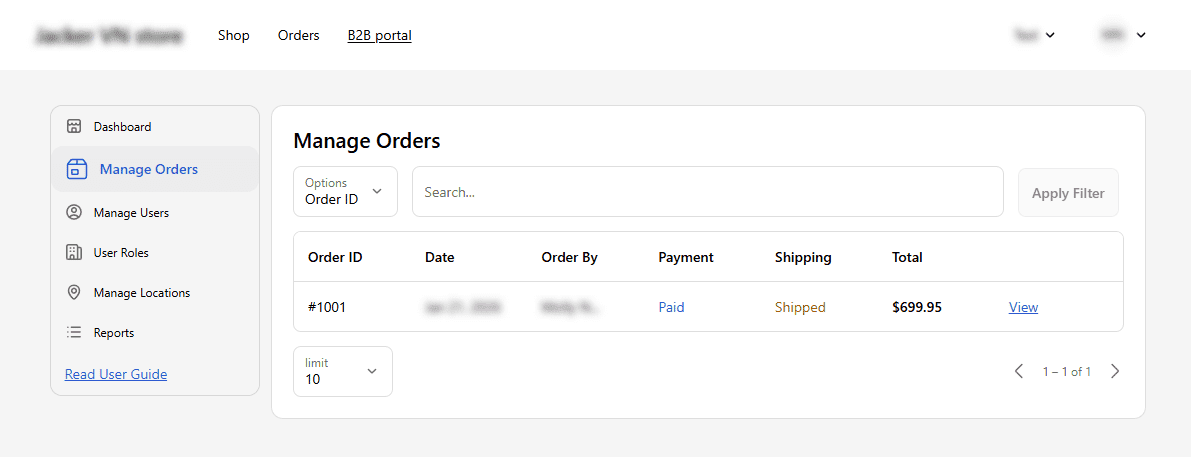
Role behavior:
- Location Admins: See all orders created under their assigned locations, including orders placed by other team members.
- Ordering users: See only their own orders within their assigned locations.
Customer actions:
- View order details (popup)
- For partially paid orders, complete payment using the Checkout button
- See fulfilled vs unfulfilled items separately
Tip for merchants: If a customer can’t find an order, check their assigned role or location in the portal’s User Management section.
3.5. How customers manage users
Your customer’s team can be set up directly inside the portal.
What company admins can do:
- See a list of all users in their company
- Invite new users
- Assign roles
- Assign locations
- Edit or remove existing users (Deletion is blocked if the user is the company owner.)
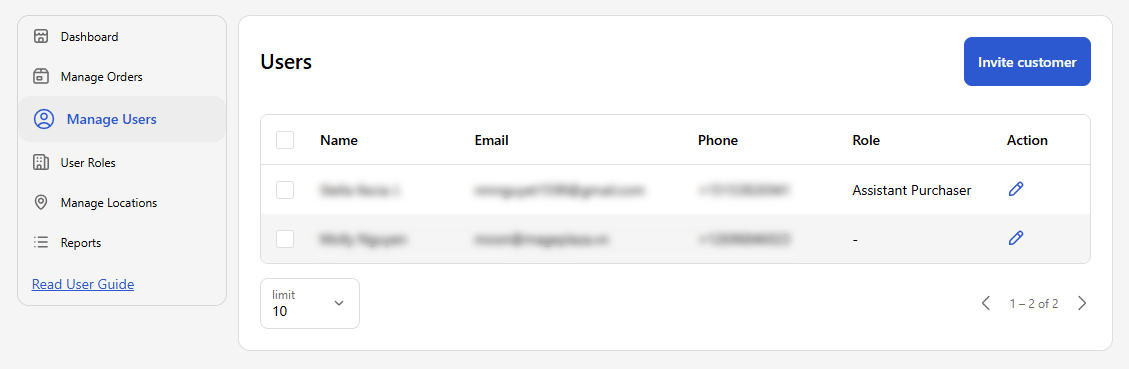
Invitation flow:
- Admin enters the user’s email.
- Selects a role and location.
- Sends the invite.
- The invited person receives an activation email.
Once the user logs in, they will appear in the company’s user list.
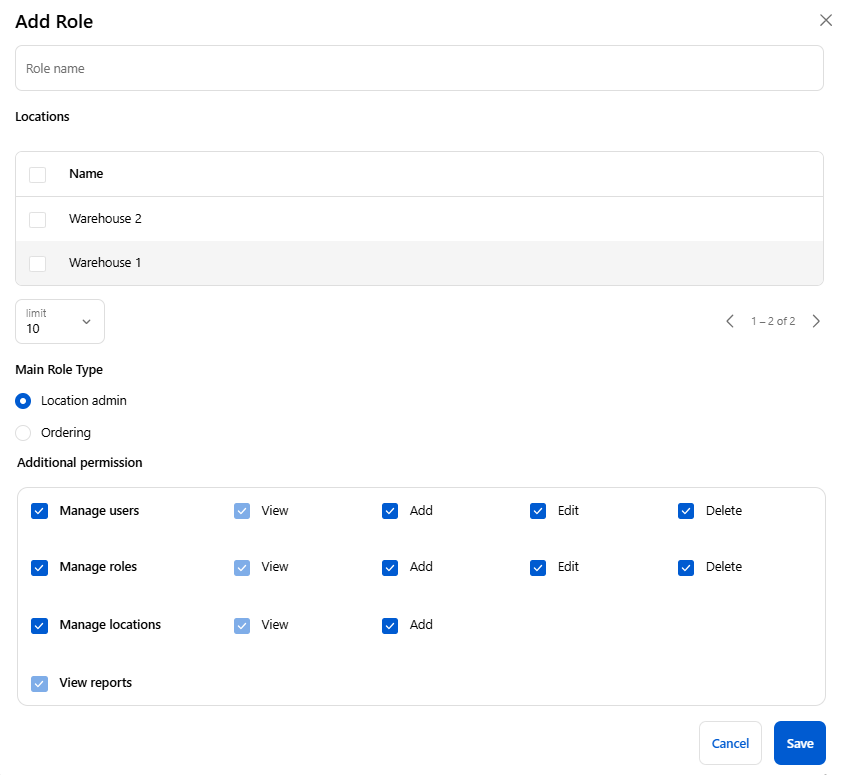
3.6. How customers manage roles and permissions
Customers can define different access levels for their team.
What they can do:
- Create new roles
- Edit existing roles (except fixed system roles)
- Assign permissions such as:
- Managing users
- Managing roles
- Managing locations
- Viewing reports
Roles must have at least:
- One permission
- One assigned location
- A unique name
Note: Default roles like “Admin” and “Buyer” cannot be deleted.
Tip for merchants: If a customer reports that certain tabs are disabled, check their assigned role. The portal will hide or block pages they don’t have permission to see.
3.7. How customers manage locations
Customers can maintain multiple company locations (e.g., branches or warehouses).
What they can do:
- Add new locations
- Enter full shipping/billing addresses
- Choose payment terms (inherited from Shopify’s B2B setup)
- View details for each location
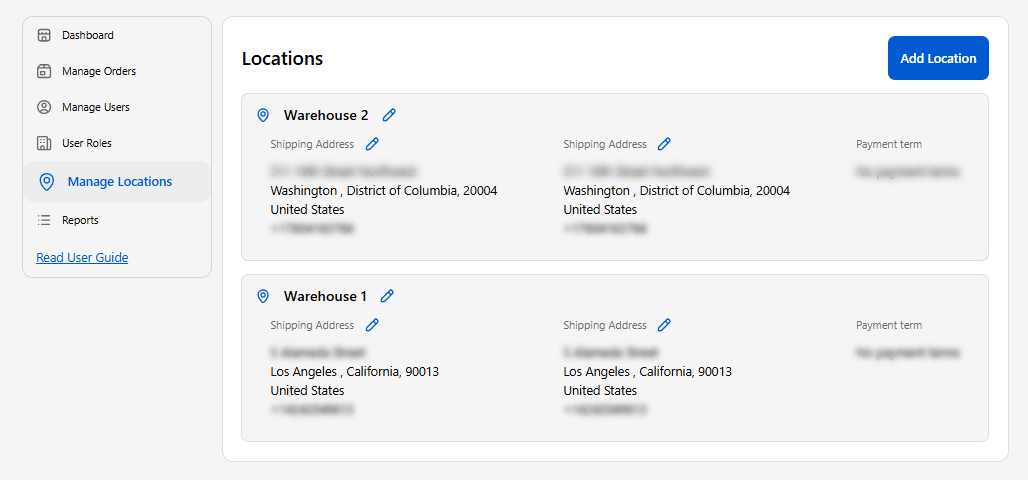
Important notes:
- Editing existing locations is limited in the MVP.
- Each location can be assigned to specific users via their roles.
Tip for merchants: If a customer says they cannot assign a location to a role, make sure you created the location in Shopify Admin first – or confirm they created it correctly in the portal.
3.8. What customers see in Reports
The Reports tab helps customers understand their activity.
Available report types:
- Orders Report
- Total orders, completed, processing
- Monthly breakdown
- AOV (Average Order Value)
- Location Report
- Active locations
- Top locations
- Orders/revenue per location
- Users Report
- Total users
- Active users
- Top performers
- Order amount per user
Filters:
Customers can filter by:
- Last 7 days
- Last 30 days
- Custom date range
If no data is available for the selected period, the portal shows clear empty states so customers know there’s simply no activity for that timeframe.