How to Customize Storefront Experience (Buyer side)
This guide explains what buyers see on your storefront after you set up the quote feature.
To configure where the Quote Widget and Add to Quote buttons appear, go to On-site content.
Buyer entry points
Depending on your On-site content setup, buyers can start a quote request from:
- Floating Quote Widget
- Add to Quote button on product pages
- Add to Quote button on collection pages
- Add to Quote button on the cart page or cart drawer
To change these placements, update them in On-site content.
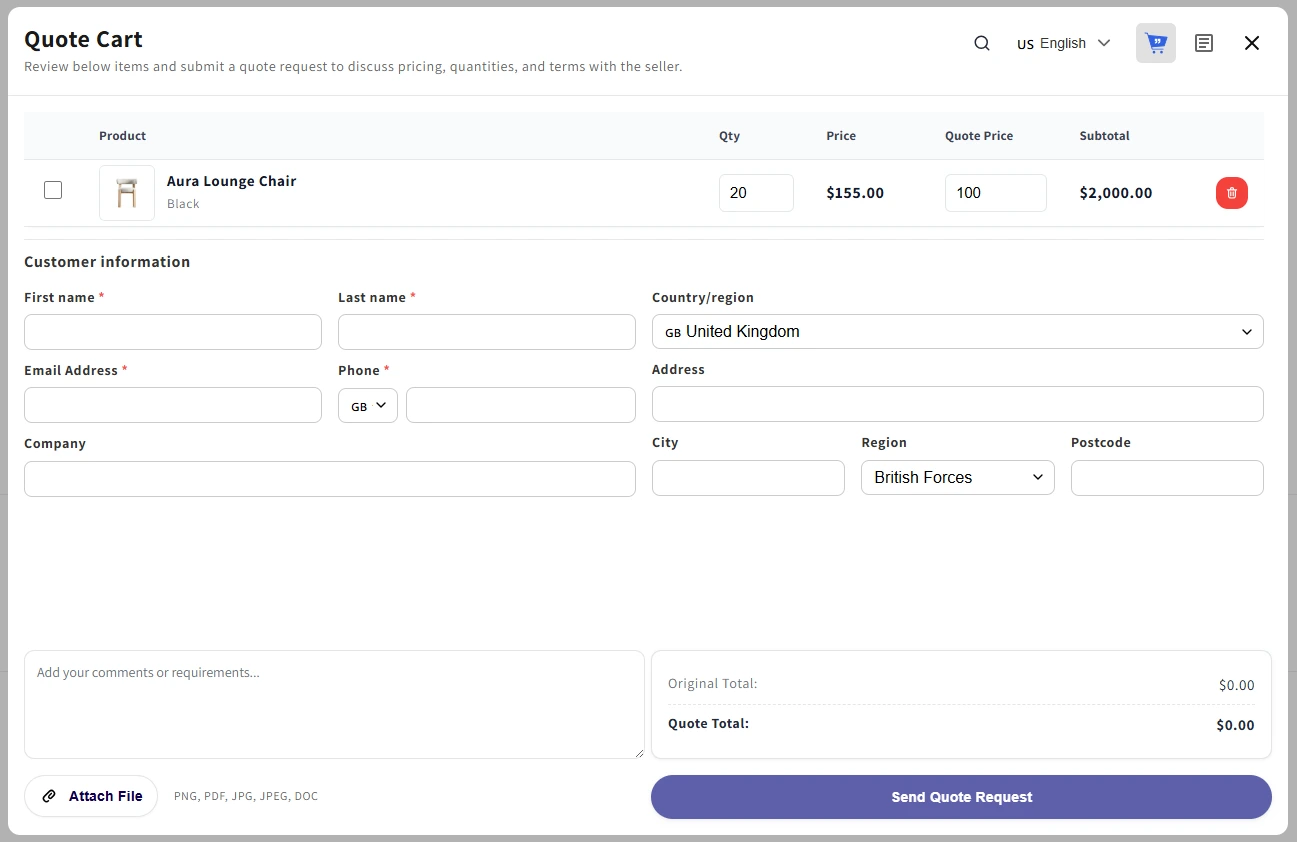
“Quote Cart” modal
When buyers click the Quote Widget or an Add to Quote button, they can open the Quote Cart. In this modal, they can review selected products, enter contact details, and submit a quote request from one modal.
The Quote Cart includes the following areas:
Product list
The product table shows all items added to the Quote Cart. For each item, buyers can review:
- Product name and image
- Variant information
- Quantity
- Original price
- Quote price
- Subtotal
Buyers can update the quantity, adjust the proposed quote price, select items, or remove products from the Quote Cart.
Customer information
Buyers need to complete the required customer information before submitting a quote request.
The form may include:
- First name
- Last name
- Email address
- Phone number
- Company
- Country or region
- Address
- City
- Region
- Postcode
Required fields are marked with an asterisk.
Comments and attachments
Buyers can add extra notes in the comment box, such as target pricing, order requirements, delivery preferences, or special instructions.
They can also attach a file if they need to share supporting documents. Supported file types include PNG, PDF, JPG, JPEG, and DOC.
Quote summary
The summary area shows the original total and quote total before submission.
After reviewing the products, customer information, comments, attachments, and quote total, buyers can click Send Quote Request to submit the request.
Note:
Buyers can search for eligible products directly from the Quote Cart modal.
- If the Quote Cart is empty, a search bar is displayed by default. The list shows the first 20 eligible variants, sorted from A to Z. Buyers can type a product name, browse matching results, and add multiple products to the Quote Cart before submitting a quote request.
- If the Quote Cart already has products, the search icon appears at the top-right of the modal, next to the language selector. Buyers can click this icon to open the search bar and add more eligible products.
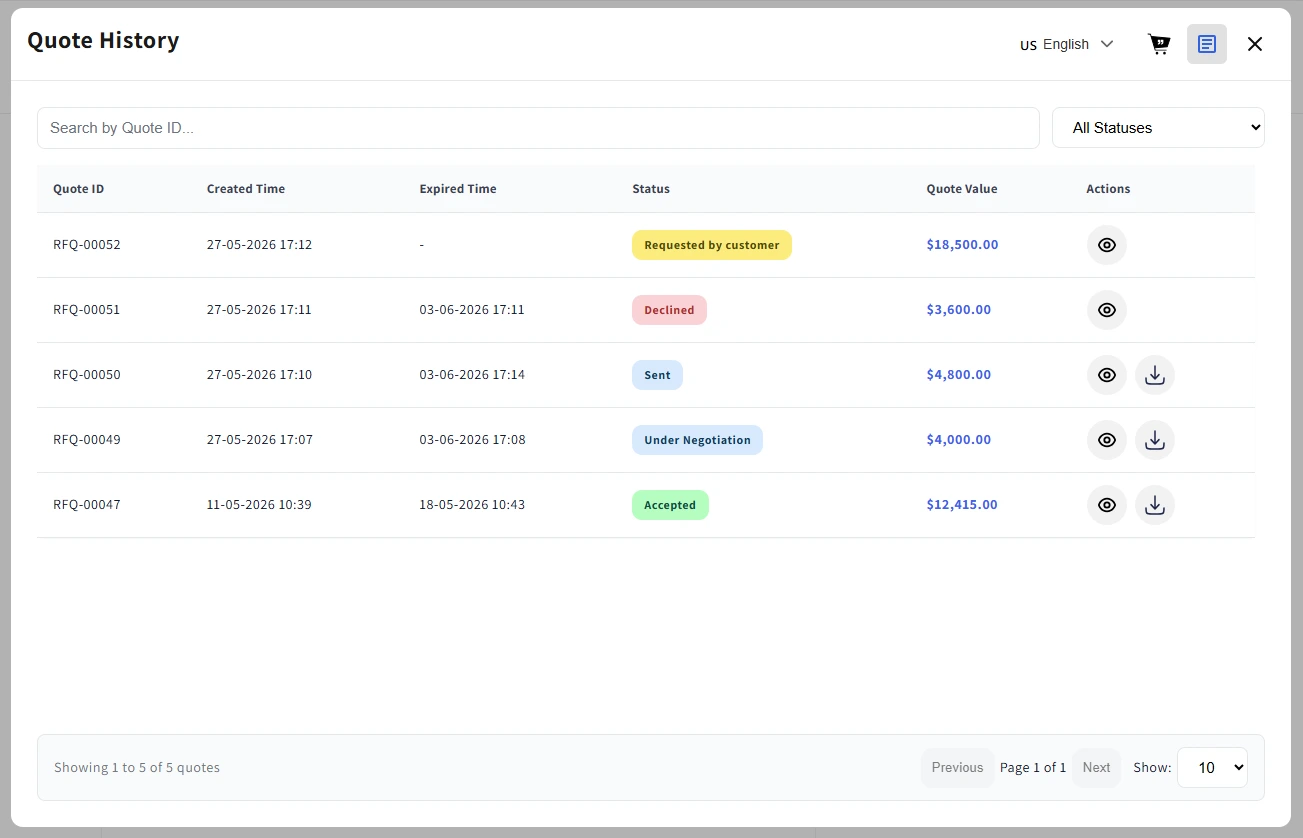
“Manage Quotes” modal
Buyers can switch to Manage Quotes to see:
- Quote ID, Created time, Status, Expired time, Quote value, and Actions.
- Actions vary by status:
- Sent / Under Negotiation / Accepted → View, Download
- Declined / Expired → View
- Accepted → View
- Unread message counts display as a red badge.
Note: Buyers need to log in to view their quote history.
Test the buyer experience
After setup, open your storefront and check that:
- The Quote Widget or Add to Quote buttons appear in the expected places.
- Eligible products can be added to the Quote Cart.
- Buyers can submit a quote request.
- Buyers can open Manage Quotes and view quote status.