How to Automate Communication & Email
This guide explains how to set quote expiration, send reminder emails, and customize email notifications in SP Request a Quote (RFQ).
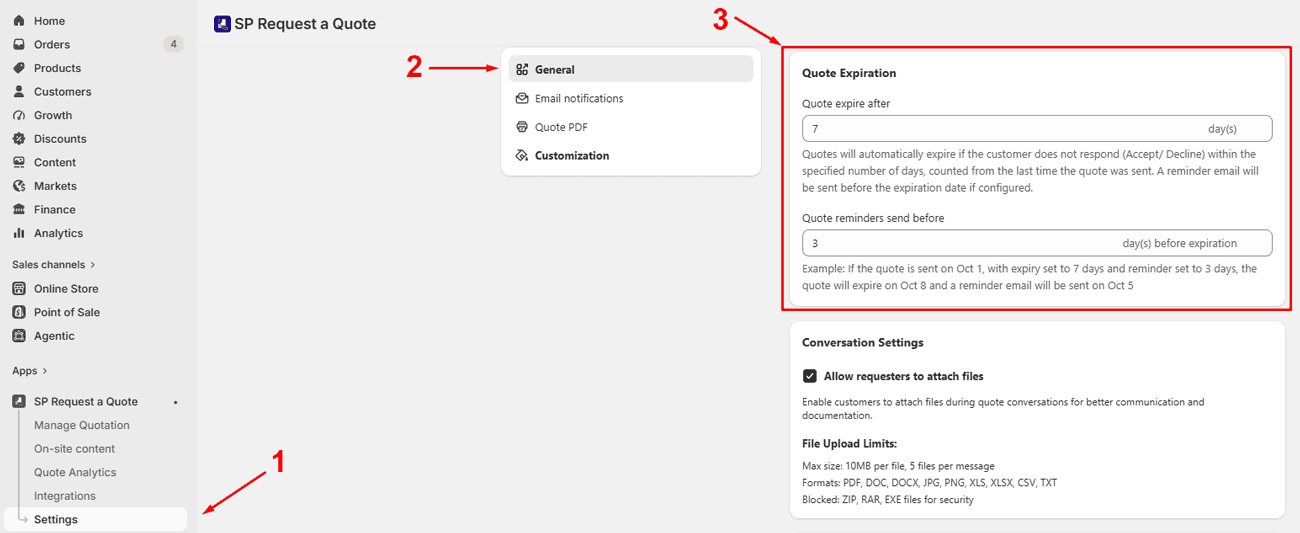
Configure quote expiration and reminders
- Go to Settings > General > Quote Expiration.
- Set Quote expire after (days). Example: 7 days.
- Set Quote reminders send before. Example: 1 day before expiry.
- Save.
How quote expiration works
- When you send a quote, the app stamps the send time.
- Expiry date = last send time + expire days.
- The app sends a Reminder email at your chosen “send before” interval.
- On expiry, if not Accepted or Declined, status becomes Expired and the app sends an Expiry Warning email. Buyers can no longer accept the expired quote.
Notes
- If you resend a quote, the expiry date recalculates from the most recent time the quote was sent.
- If a quote is Accepted or Declined before the reminder, no reminder is sent.
- If No expiry (0 days), reminders are disabled.
Set up email notifications
Email Notifications lets you manage the email templates sent during the quote process.
You can choose a template style, edit each email notification, insert variables, preview changes in real time, and send test emails before using them with customers.
Go to: Apps → SP Request a Quote (RFQ) → Setting → Email notifications
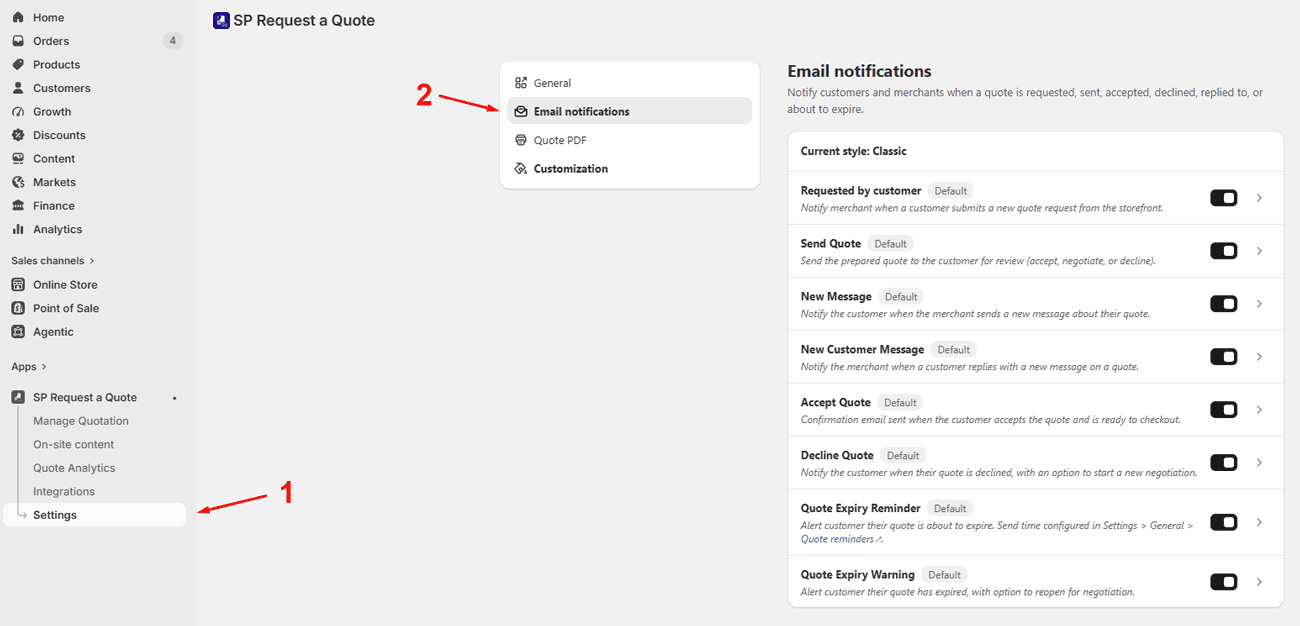
From this page, you can manage all quote-related email notifications in one place.
View email notifications
The app includes 8 email notifications used during the quote process.
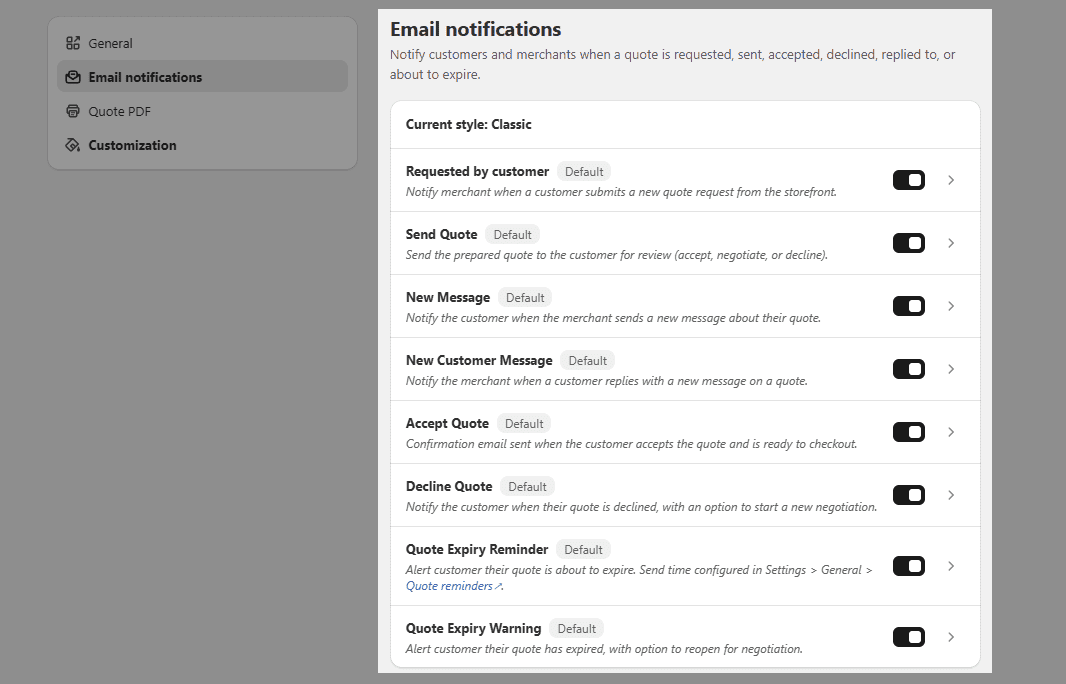
Each notification has a status badge:
- Default: The email is using the default template content.
- Edited: The email has saved custom changes.
This helps you quickly see which email templates have been customized.
Edit an email notification
Click a row to edit the content of each email.
You can:
- Choose an email template style
(*) - Edit the email subject
- Edit the email code
- Insert variables
- Preview changes in real time
- Send a test email
- Reset the email to default
- After making changes, click Save to apply them.
Choose an email template style
You can choose the design style used for quote emails.
Available styles include:
- Classic: Default email style
- Editorial
- Document
- Sidebar Timeline
The selected style applies to all email notifications.
If you have already edited email content, your custom content is kept when you switch to another style.
(*) On the Free plan, only the Classic style is available. Editorial, Document, and Sidebar Timeline are disabled.
Edit email subject
Use the subject field to customize the email subject line.
You can include variables in the subject to make the email more personalized, such as quote ID, customer name, or store information.
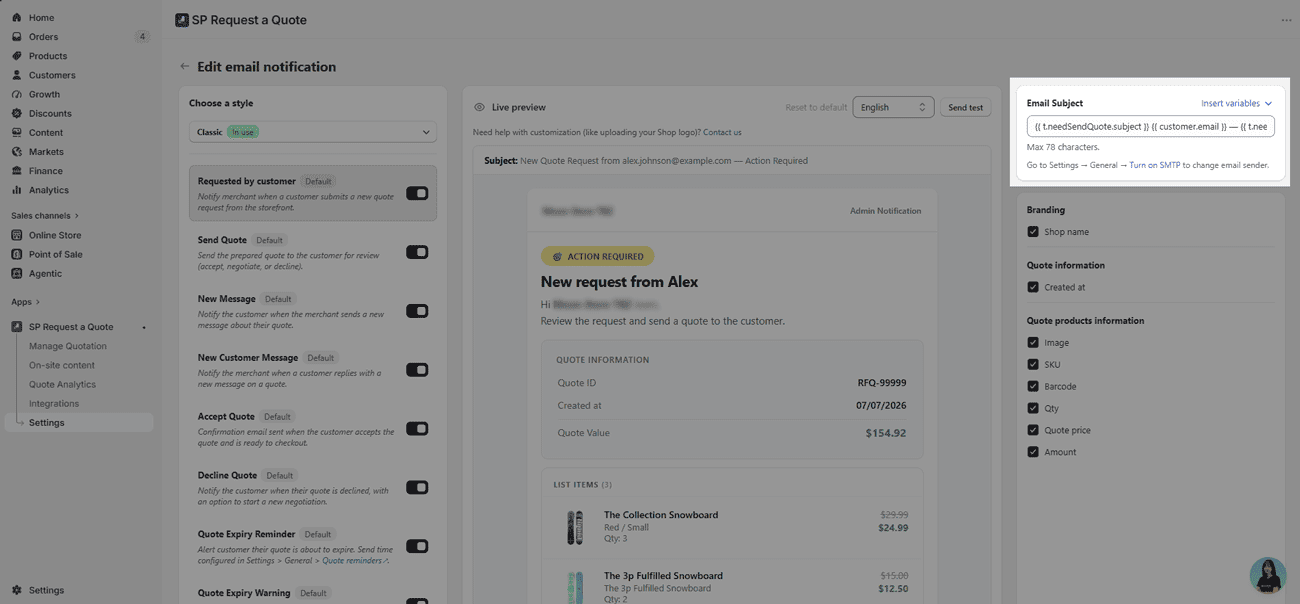
Note: You can also select the language from the dropdown to control the email language.
Edit email code
Use Edit code to customize the email body and layout.
This is useful when you want to adjust the wording, structure, or design of a specific email notification.
Make sure to preview and test the email before using it with customers.
Insert variables
Variables let you automatically show quote, customer, product, or store information in the email.
When editing an email notification, choose variables from the available variable list and insert them into the subject or email body.
For example, variables can help display information such as:
- Store name
- Customer name
- Quote information: Quote ID, create at, quote value, expiration date, etc.
- Quote products information: Image, SKU, barcode, etc.
- Order summary: Subtotal, shipping & delivery, estimated tax, final total
- Attachments (quote PDF)
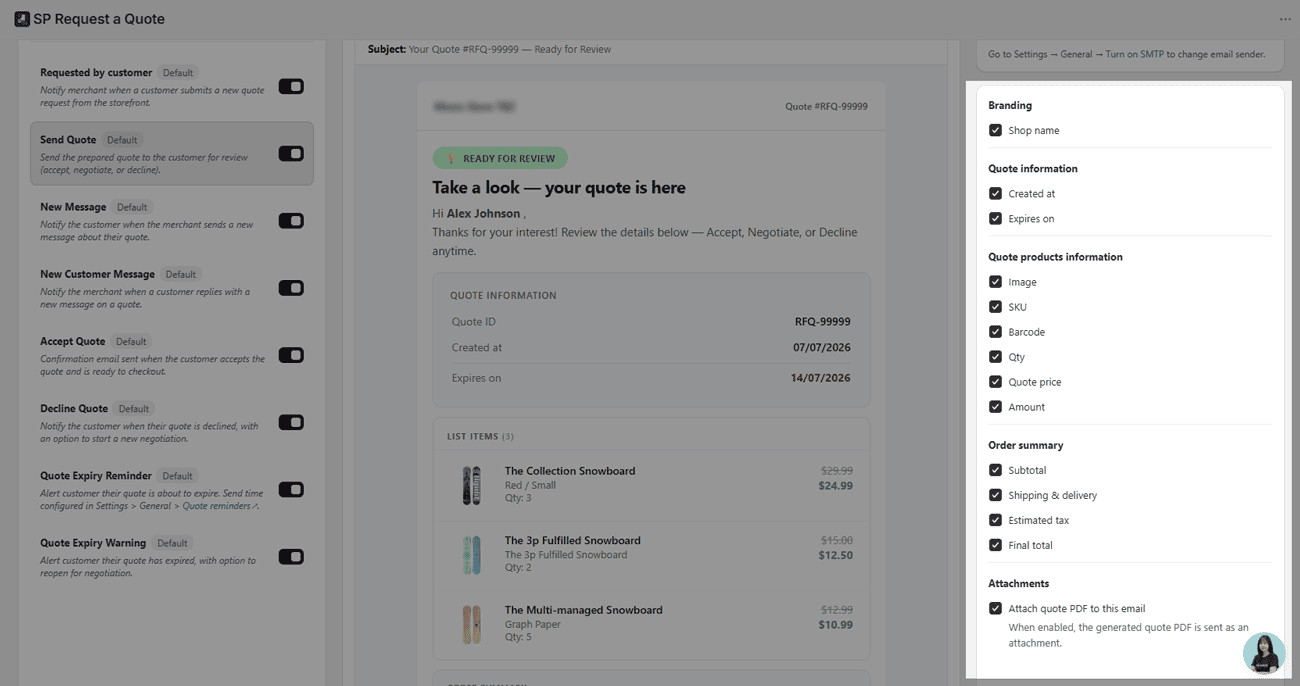
Note: You can attach a detailed quote PDF to Send Quote and Accept Quote emails by enabling the PDF attachment option when sending the email.
Live preview
The live preview updates in real time as you edit the email.
Use the preview to check:
- Email layout
- Text content
- Variable placement
- Order Summary block
- Customer-facing actions
This helps you review the email before saving or sending a test.
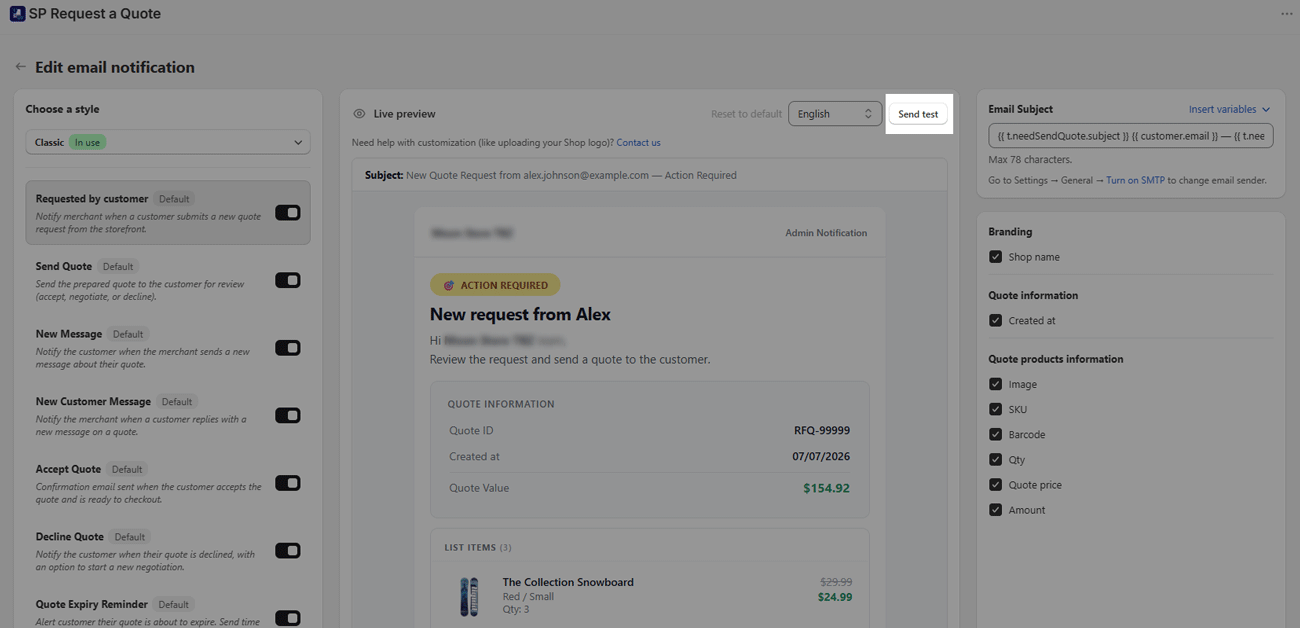
Send test email
Click Send test to send a test version of the selected email notification.
Use this option to confirm how the email looks in an inbox before it is sent to customers.
Reset to default
Click Reset to default if you want to restore the original template content.
This action removes your saved edits for that email notification and returns it to the default version.
Order Summary in emails
The Send Quote and Quote Expiry Reminder emails now include an Order Summary block.
The Order Summary block may show:
- Subtotal
- Shipping
- Estimated tax
- Final total
These values appear when they are available in the quote.
Timezones
The app formats date and time in emails to the buyer’s timezone.
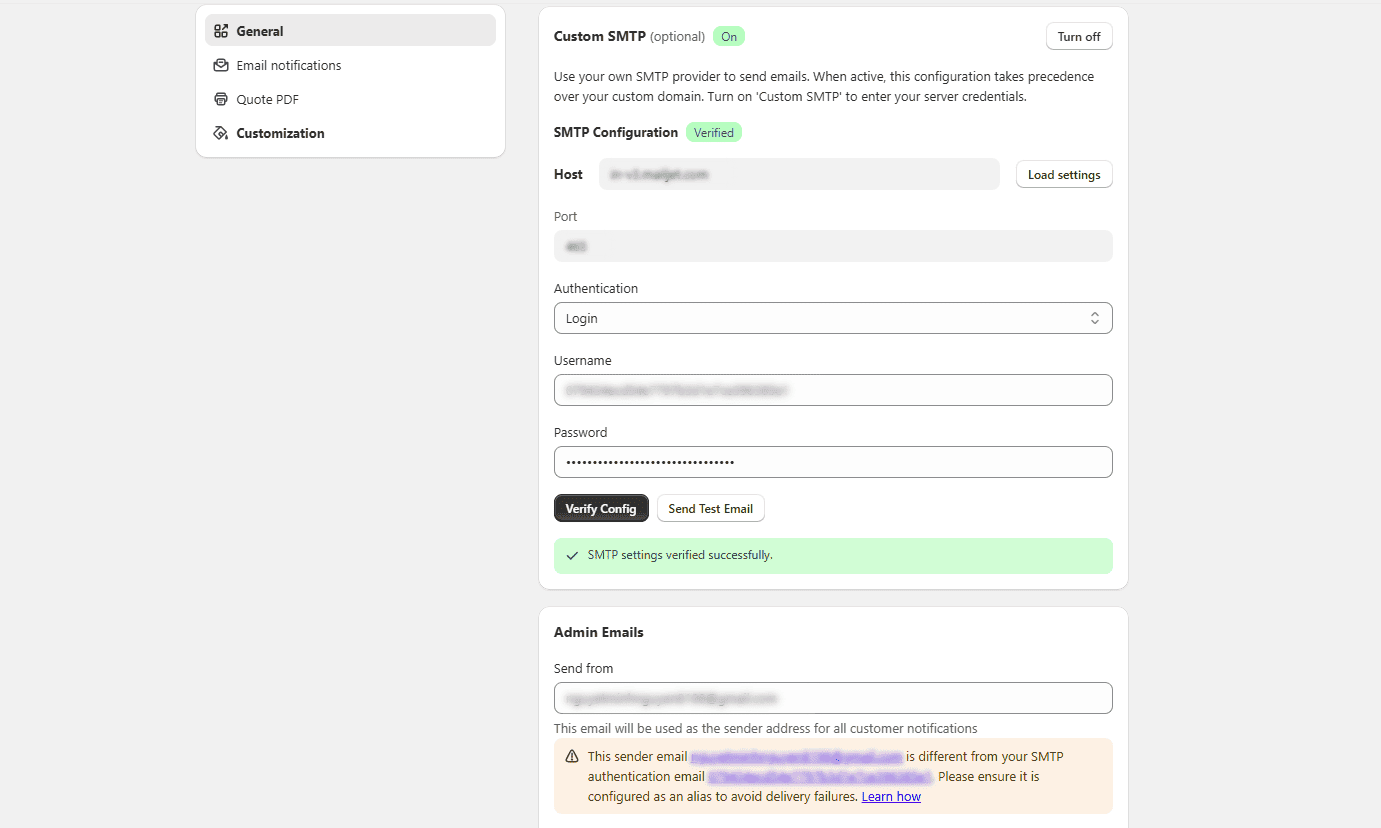
Use your SMTP (optional)
- Go to Settings > General > SMTP configuration.
- Enter Host, Port, Authentication (login or none), Username, Password.
- Click Load settings if using a supported provider (Gmail/GSuite) to auto-fill.
- Click Verify config:
- Enter a test email and send.
- If successful, the section shows a green Verified label.