How to create and show Instagram/TikTok feed
With MP Instagram Feed, you can turn your Instagram and TikTok content into a shoppable feed and publish it on your storefront in just a few steps. This guide walks you through the whole flow — from creating a new feed and tagging products, to customizing the display and showing the feed live on your store.
Note: Before you start, make sure you have connected at least one Instagram, Instagram with Facebook page, or TikTok account. If no account is connected yet, the app will prompt you to click Connect to link one first.
🎥 Prefer a quick walkthrough?
Ready to set it up? Follow the detailed guide below.
How to create an Instagram/TikTok feed
1. Open the MP Instagram Feed dashboard
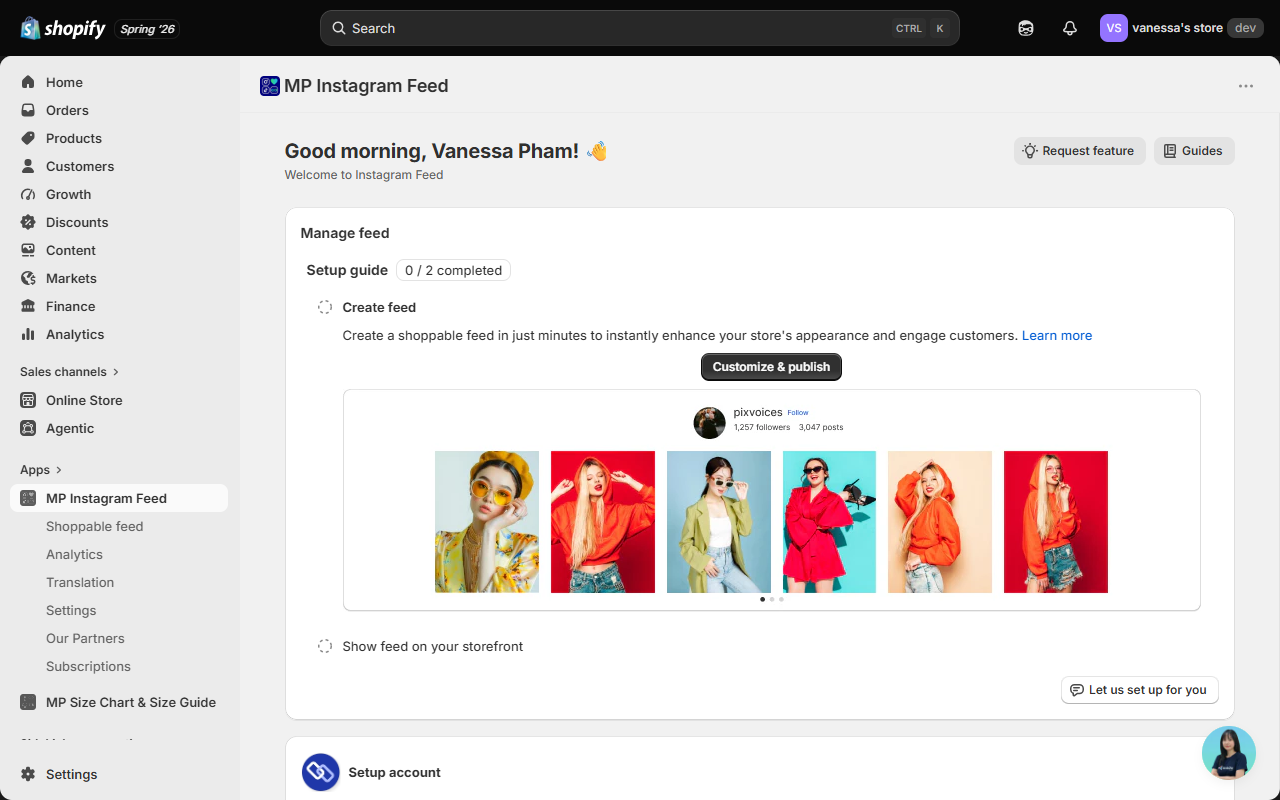
From your Shopify admin, open MP Instagram Feed. On the home dashboard you’ll find the Manage feed card with a Setup guide that walks you through creating and publishing your first feed.
2. Start creating a feed
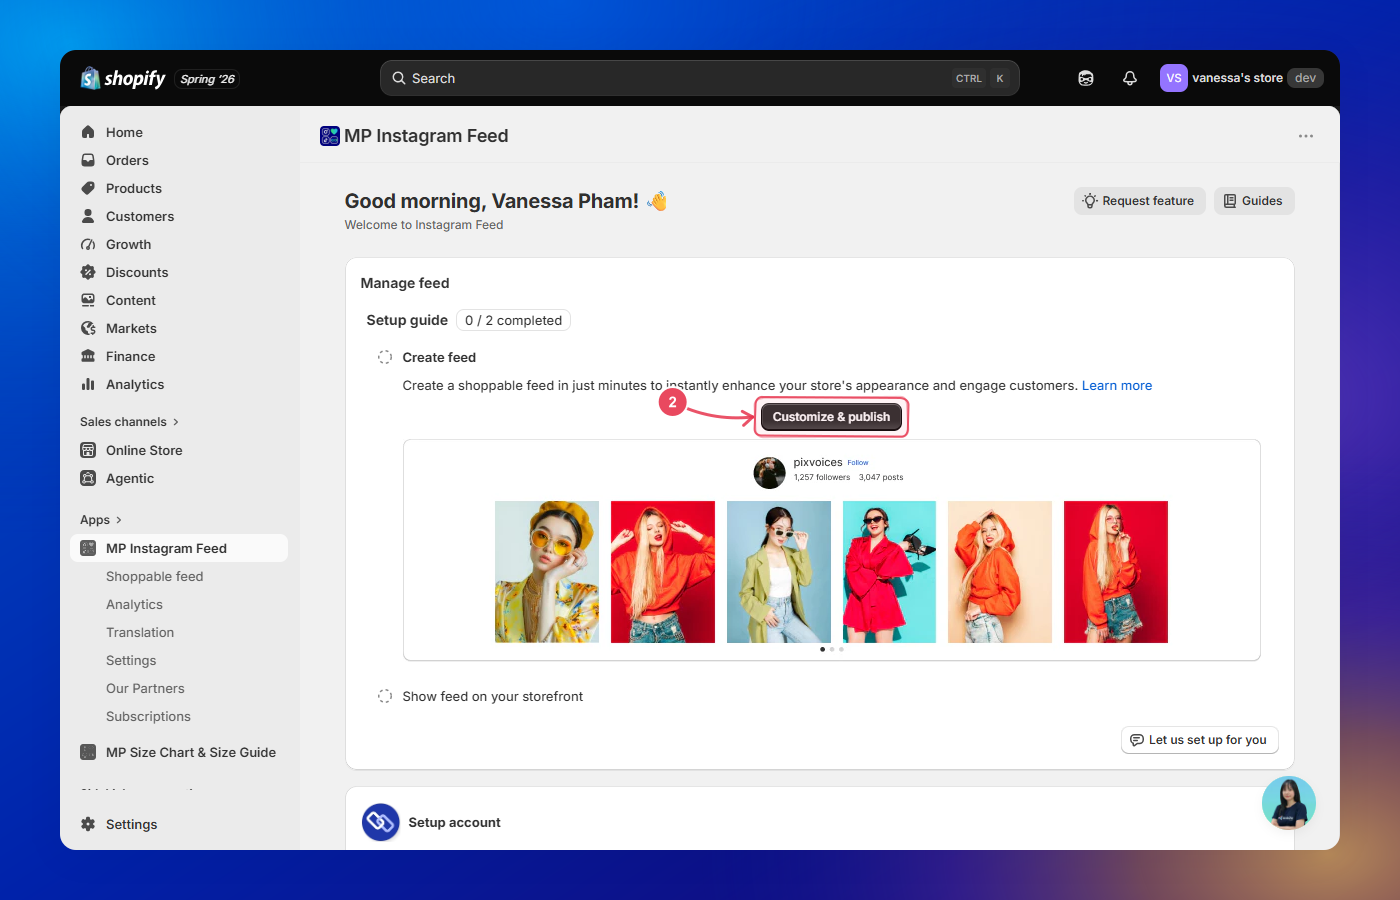
In the setup guide, click the Customize & publish button to begin building a new feed.
3. Choose a layout to get started
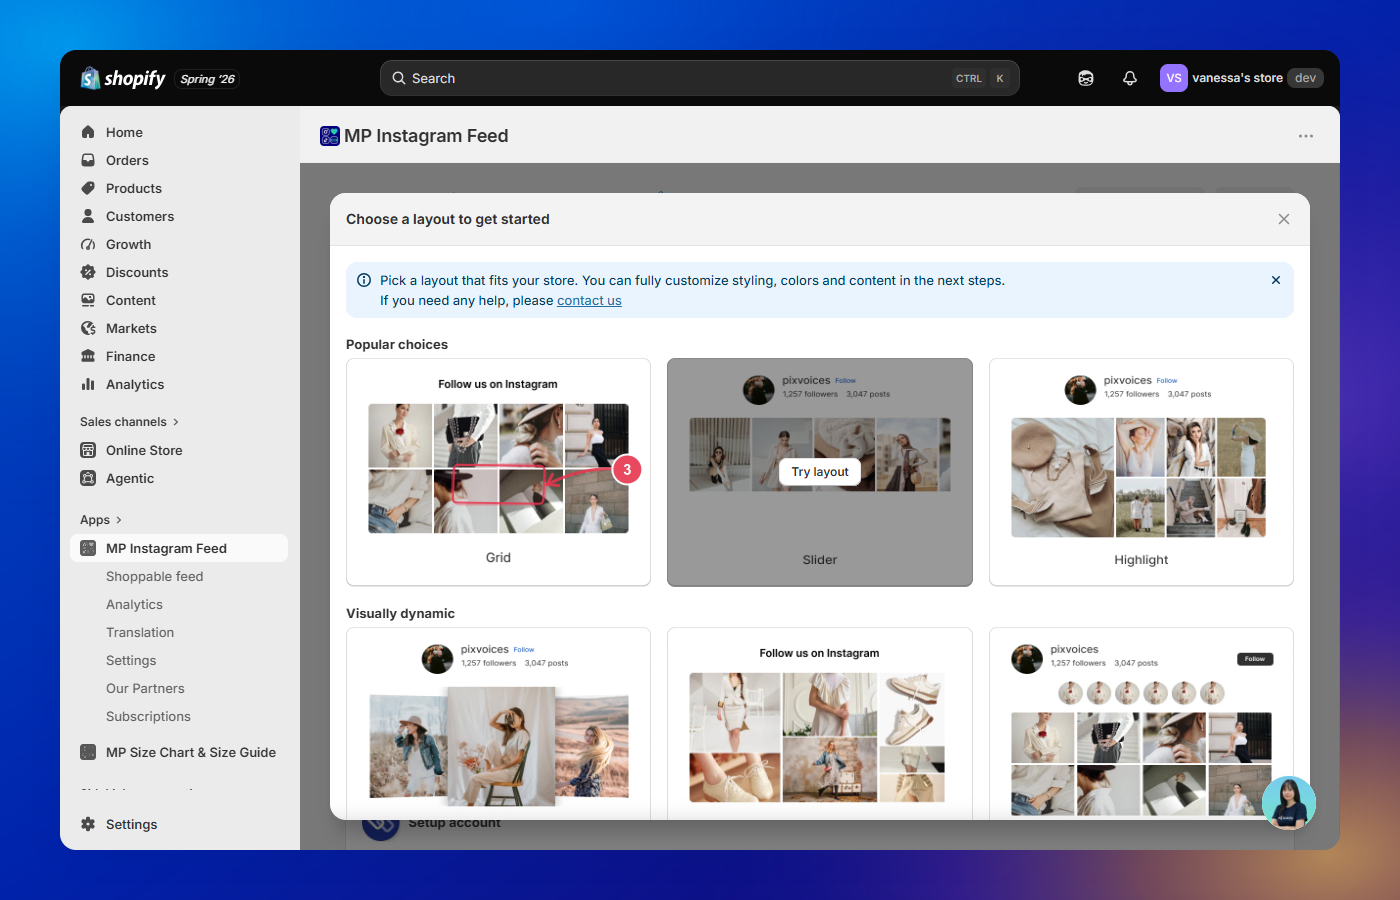
A Choose a layout to get started window appears with ready-made layouts grouped under Popular choices and Visually dynamic. Pick the one that best fits your store and click Try layout to open the feed editor. You can change the layout later in the setup step.
4. Select your account and arrange posts
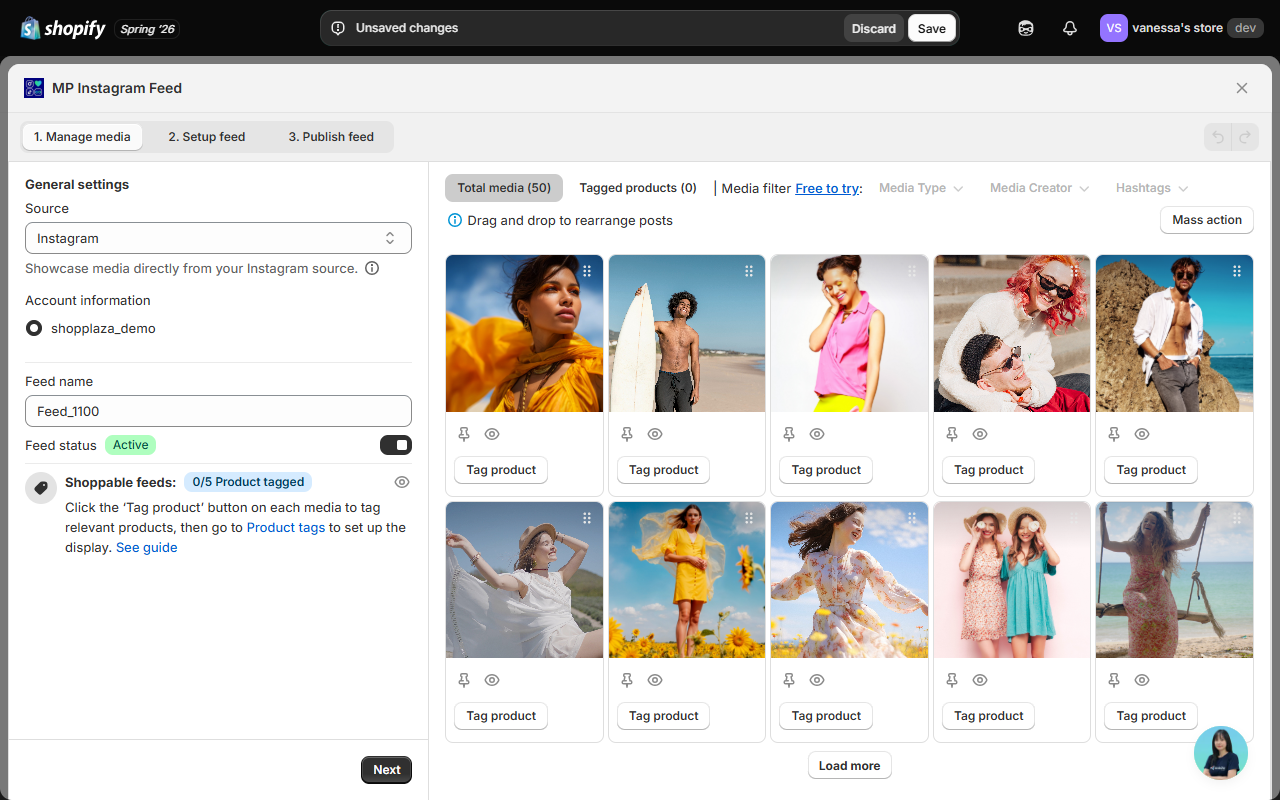
The editor opens on the Manage media step. In the General settings panel on the left, configure:
- Source: Choose the platform to pull media from (e.g. Instagram).
- Account information: Select the connected account you want to showcase.
- Feed name: Edit the default name if needed.
- Feed status: Toggle the feed Active or inactive.
If an account shows a fail to connect due to invalid token message:
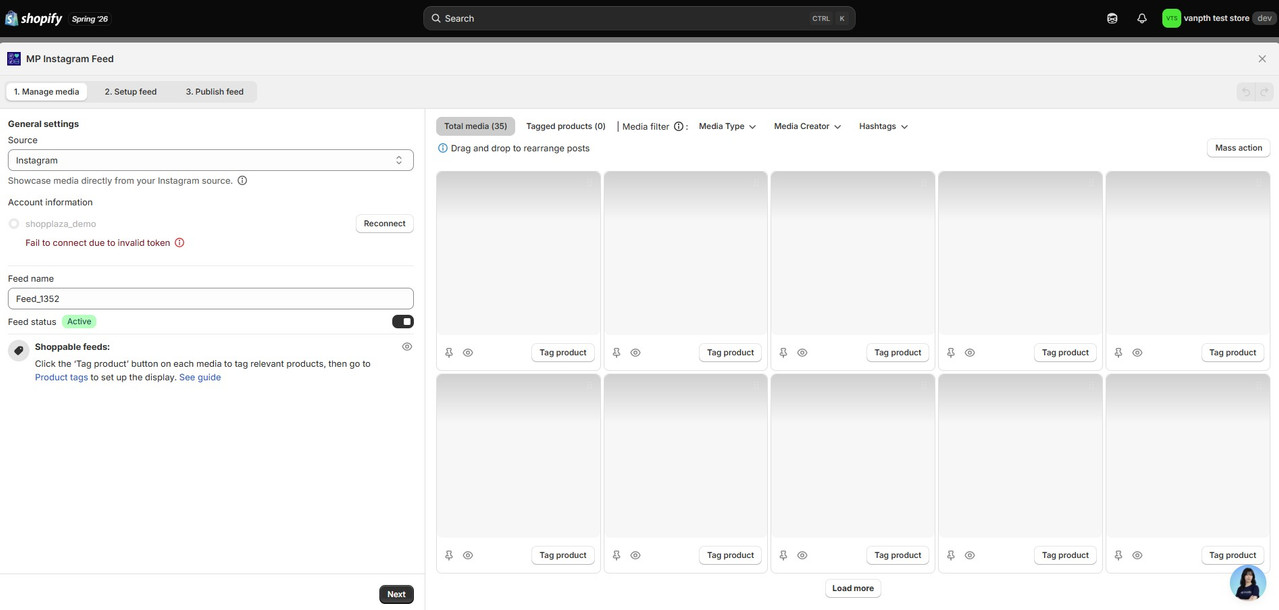
- Click Reconnect to reauthorize access.
- Once successful, the account will move to the Active accounts section and can be selected.
On the right, your posts are loaded automatically. Use the Media filter (Media Type, Media Creator, Hashtags) to adjust posts from your Instagram/TikTok account.
- Media type:
- Image: Posts include images only.
- Video: Posts include video only.
- Mixed-type: Posts include both images and videos.
- Story type:
- Image: Stories include images only.
- Video: Stories include video only.
- Media creator:
- Owner: Posts from the main account manager.
- Collaborators include two types of media: collab posts and tagged posts.
- Collab posts: Posts from guest contributors or team members.
- Tagged posts: Posts where the guest’s account has been tagged.
-
Hashtags: Search hashtags to find posts related to specific topics.
- Mass action: To update bulk posts, click on Mass action > Tick on the total post number.
- Pin to top: Pin one or more media to the top.
- Hide all: Hide one or more media.
- Rearrange products: Drag and drop posts to rearrange their positioning.
5. Tag products on your posts
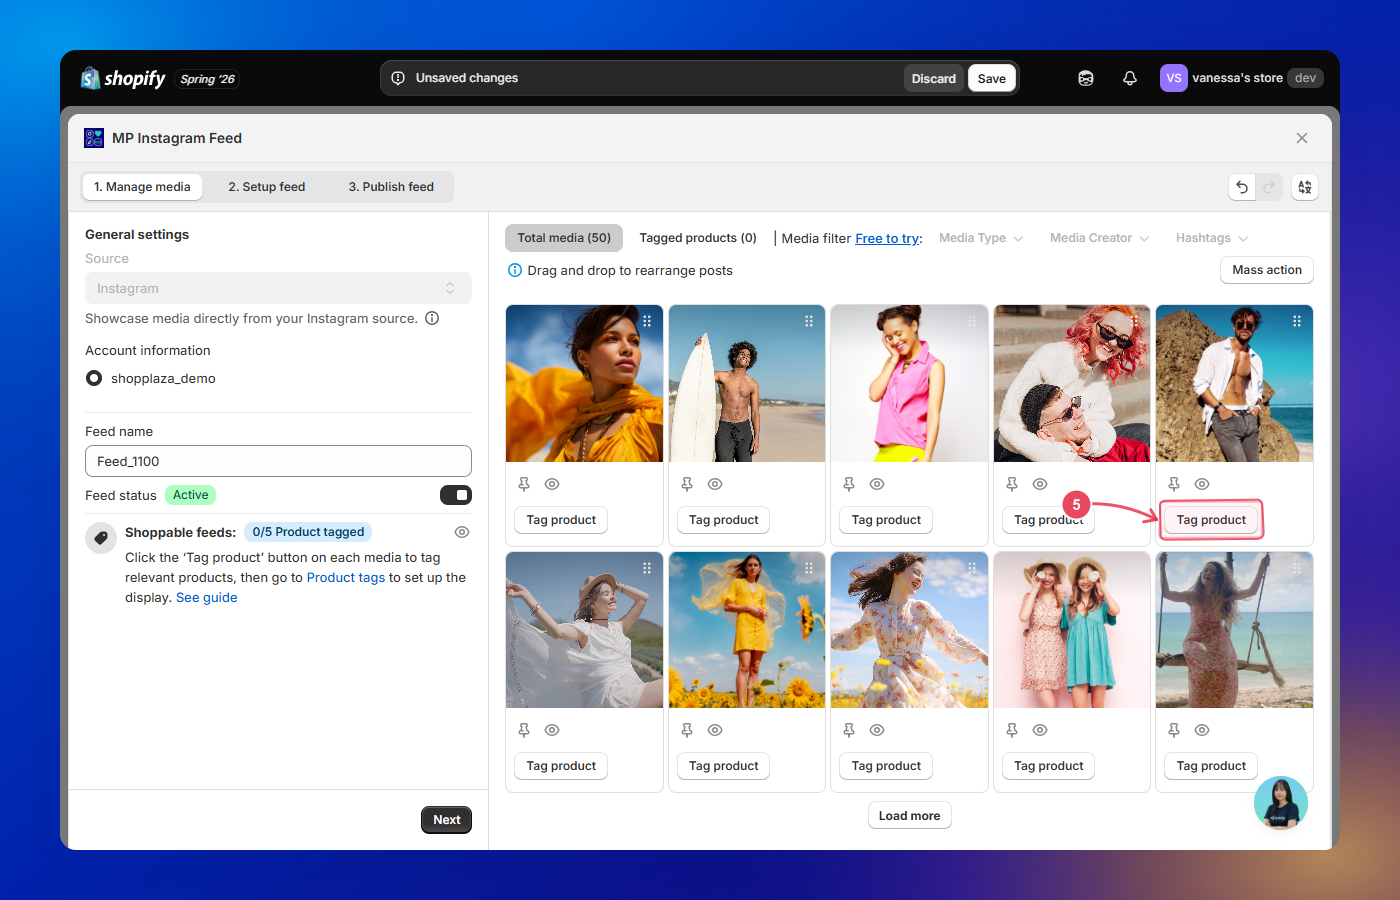
To make your feed shoppable, click the Tag product button on any post.
In the Tag product window, click anywhere on the image to drop a tag, then choose the product you want to link from the list. The tagged product and its price appear on the right, and you can drag the dots to reposition the tag. Click Confirm to save.
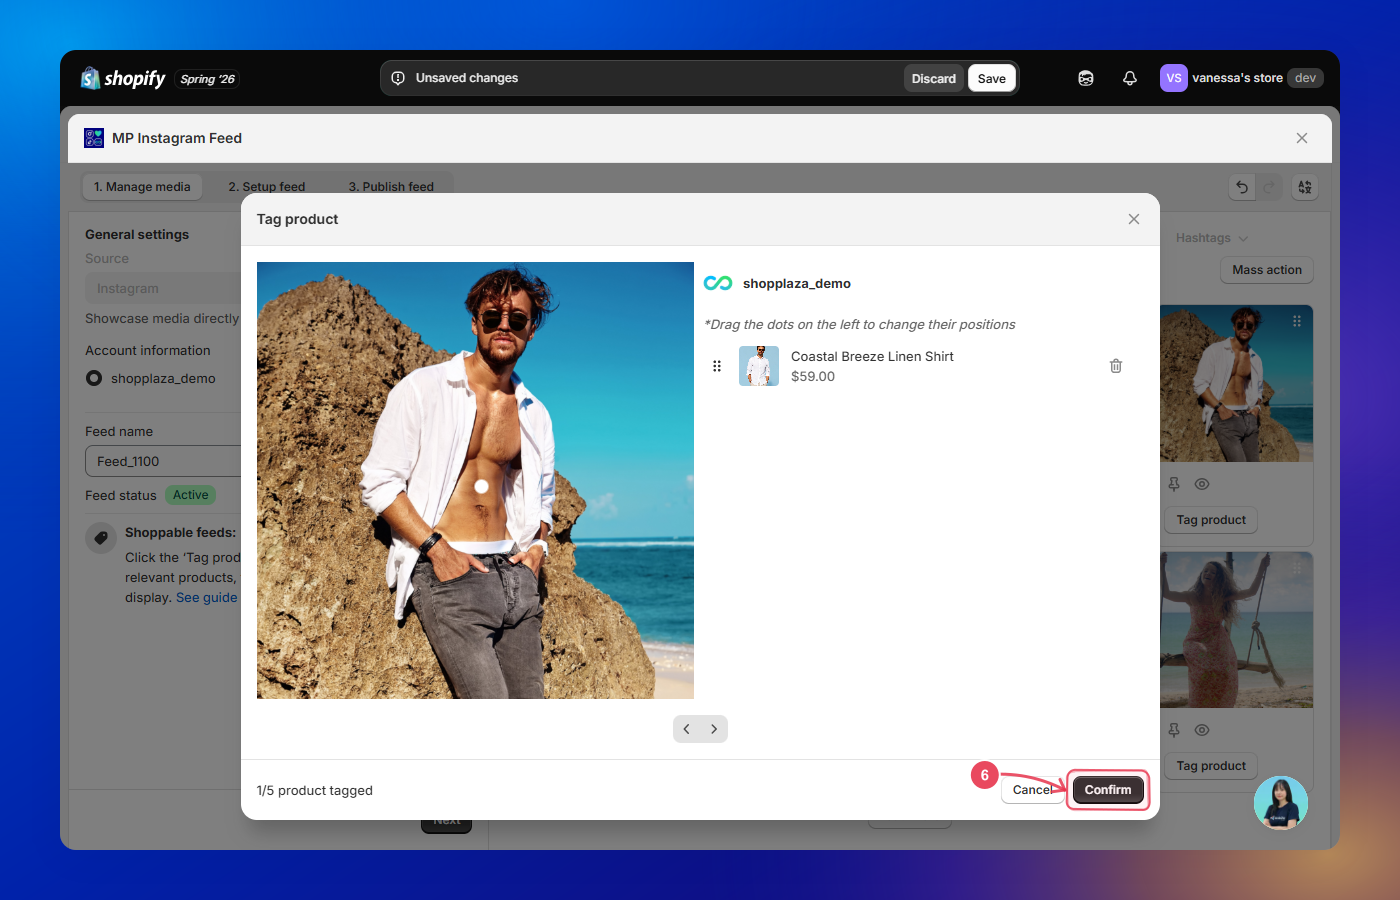
Note: Each post can hold up to 5 tagged products. After tagging, you can customize how the tags appear on the storefront in the Shoppable feeds section.
6. Customize the feed display
Click Next to move to the Setup feed step. Use the Mobile / Desktop toggle to configure each device, or tick Apply mobile settings for desktop to reuse the same settings.
Here are 4 main sections to customize the feed:
- Layout: Select the layout type for your Instafeed.
- Heading: Set up the feed heading.
- Spacing: Set up the feed spacing.
- Advanced settings: Customize the feeds with advanced settings (Setup Background color, Video auto play, Setup layout for stories, Media overlay and Custom CSS).
Layout
Start with the Layout section — switch between Grid, Slider, Highlight, Coverflow, Masonry, Collage, Stories bar, Split profile, Scattered collage, Product bar, Shop cards. The live preview on the right updates instantly.
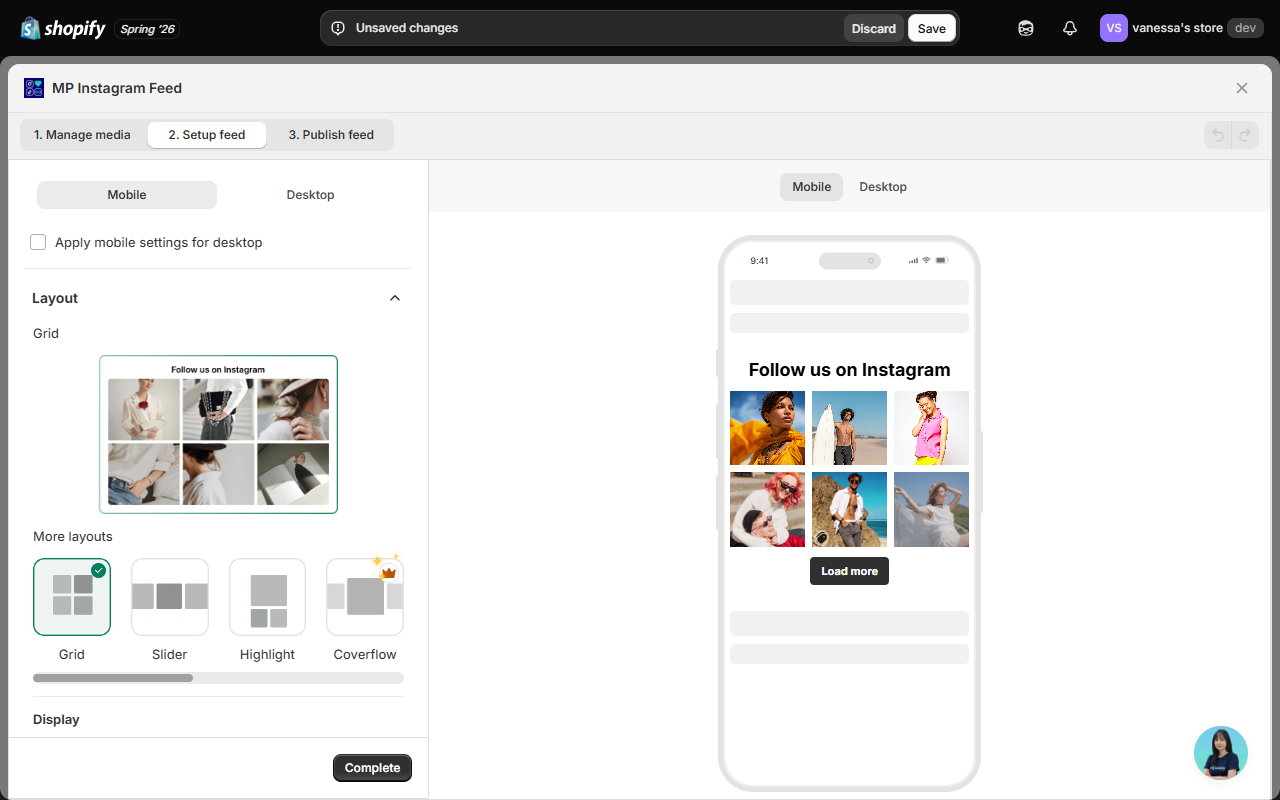
Scroll down to fine-tune the rest of the display:
- Display: Set the number of posts, Columns, and Rows.
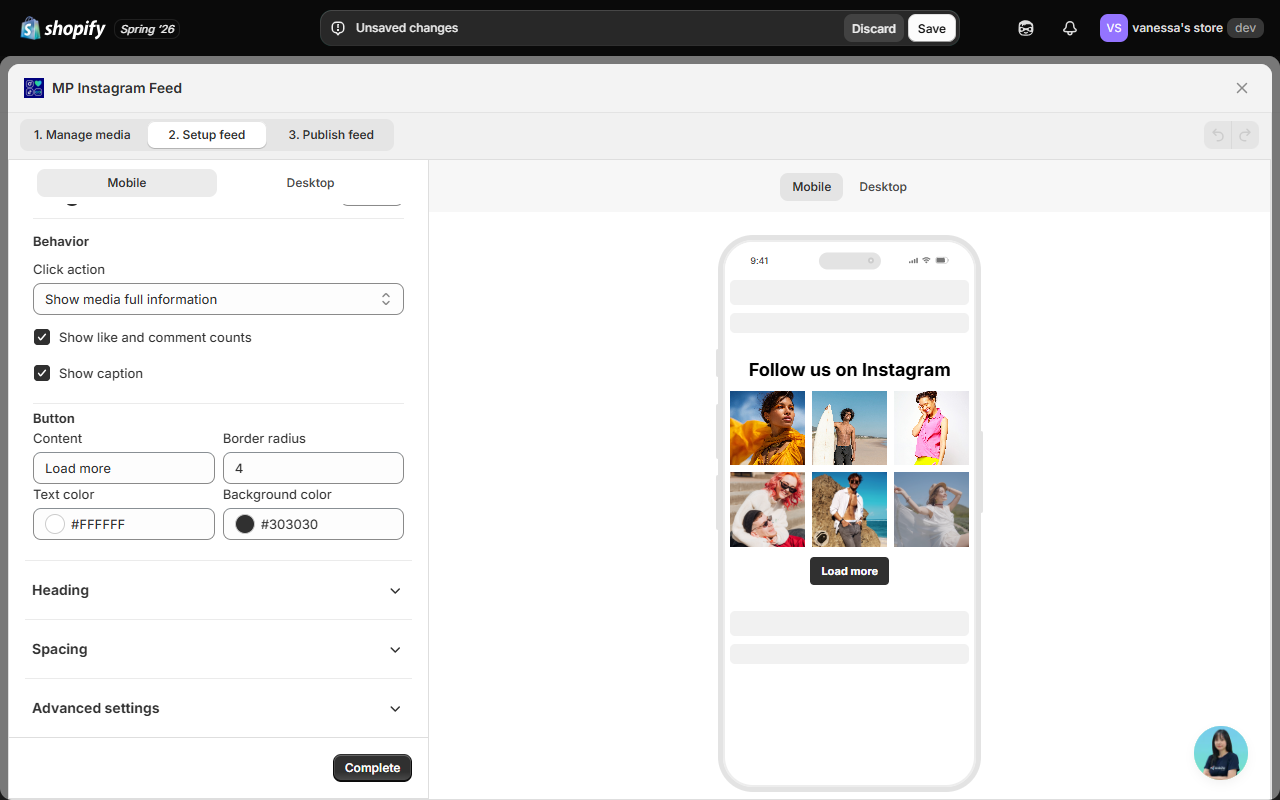
- Behavior:
- Choose the Click action. There are 3 options:
- Show media full information: When customers click an image, a pop-up will open showing the full post.);
- Show media only: A pop-up will open showing only the media (image or video), without captions, tags, or product info. (This action will only appear if you select Instagram as the source; it is not available when TikTok is selected.);
- Redirect to Instagram/TikTok: Customers will be redirected to the corresponding Instagram post when they click an image.
- Show like and comment counts (Instagram only): Display the number of likes and comments on your Instagram posts. (Note: This feature is only supported for Instagram feeds. TikTok feeds do not display like or comment counts.)
- Show caption: Show the caption of your media.
- Button (available on Grid, Highlight, Masonry, and Stories bar layout): Edit the load-more button content, border radius, and colors.
Heading
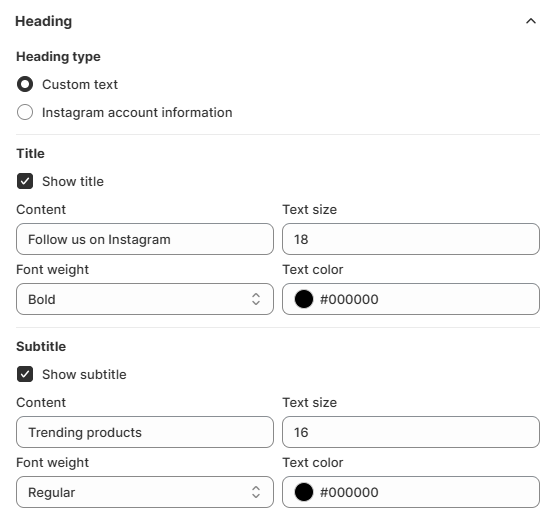
Heading type:
- Custom text: In Custom text section, title and subtitle have the same settings.
- Title/Subtitle: Tick/untick the box to show/hide the title/subtitle.
- Content: Fill in the title/subtitle text.
- Text size: Set up the text size.
- Font weight: Set up the font weight to make the text bolder or lighter.
- Text color: Select the text color to fit your theme.
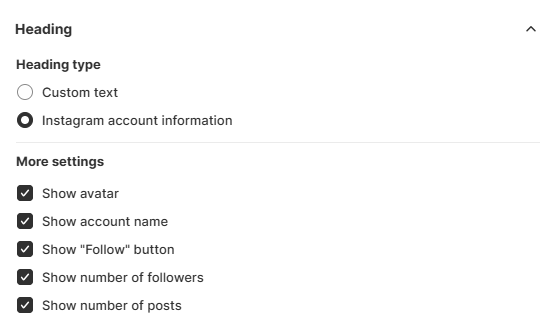
- Instagram account information (for creating Instagram feed): Show information relevant to your Instagram account.
- Show avatar: Display the Instagram profile picture.
- Show account name: Show the Instagram account’s name.
- Show “Follow” button: Add a “Follow” button to let customers follow directly from the feed.
- Show number of followers: Display the total number of followers to build social proof.
- Show number of posts: Show the total number of posts to highlight content activity.
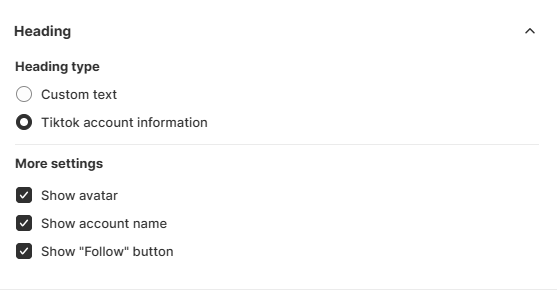
- TikTok account information (for creating TikTok feed): Show information relevant to your TikTok account.
- Show avatar: Display the TikTok profile picture.
- Show account name: Show the TikTok account’s name.
- Show “Follow” button: Add a “Follow” button to let customers follow directly from the feed.
Spacing
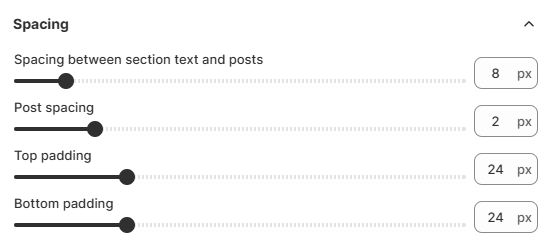
- Spacing between section text and posts: Adjust the gap between the section heading/subheading and the media feed.
- Post spacing: Control the space between each individual post (image or video).
- Top padding: Add space above the entire feed section.
- Bottom padding: Add space below the feed section.
Advanced settings
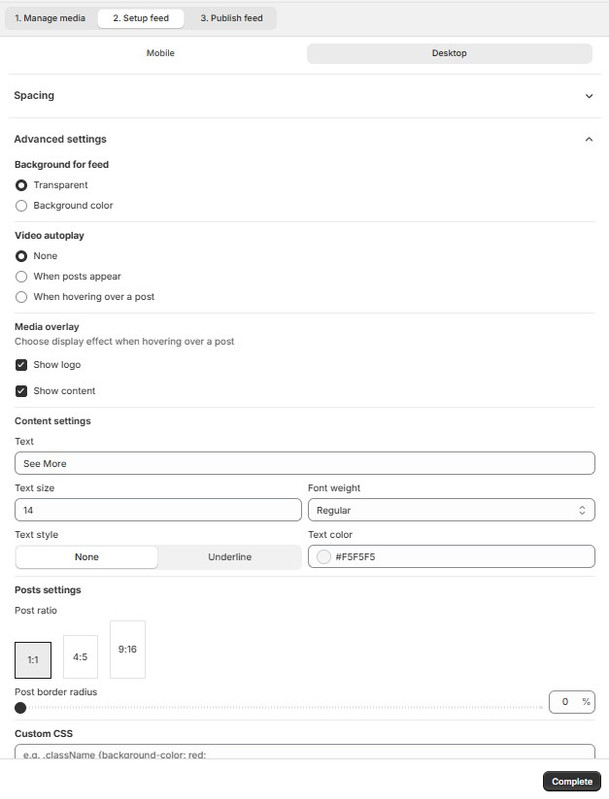
Background for feed
- Transparent: Keeps the feed background see-through, blending with your page.
- Background color: Allows you to choose a solid color for the feed background.
Video autoplay (for mobile)
- When posts appear: Automatically play videos as soon as they enter the viewport.
Video autoplay (for desktop)
- None: Videos will not play automatically. Users must click to play.
- When posts appear: Automatically play videos as soon as they enter the viewport.
- When hovering over a post: Videos will only autoplay when a user hovers their mouse over the specific post.
Note: The video autoplay feature is not supported on TikTok feed.
Media overlay (for desktop only)
This setting allows you to display additional information or branding over each media post when users view the feed on desktop.
- Show Instagram logo: Display the Instagram icon overlay on each post to indicate the source.
- Show content: Display the post caption, description, or other content overlay when users hover over the media.
Custom CSS
- Add your own custom styling here (e.g., .className { background-color: red; }).
- Ideal for advanced users who want more design flexibility.
7. Complete the setup
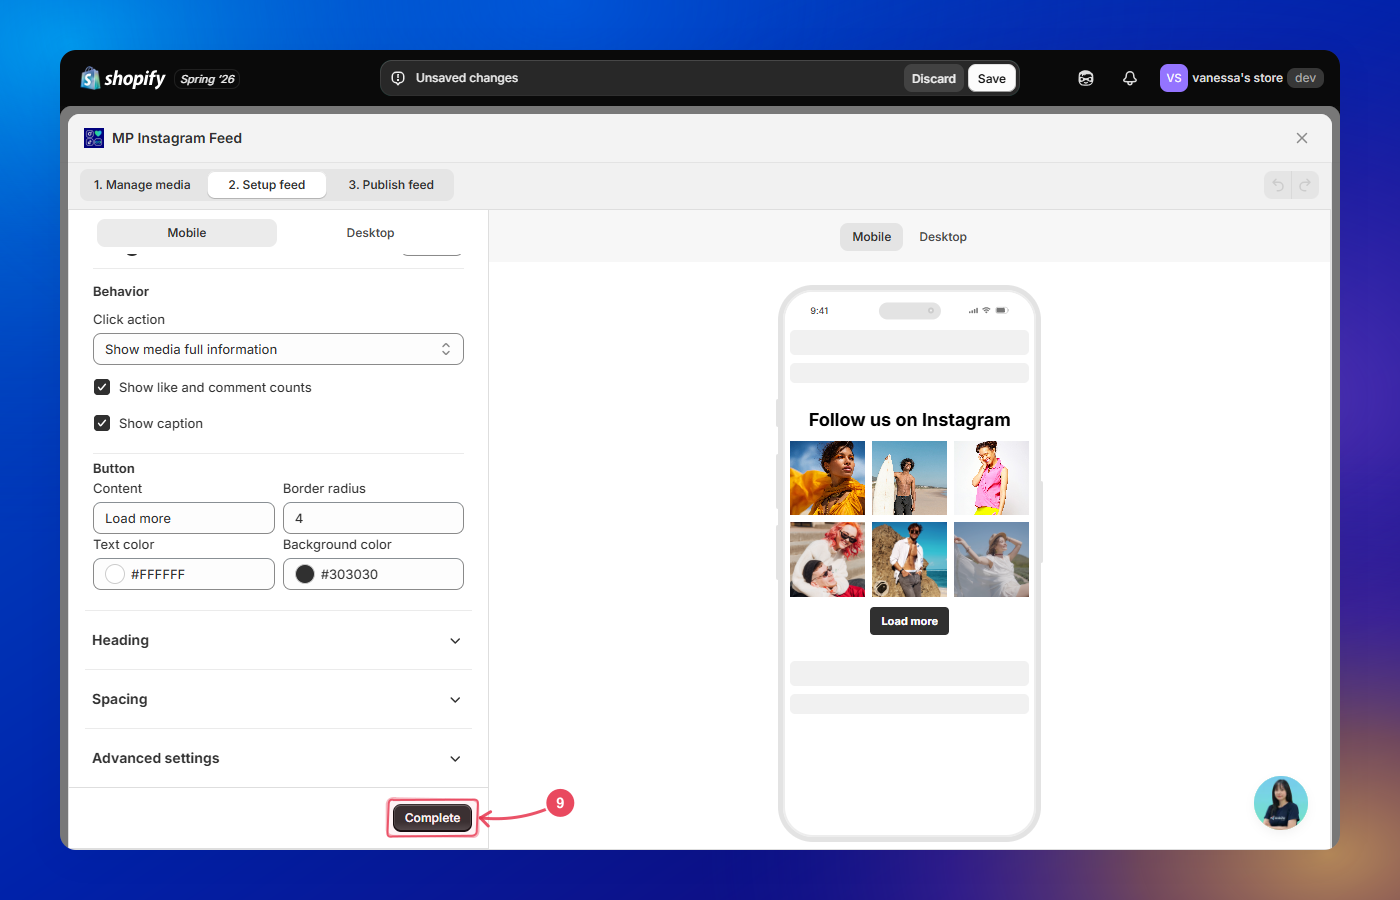
Once you are happy with the design, click the Complete button to finish customizing and move to publishing.
How to show the feed on your store
8. Select where to display the feed
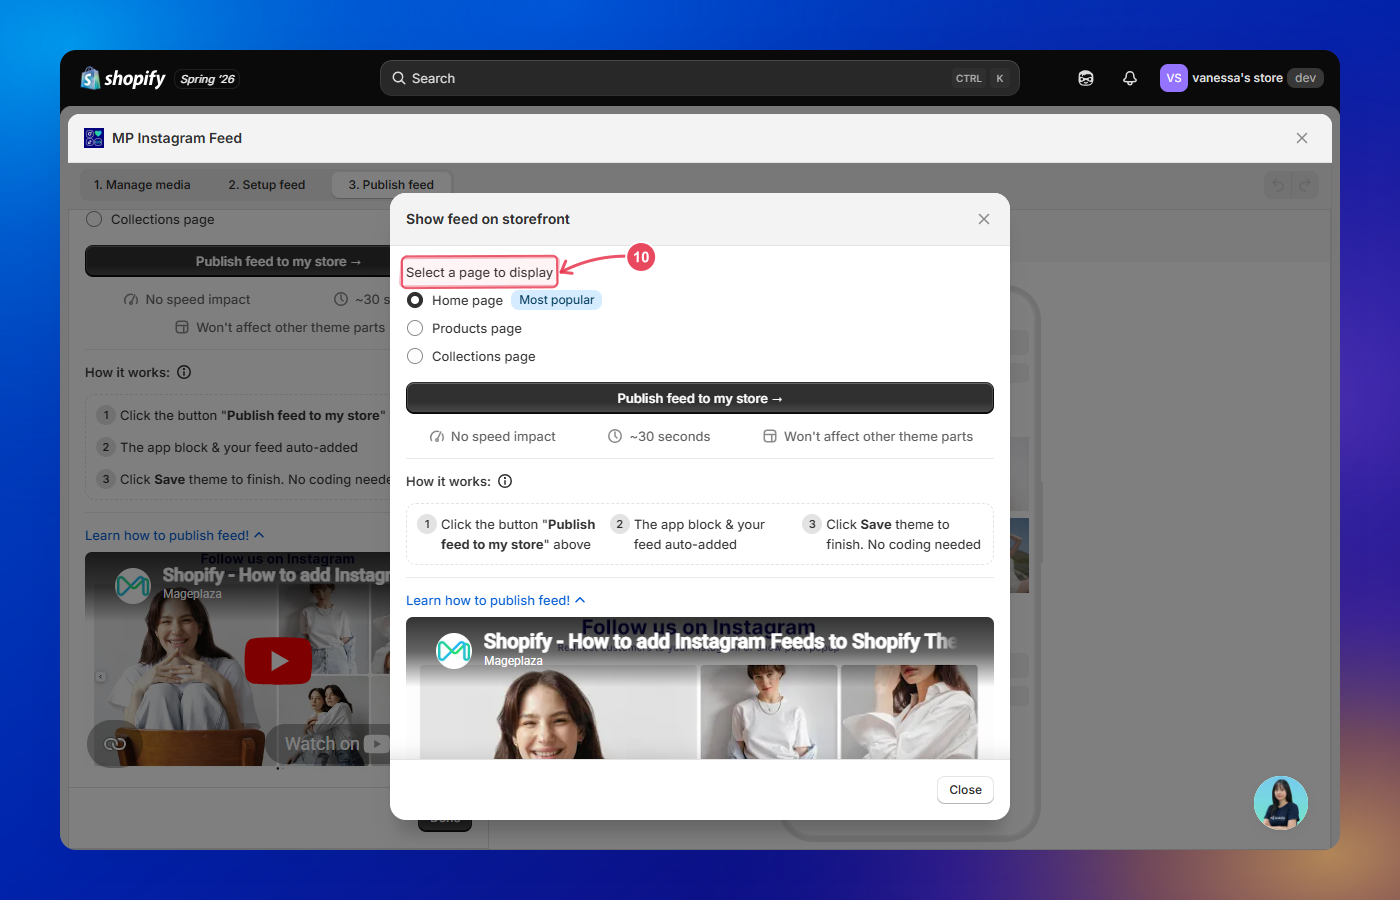
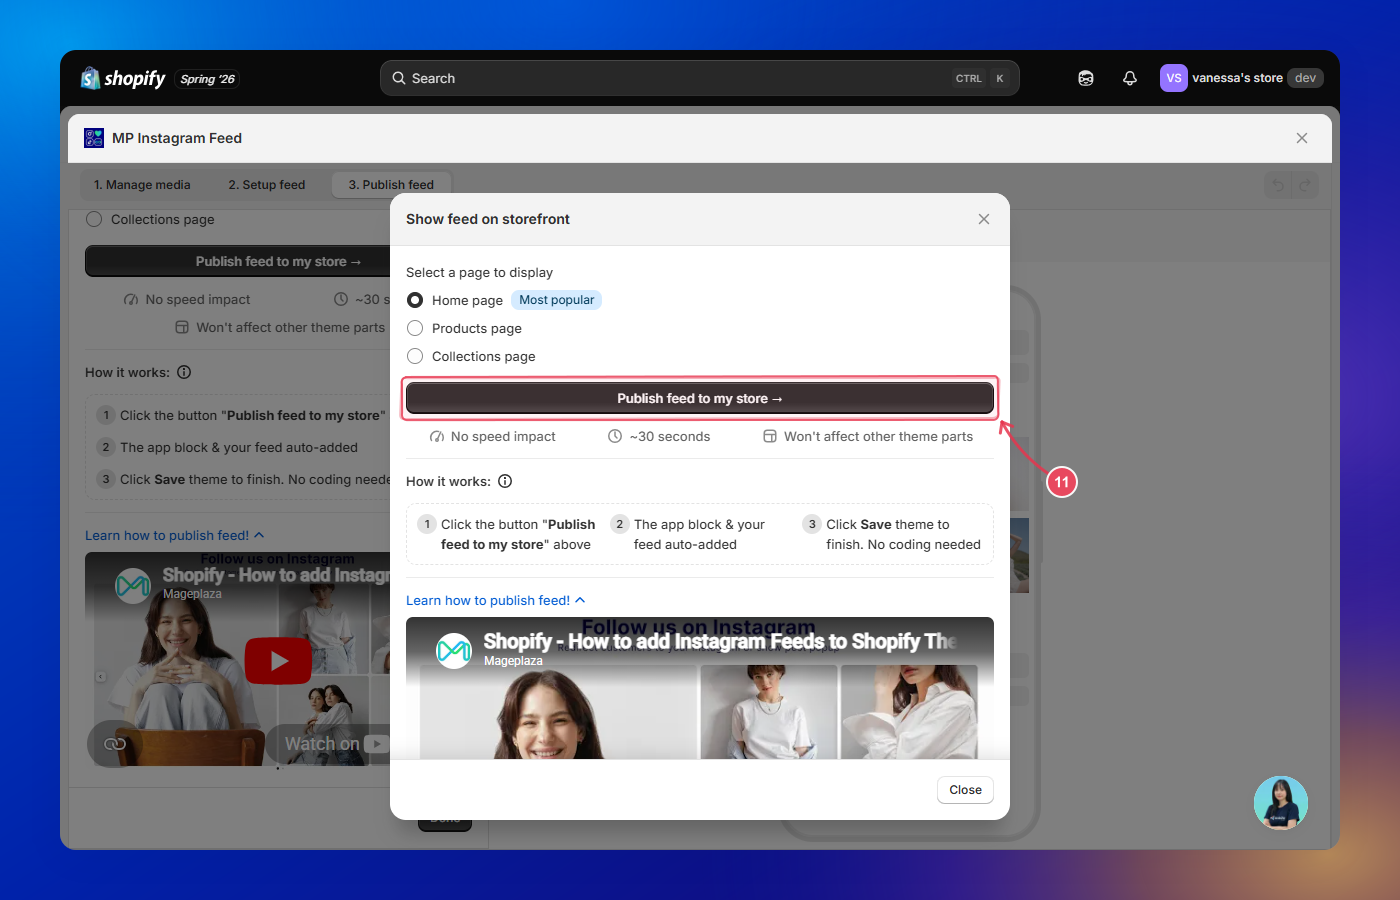
On the Publish feed step, the Show feed on storefront window appears. Under Select a page to display, choose where you want the feed to show — Home page, Products page, or Collections page.
9. Publish the feed to open the theme editor
After picking a page, click Publish feed to my store →. The app block and your feed are auto-added to the selected page, and Shopify’s theme editor opens automatically — no coding needed.
10. Confirm the feed block in the theme editor
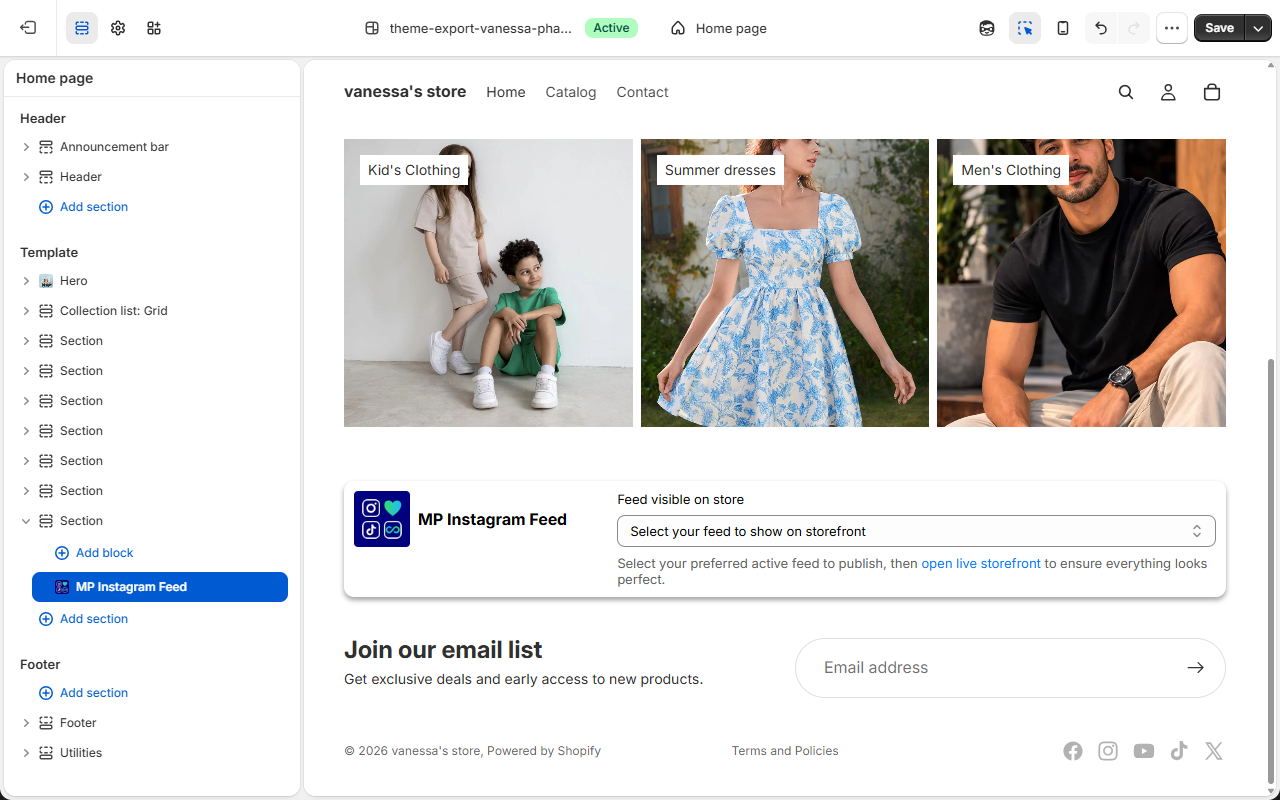
In the theme editor, the MP Instagram Feed block is already placed on the selected page.
11. Select the feed to show
In the block, open the Feed visible on store dropdown and select the feed you just created.
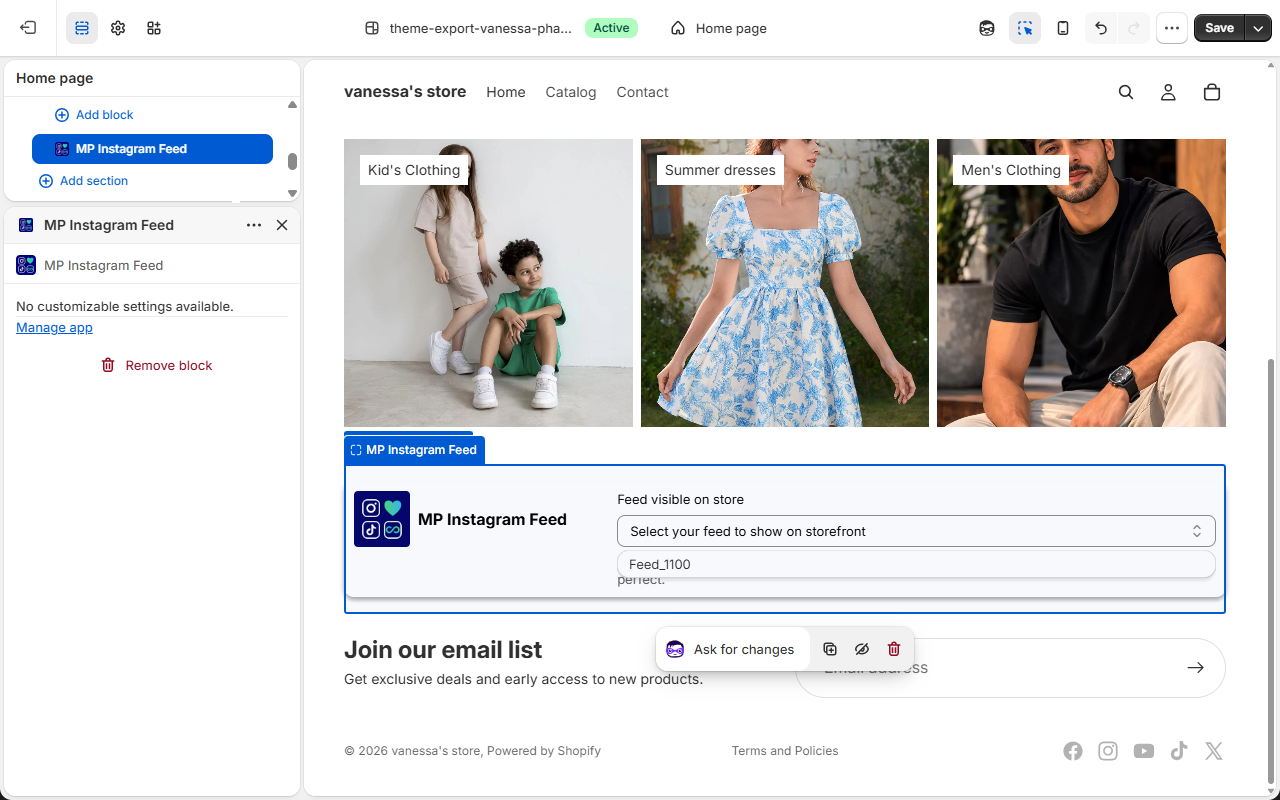
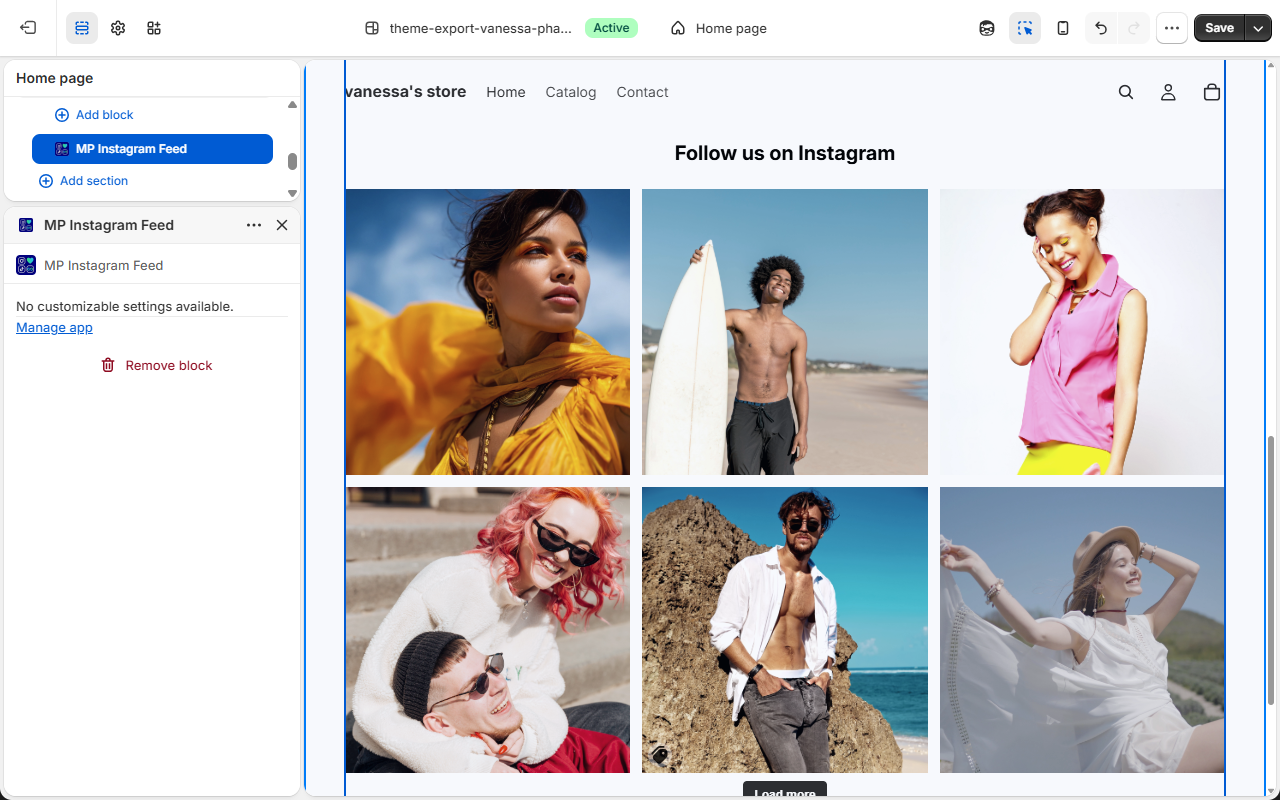
Once selected, the feed renders right inside the live preview so you can see exactly how it will look on your storefront. You can also click the open live storefront link below the dropdown to preview the published result on your real store.
12. Save to publish
When everything looks right, click Save in the top-right corner to apply the changes.
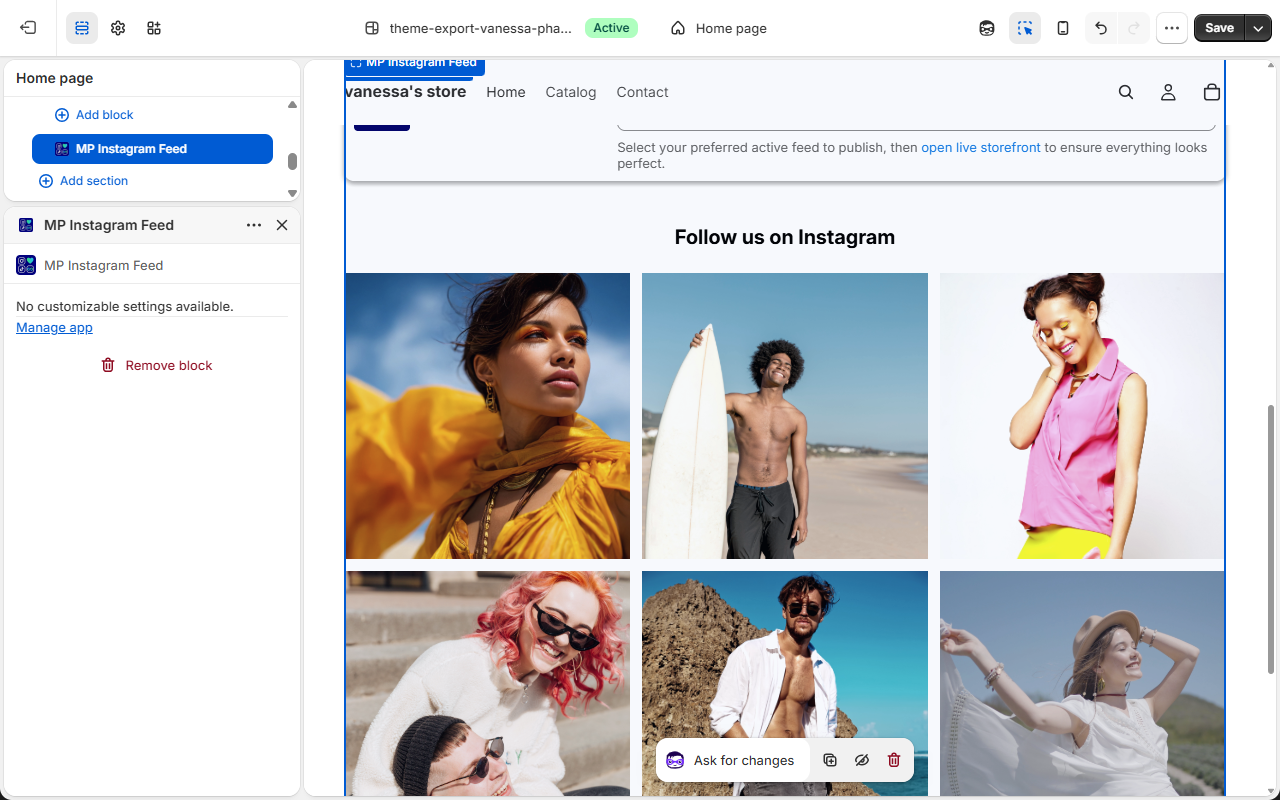
Note: Your feed only appears on the live storefront after you click Save — the open live storefront link reflects the last saved version of your theme.
13. View the feed on your storefront
Open your storefront and scroll to the feed section. Your Instagram/TikTok feed is now live, displaying your posts (and any tagged products) to your customers.
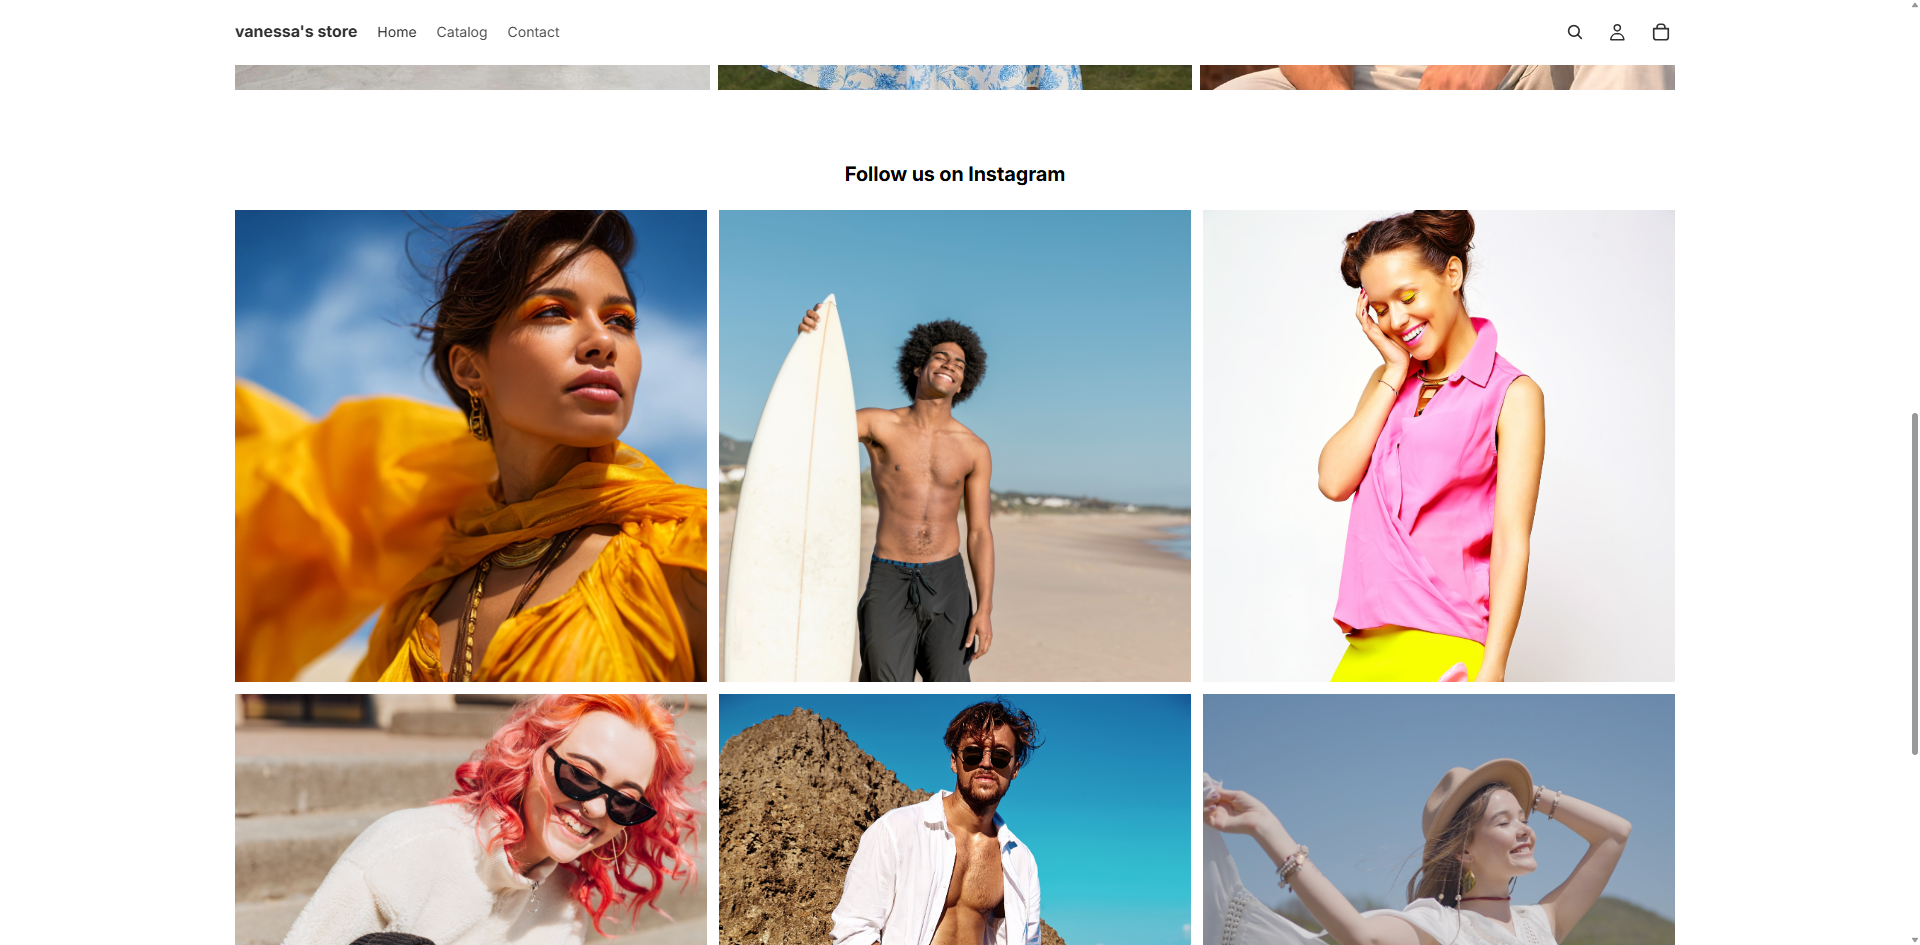
Note: Publishing has no speed impact, takes about 30 seconds, and won’t affect other parts of your theme.