How to upload your own posts with Media library
Media library lets you create your own posts from photos and videos, then show them in any feed next to your Instagram and TikTok content. You can use product photos, campaign videos, or customer content that isn’t on your social accounts.
Your own posts are stored in your store, so they don’t depend on your Instagram connection or token. For example, if a video can only show as a still image because of music copyright on Instagram, you can upload the video yourself and show it in your feed.
Step 1: Open Media library
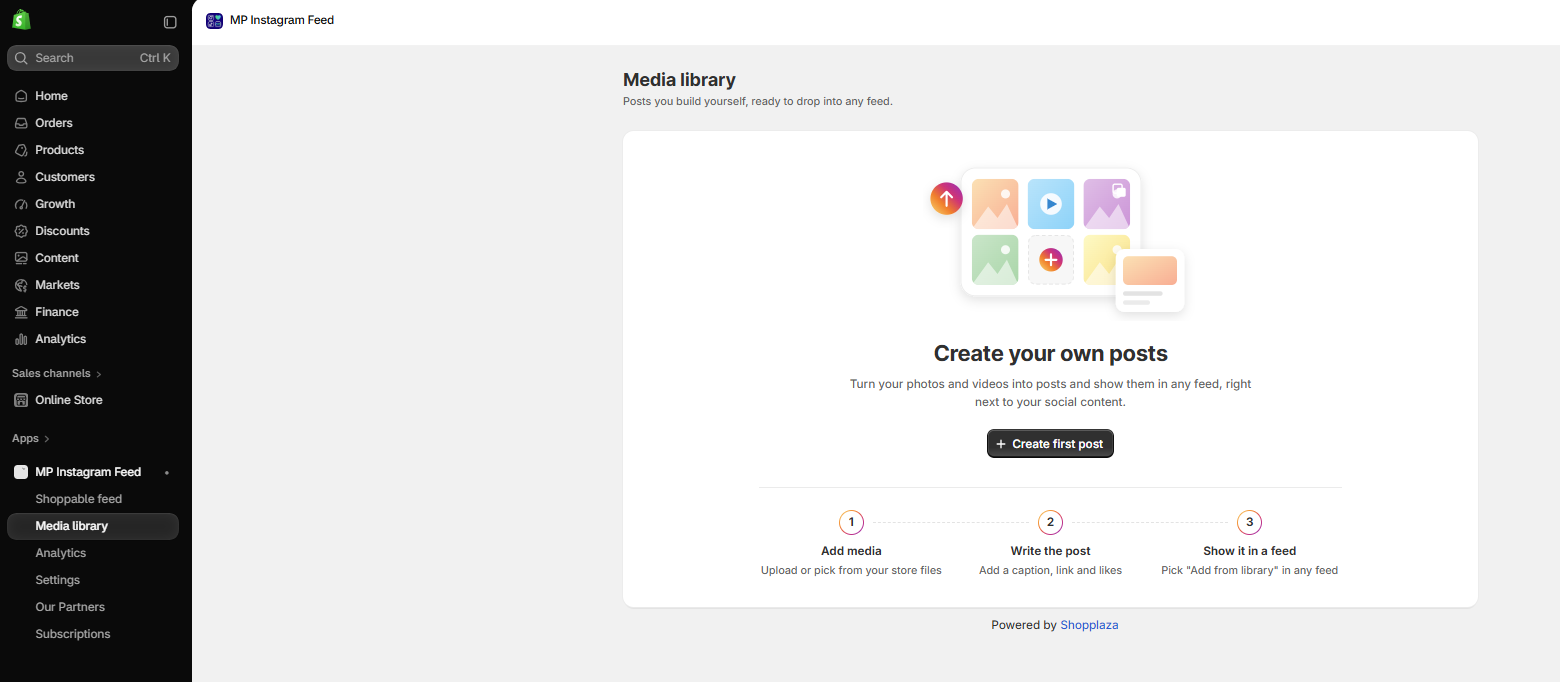
In the app, go to Media library and click Create first post. If you already have posts, click + New post in the top-right corner.
Step 2: Allow access to your store files
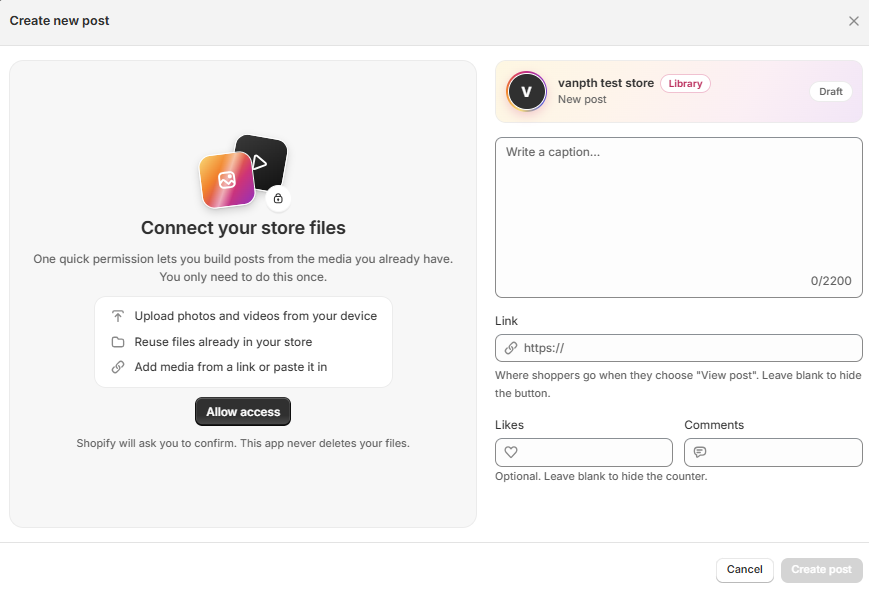
The first time you create a post, the app asks for permission to use your store files. You only need to do this once.
#1. In the Create new post window, click Allow access.
#2. Shopify shows an Update data access popup. Click Update to confirm.
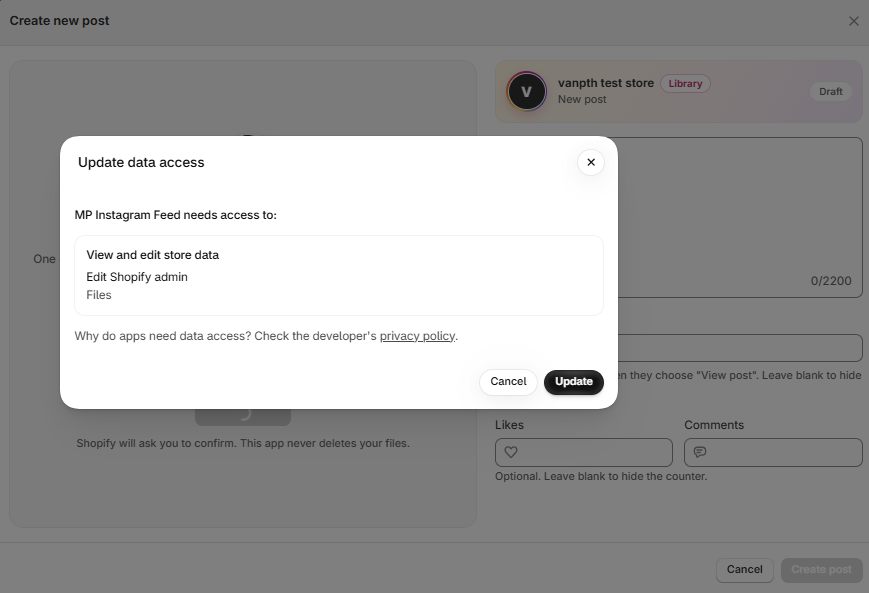
The app never deletes your files.
Step 3: Add photos and videos
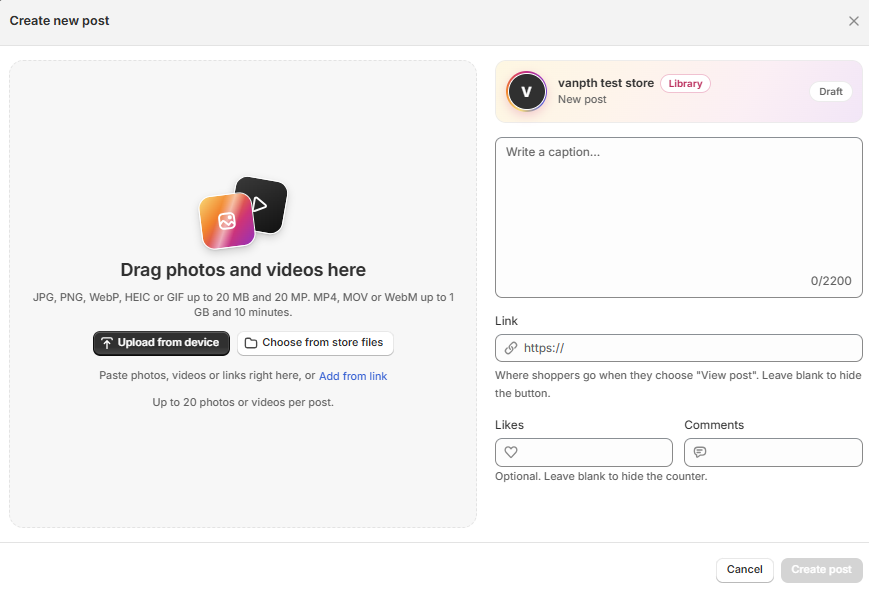
You can add media to your post in three ways:
- Upload from device: Upload photos and videos from your computer.
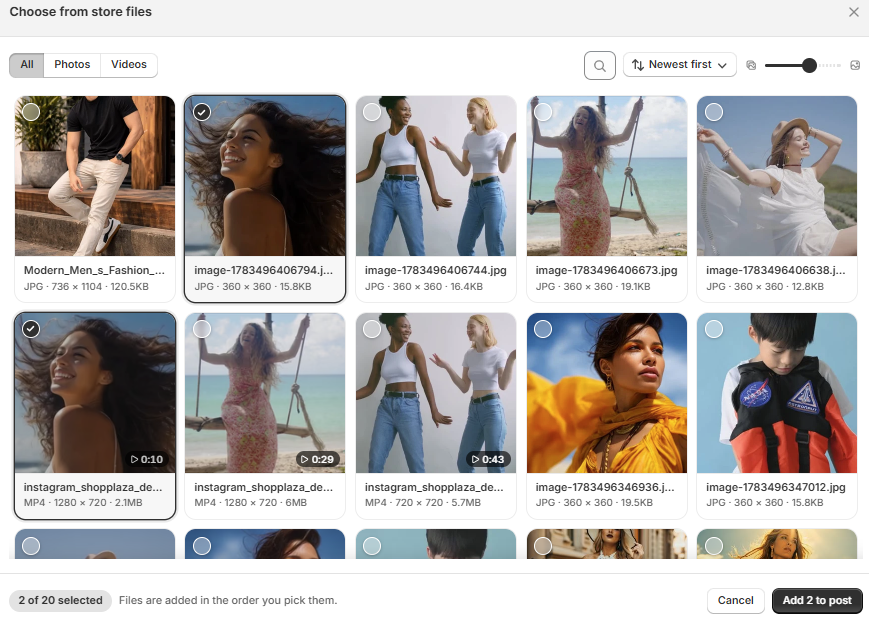
- Choose from store files: Reuse files already in your Shopify store.
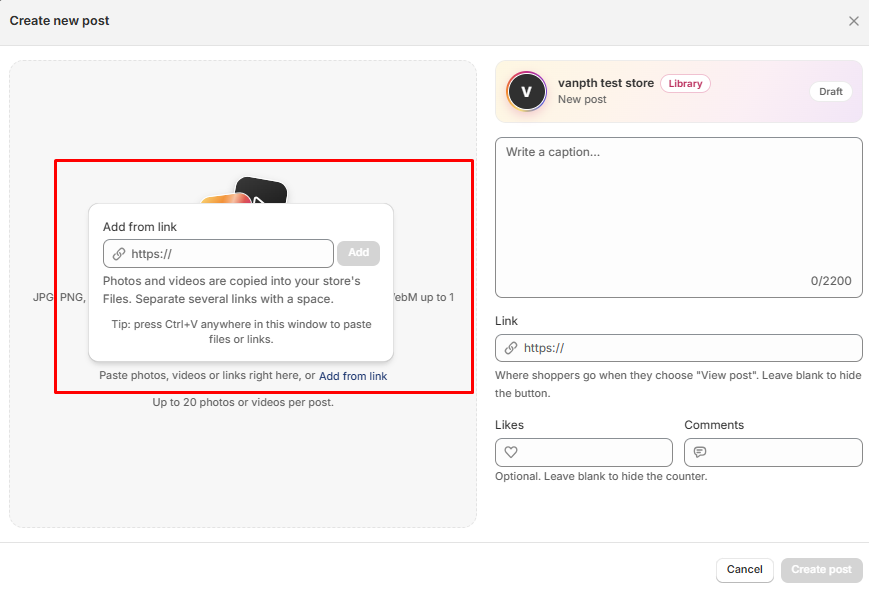
- Add from link: Paste a link to a photo or video. You can also press Ctrl+V anywhere in the window to paste files or links.
Supported files:
- Photos: JPG, PNG, WebP, HEIC, or GIF, up to 20 MB and 20 MP.
- Videos: MP4, MOV, or WebM, up to 1 GB and 10 minutes.
- Up to 20 photos or videos per post.
Add from link: Click Add from link, paste the link, and click Add. To add several files at once, separate the links with a space. Photos and videos added from a link are copied into your store’s Files.
Choose from store files: Click Choose from store files, select the photos or videos you want, then click Add [number] to post. Files are added in the order you select them.
Step 4: Write your post
After you add your media, fill in the post details.
#1. If you added more than one file, choose how to post them:
- One carousel: All files in one post, shown as slides.
- Separate posts: One post for each file.
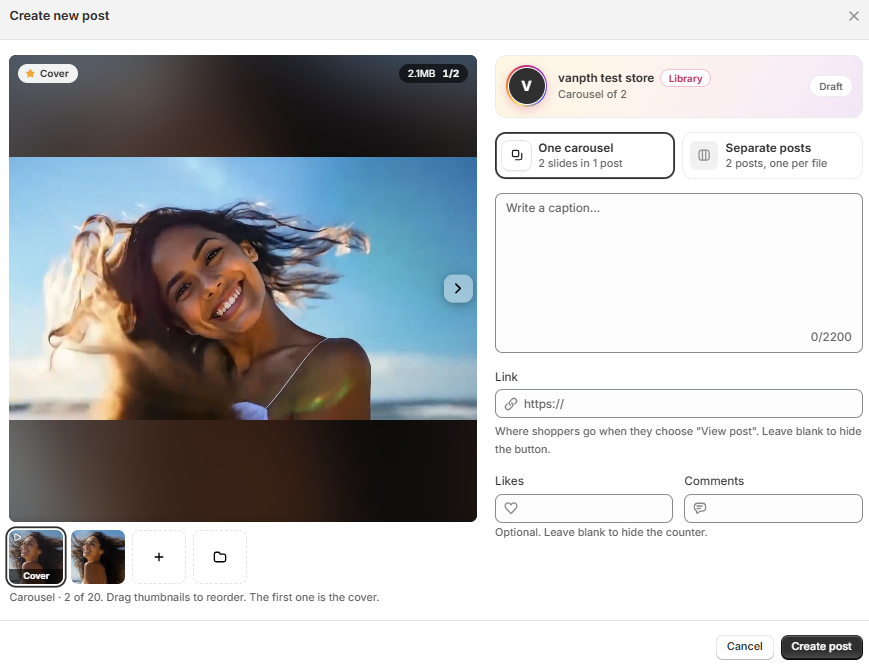
#2. Write a caption (up to 2,200 characters). #3. Link: Enter the page shoppers go to when they click View post, such as a product or collection page. Leave it blank to hide the button. #4. Likes and Comments: Enter the numbers you want to show on the post. These are optional. Leave them blank to hide the counters. #5. Click Create post.
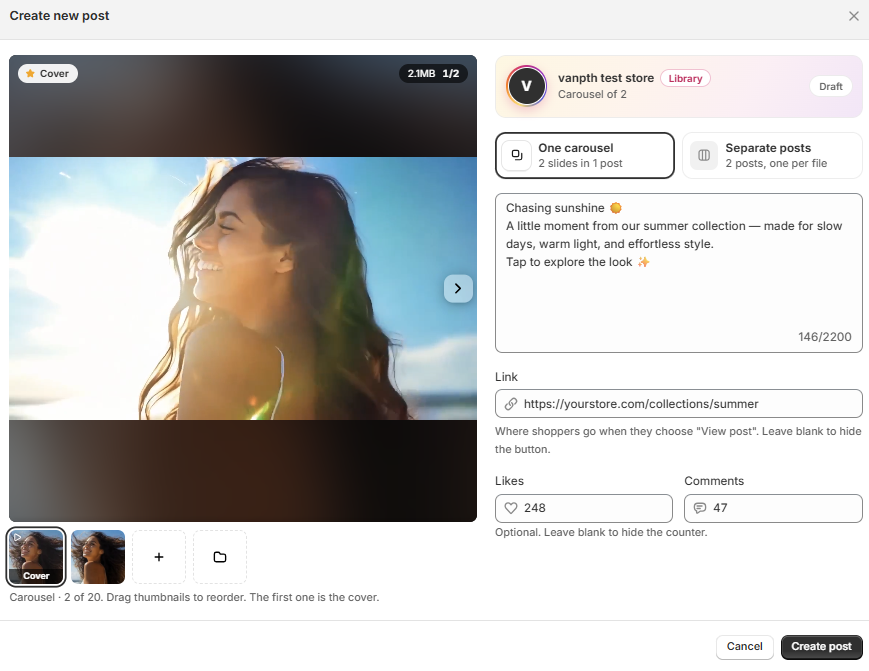
Tip: For a carousel, drag the thumbnails below the preview to change the order. The first file is the cover.
Step 5: Add your posts to a feed
You can add posts to a feed from Media library or from the feed editor.
Option 1: From Media library
#1. In Media library, click Select, then tick the posts you want to add. #2. Click + Add to feed.
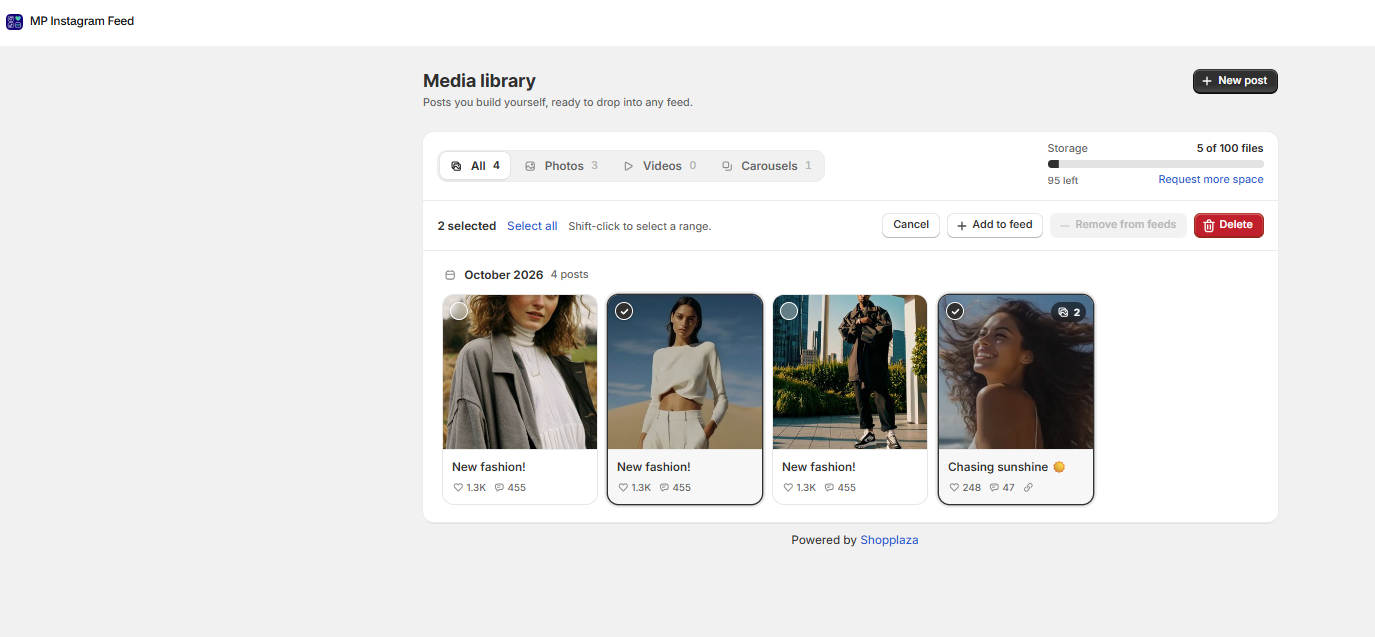
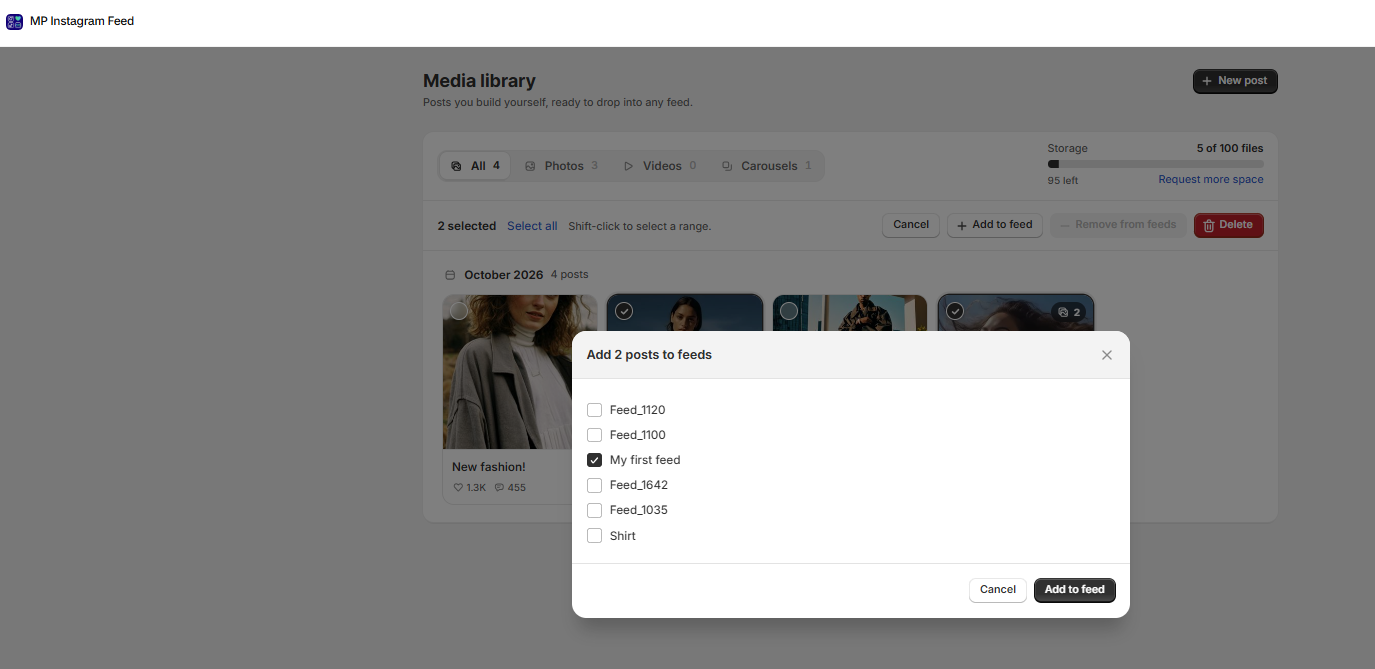
#3. Tick the feeds you want to add the posts to, then click Add to feed.
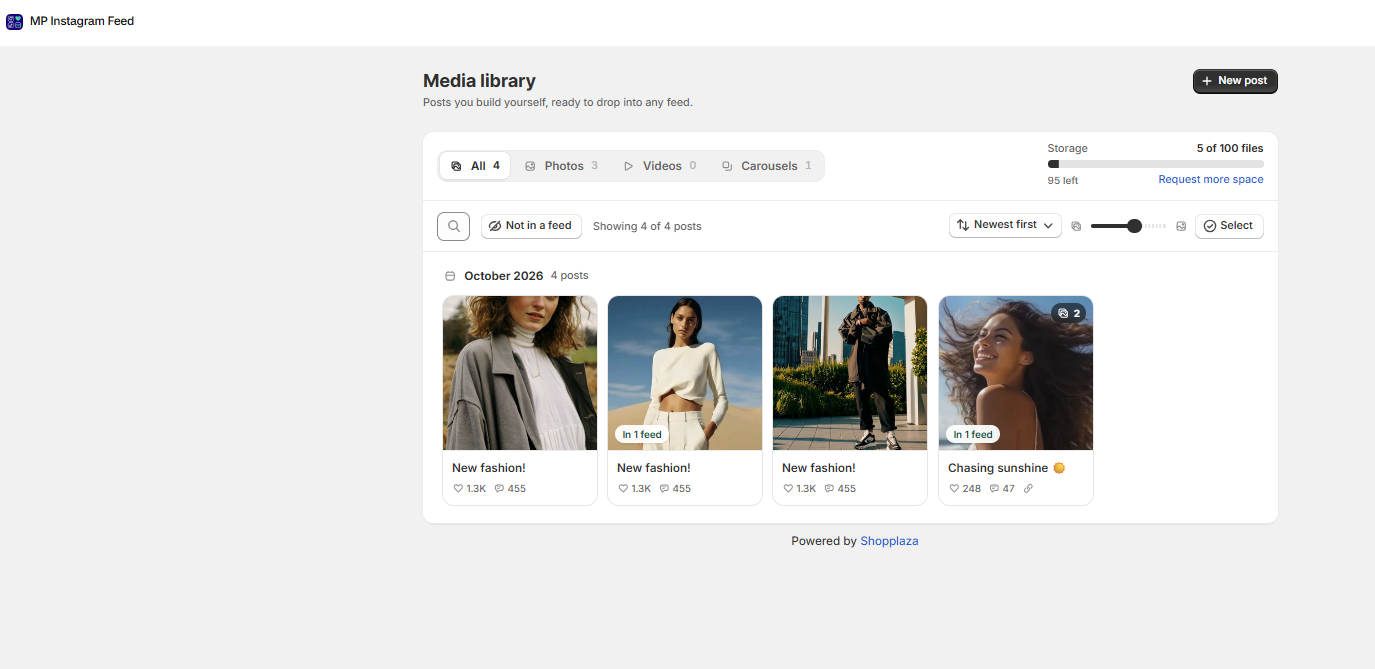
Posts that are in a feed show a badge, such as In 1 feed.
Option 2: From the feed editor
#1. Create a new feed or edit an existing one. #2. On the Manage media step, find Your own posts under Content sources and click + Add from library.
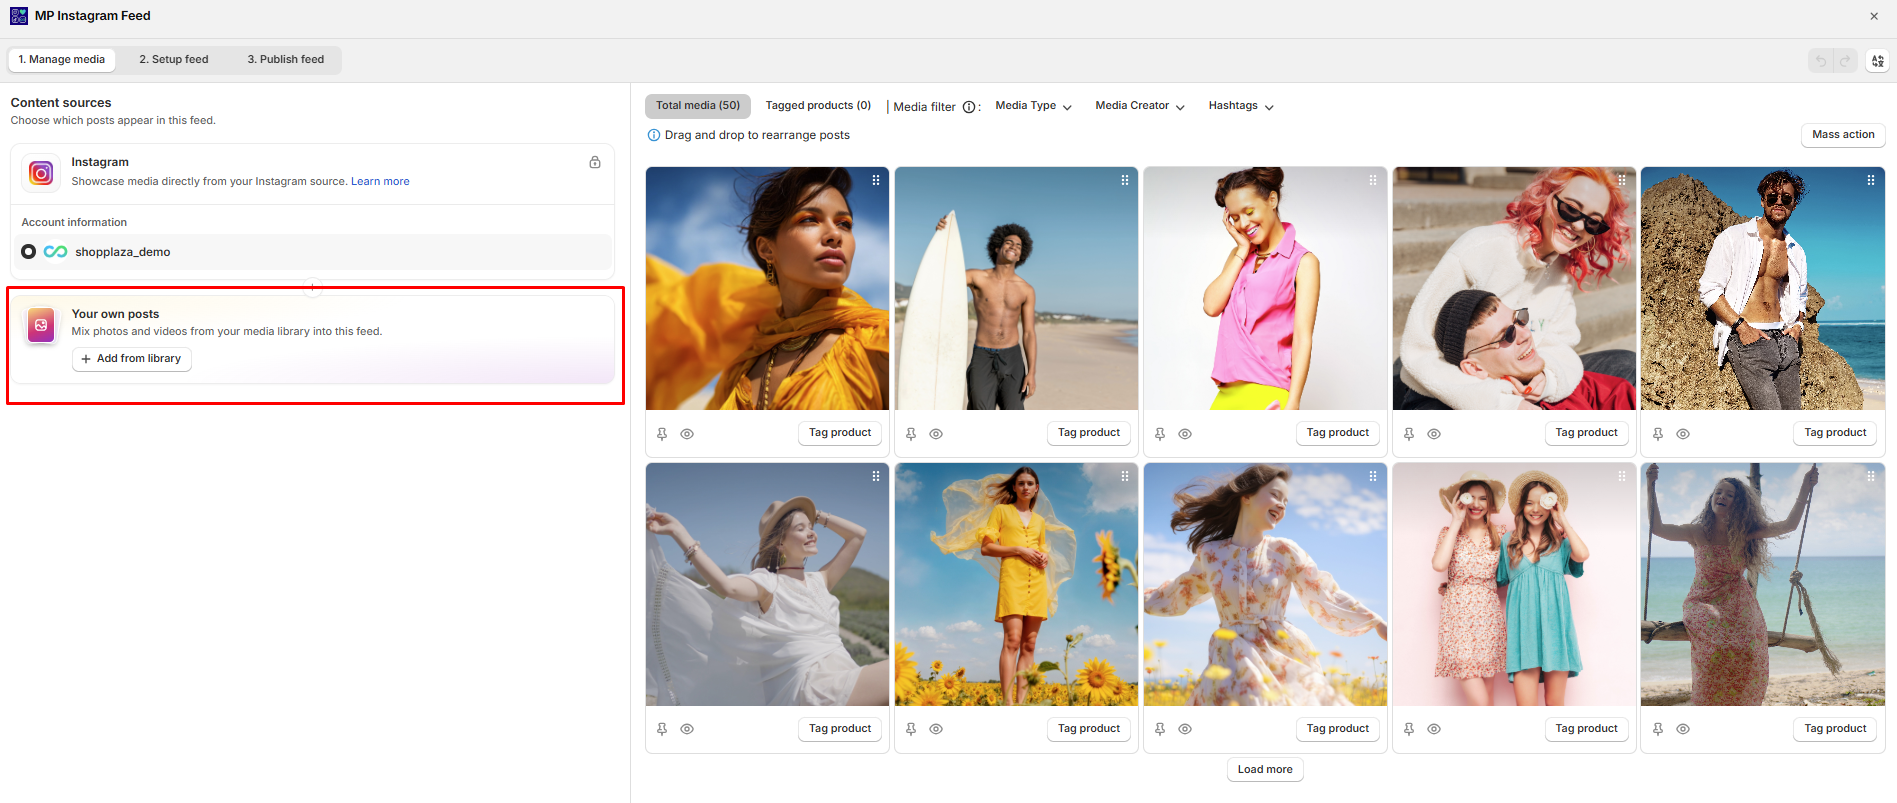
#3. Select the posts you want, then click Add [number] to feed. You can also click + New post here to create a new post without leaving the editor.
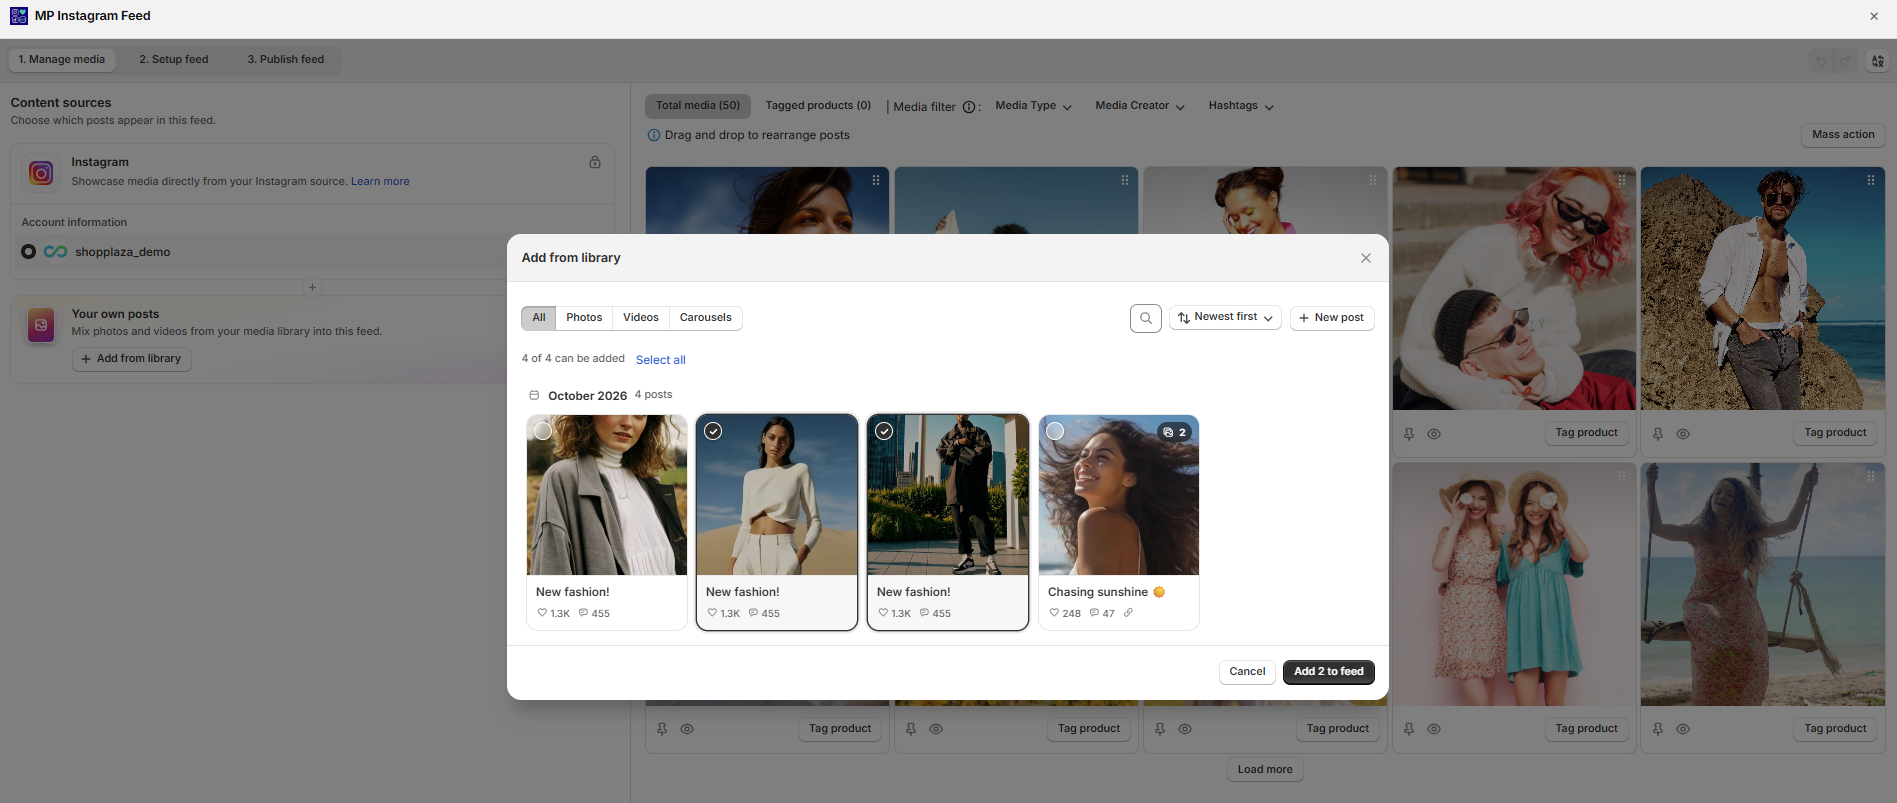
#4. The posts are added to your feed right away, with a Library badge so you can tell them apart from your social posts. Click Save in the Unsaved changes bar at the top.
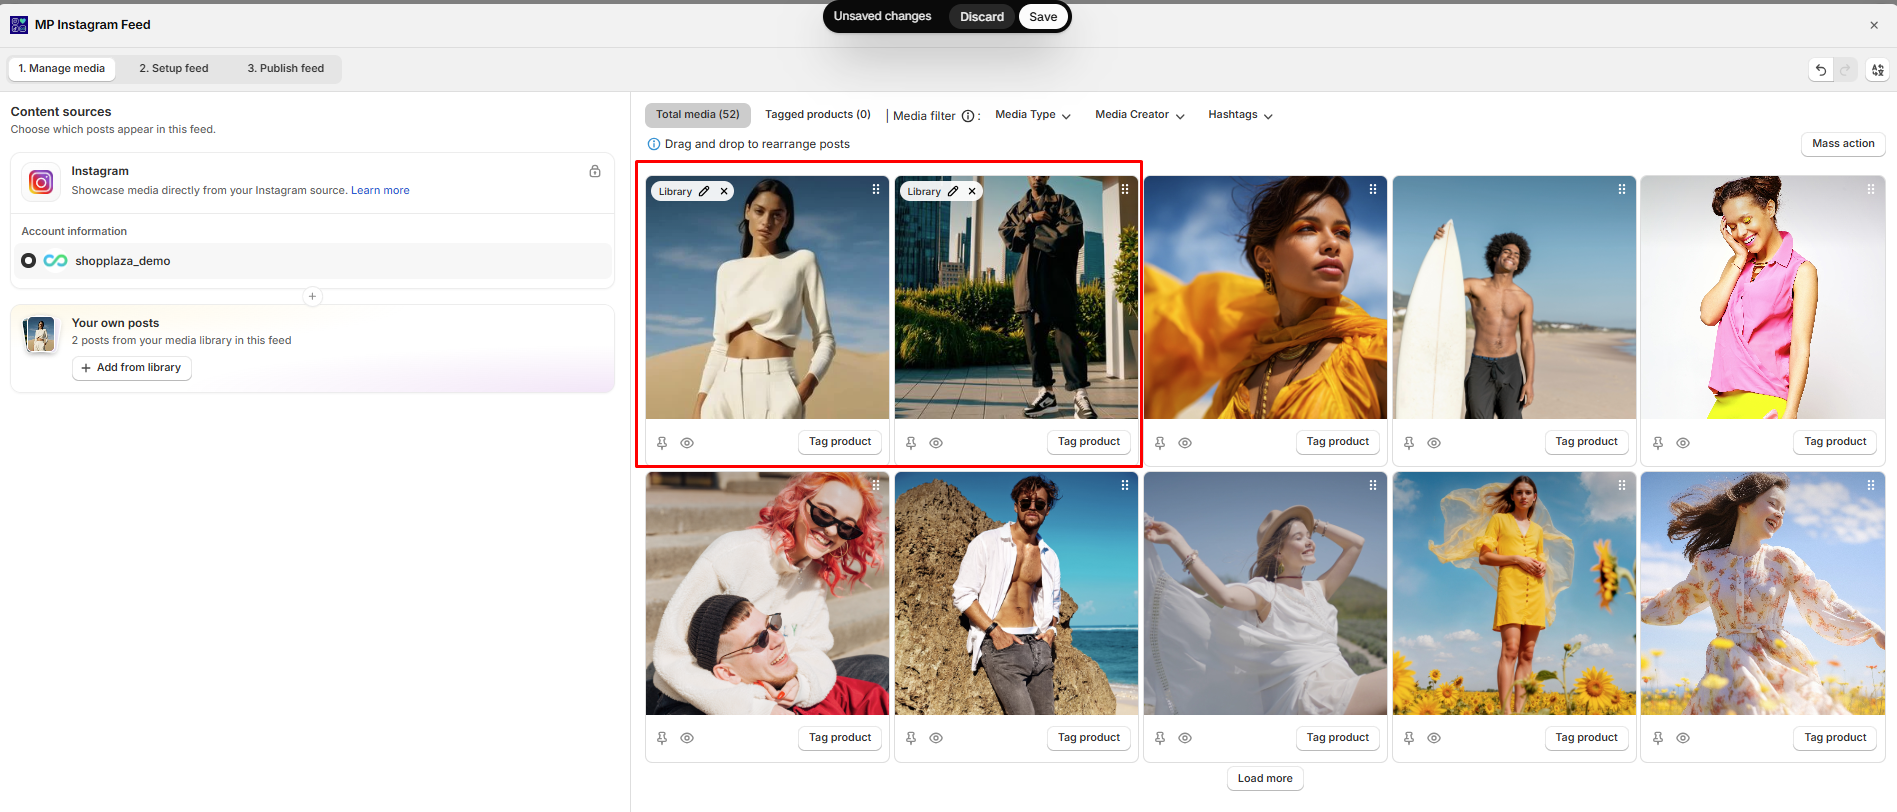
On each library post in the feed, click the pencil icon to edit the post, or the × icon to remove it from this feed. Like other posts, you can drag and drop it to change its position, or tag products on it.
Manage your Media library
- Filter posts: Use the All, Photos, Videos, and Carousels tabs, or click Not in a feed to find posts you haven’t used yet.
- Remove from feeds or delete: Click Select, tick the posts, then click Remove from feeds or Delete.
- Storage: The Storage bar shows how many files you have used (e.g., 5 of 100 files).
Need more space? Click Request more space to open a chat with our support team, and we’ll increase your Media library limit.
Wrap up
With Media library, you can add your own photos and videos to any feed, alongside your Instagram and TikTok posts. Create a post, add a caption, link, and counters, then add it to your feeds from Media library or the feed editor. To learn more about building a feed, see how to create and show your Instagram/TikTok feed.