How to use auto-fill keys
How to use auto-fill keys
What are auto-fill keys?
Auto-fill keys allow you to save and reuse customer measurement data across different size charts. They help streamline the sizing process and create a smoother shopping experience, especially for returning customers.
Customers won’t see the keys — they work in the background to connect measurement fields between charts.
What auto-fill keys do
- Save measurements: Store values entered by customers (e.g., chest, waist, bust).
- Reuse across charts: If the same measurement appears in another size chart, the saved value is auto-filled.
- Suggest sizes: Use saved data to recommend sizes for future orders, helping reduce fit-related returns.
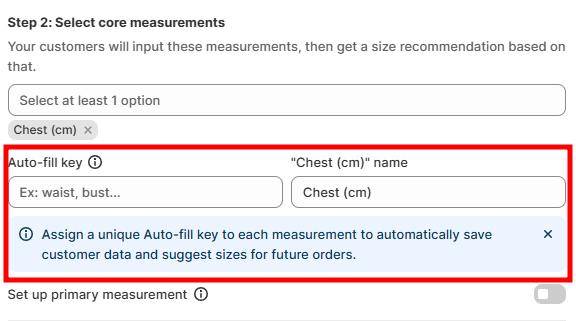
How to set up auto-fill keys
- Go to the measurement field in your size chart.
- Enter a unique Auto-fill key (e.g., chest_cm, waist_inch, bust_cm).
- Keep the name consistent across all size charts. Example: If you name a key “Chest (cm)” in one chart, use the exact same name in other charts where you want that data reused.
- Save your changes.
Important notes
- Uniqueness matters: Each measurement type must have its own distinct key.
- Consistency is crucial: Do not rename keys once created — this may break the connection and cause data loss.
- Invisible to customers: Auto-fill keys are backend logic only. Shoppers will only see the measurement field, not the key.
Example
Chart A (T-Shirt):
- Auto-fill key = chest_cm
- Customer enters: 100 cm
Chart B (Jacket):
- Auto-fill key = chest_cm
- System automatically fills in 100 cm from the previous entry.
Result → The customer doesn’t need to re-enter their chest size when shopping for another product, making checkout faster and sizing more reliable.
Tip: Plan your auto-fill key names carefully (e.g., chest_cm, waist_cm, hip_inch) before creating multiple charts. This ensures seamless data reuse and avoids potential errors.