For Merchants (Shopify Admin & Embedded App)
IMPORTANT: This app is available only on Shopify Plus stores with Customer Accounts enabled (Legacy not supported). Please make sure to review this before installing.
This section covers everything the merchant (you) does: enabling the app, controlling approval rules, managing email templates, and approving/declining companies.
2.1. Merchant overview
As a merchant, you mainly work in two places:
- Embedded app (SP B2B Company Accounts)
- Dashboard (status, overview, quick help, app info)
- Settings (App control + email templates)
- High-level overview of B2B activity
- Native Shopify Admin
- Customers → Companies: Approve/decline company registrations
- Orders: View orders as usual, with extra B2B context and a quick link back to the company dashboard
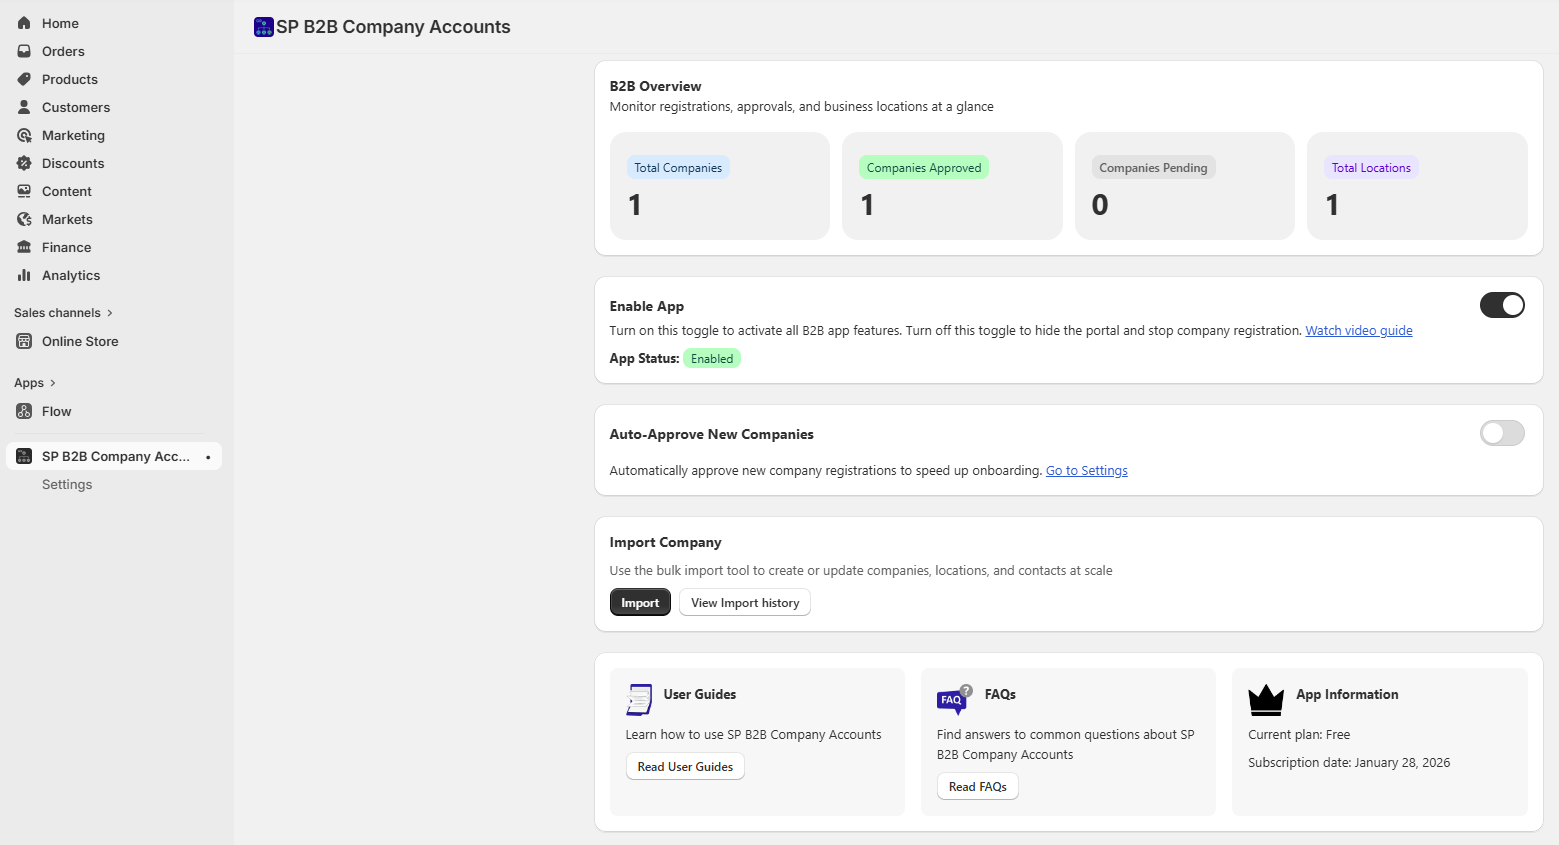
2.2. Dashboard (embedded app)
When you open the app, you land on the Dashboard.
The dashboard includes:
- B2B Overview cards
- Total Companies: Count of all companies (Approved, Not approved, Rejected)
- Companies Approved: Count of companies with status
Approved - Companies Pending: Count of companies with status
Not approved - Total Locations: Sum of locations assigned across all companies
-
Enable App card: Controls whether the B2B portal is active or not on your storefront. To help customers access the portal on your storefront, you need to activate the app in Theme Editor. Watch this video for the detailed guide.
-
Auto-Approve card: Controls whether new company registrations are auto-approved or manually reviewed.
Note: For better control and security, we recommend keeping this OFF so you can review each B2B company before granting access to the portal.
-
Import Company card: Bulk import companies, locations, and contacts using a sample file.
-
Quick Help (User Guide + FAQs)
- App Info
2.3. Settings (General + Email Templates)
Open Settings from the app’s navigation.
The Settings page has two tabs:
- General Settings
- Email Templates
Use this area when you want to update how the app works behind the scenes.
2.3.1. General settings
Here you control the main behaviors of your B2B portal.
Enable App
Same toggle as on the Dashboard.
Turning it off hides the entire portal from your storefront.
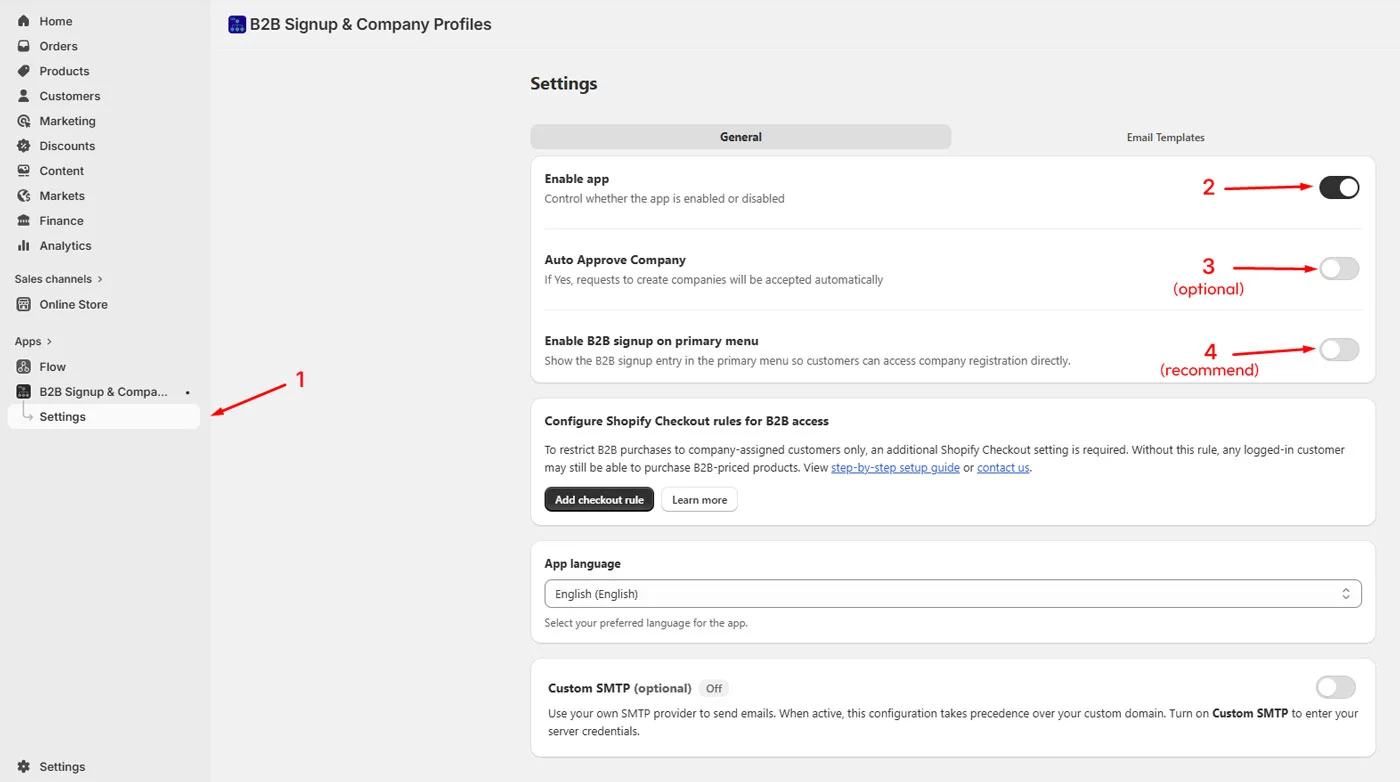
Auto-Approve New Companies
If you prefer fast onboarding, turn this on.
If you prefer to vet every B2B request, keep it off.
Any change here will show Shopify’s Save Bar. Click Save when ready.
Enable B2B Signup on Primary Menu
Show a “B2B signup” link in your store’s primary menu so customers can access the company registration form.
- Turn on: Display the signup link in the menu.
- Turn off: Hide the signup link.
Notes:
- This only controls the menu entry.
- Requires “B2B signup modal” to be enabled in the theme editor.
- If the modal is disabled, the link will not open the signup form.”
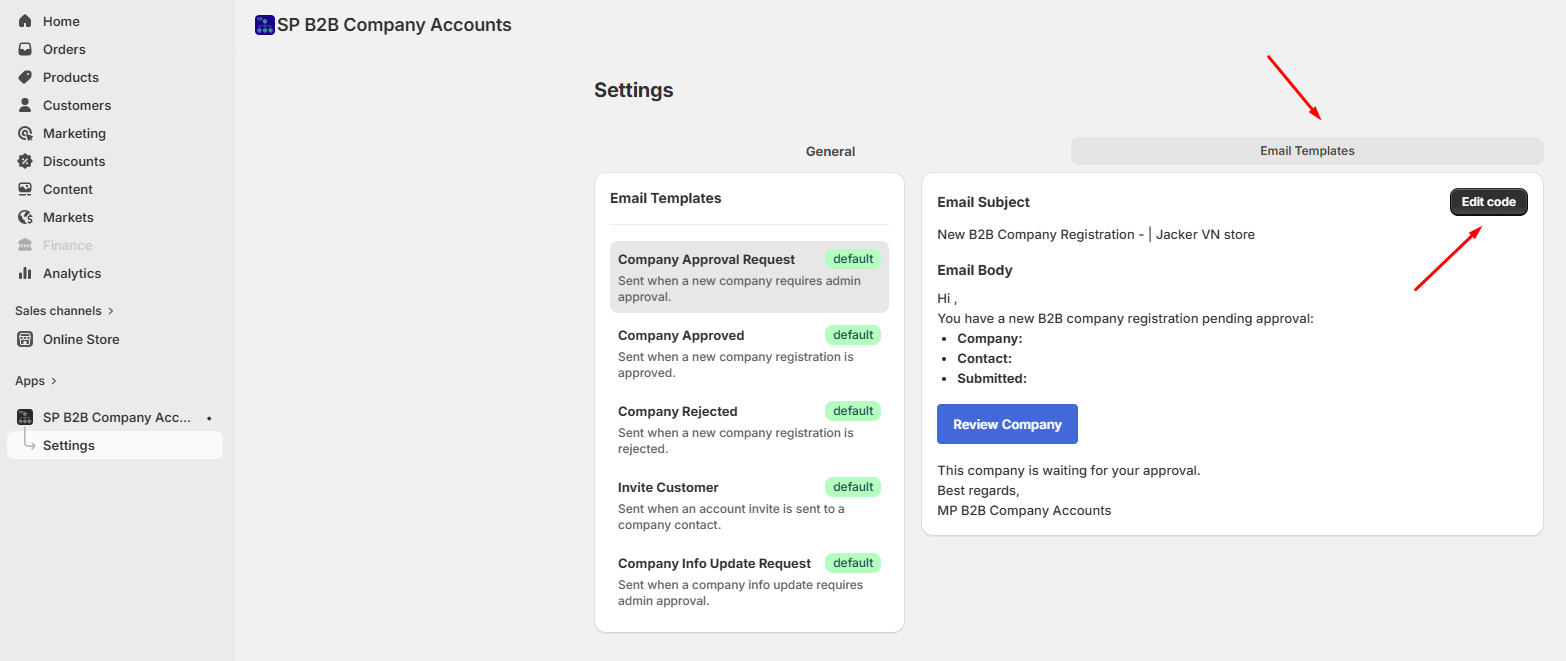
2.3.2. Email templates
This section lets you edit the emails sent during the B2B flow, such as:
- When a new company requests approval
- When a company is approved
- When a company is rejected
- When a customer is invited
- When a customer requests company info changes
How to edit a template:
- Select a template from the sidebar.
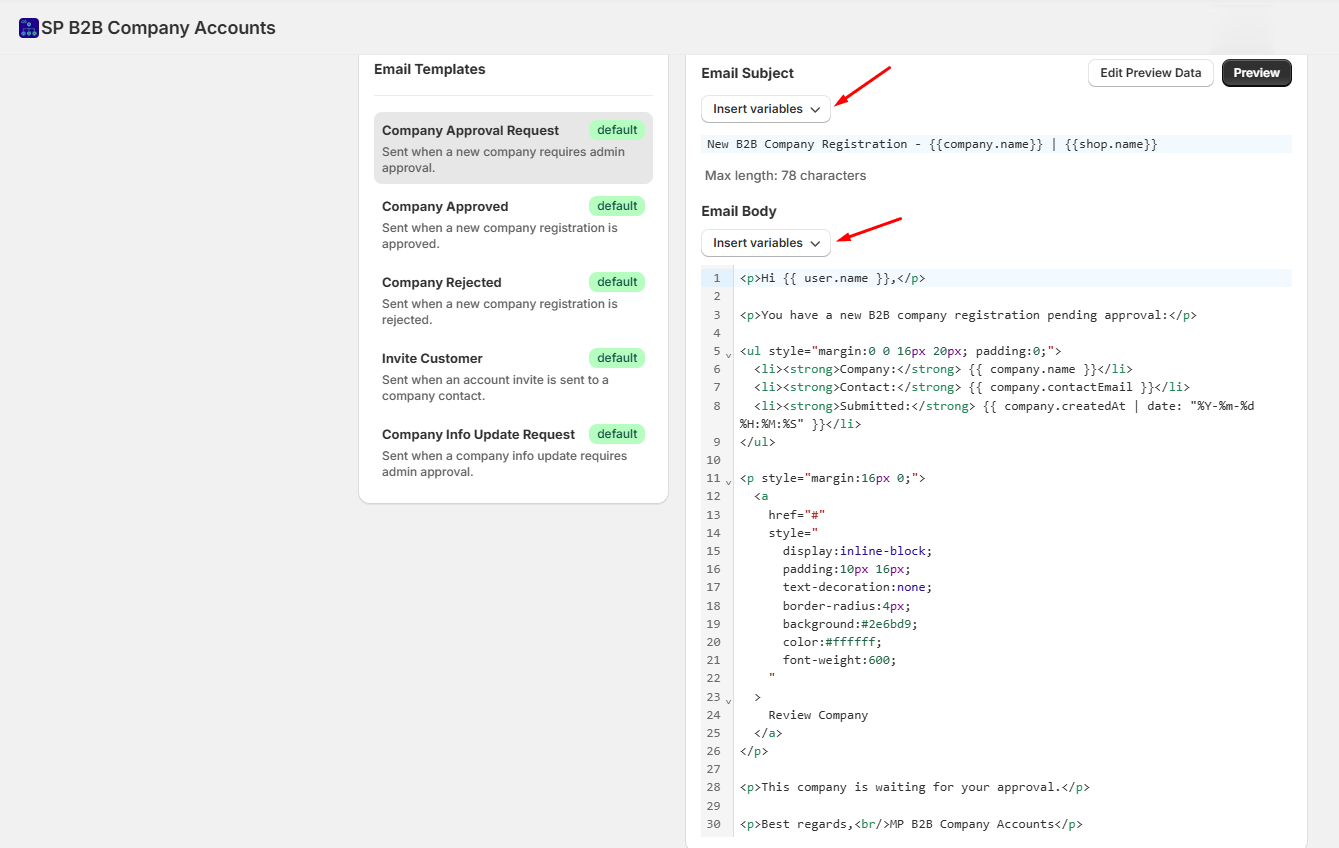
- Click Edit code if you want to adjust the wording.
- Update the subject or body.
- Click Preview to see how it looks.
- Use Save to confirm your changes.
You can also:
- Insert Liquid variables (like company_name, email, etc.)
- Update preview data so your preview reflects real examples
If something goes wrong while saving, Shopify will show an error so you don’t lose your edits.
2.4. Managing Company Approvals (Shopify Admin)
When a B2B customer submits a company request (and auto-approve is OFF), you’ll review it in Shopify Admin.
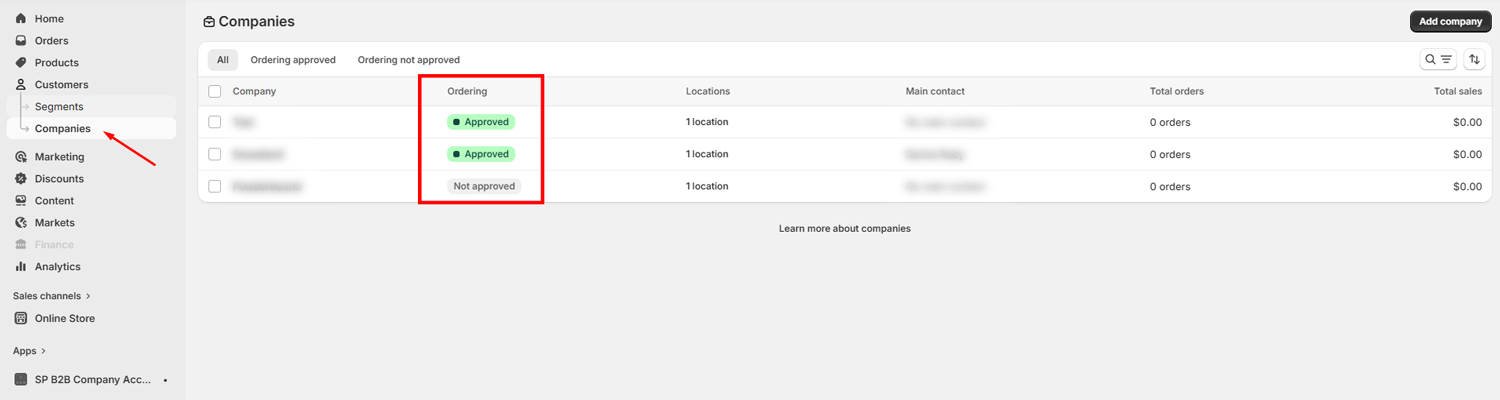
Where to find company requests:
Go to: Shopify Admin → Customers → Companies
Here you’ll see companies with the status Not approved.
2.4.1. Approving a company
- Open the company you want to approve.
- Click More actions → Approve.
- Review the main contact email used to register this company.
- Click Accept.
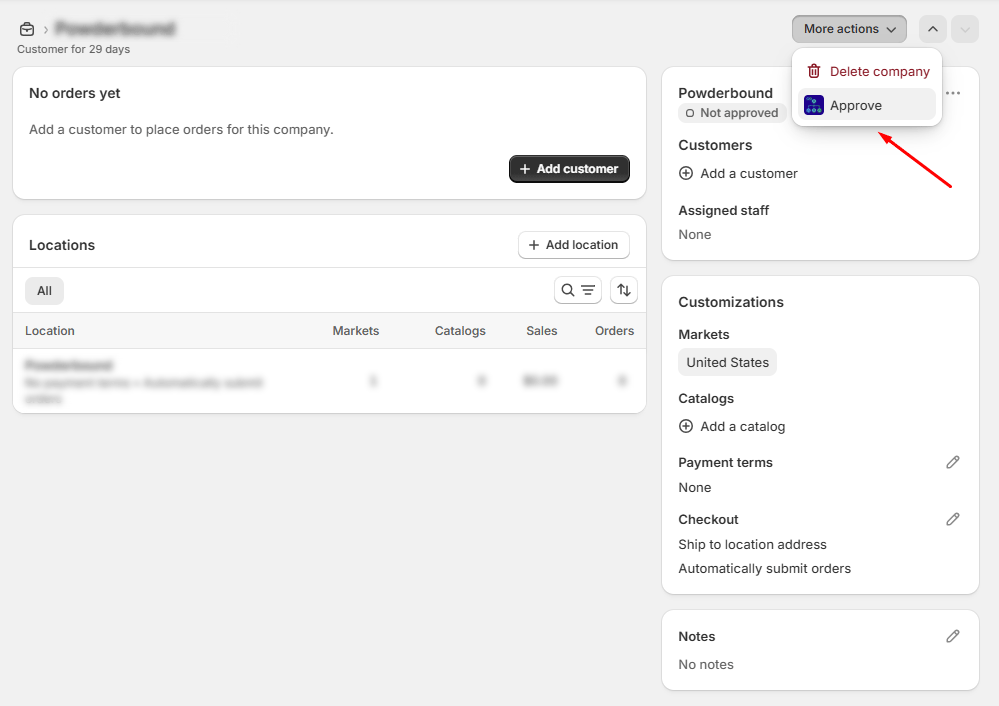
What happens next:
- The company becomes Approved.
- The customer is linked to the company automatically.
- An approval email is sent to the customer.
- The customer can now enter the B2B portal.
2.4.2. Declining a company
If something looks off:
- In the same approval modal, click Decline.
- Add a decline reason (optional but recommended).
- Confirm the action.
After declining:
- A note is added to the company record with the timestamp and reason.
- A rejection email is sent to the customer.
Customers cannot resubmit the same company through the form. They will need to contact you for next steps.
2.4.3. If emails fail to send
Sometimes your email provider or Shopify’s email service may fail temporarily.
If that happens:
- The approval/rejection will still save
- You’ll see a message like: “Email failed to send. Please try again later.”
- You may need to resend communication manually
2.5. Checkout Rules
Shopify doesn’t block checkout by company assignment automatically, so you need to set up a checkout rule.
- Go to Shopify Admin
- Navigate to Settings → Checkout
- Scroll to the Checkout rules section
- Create a rule that blocks checkout when:
- The customer is logged in
- The customer is not assigned to a company
- Save and enable the rule
Result: Only company-assigned customers can check out, and the warning banner will disappear.