How to Manage Quotes (Merchant side)
Open quote management
Go to: Apps → SP Request a Quote (RFQ) → Manage Quotation
You will see a list of all quotes with:
- Quote ID (RFQ-xxxxx)
- Customer info
- Created time
- Status
- Expired time
- Quote value
- Actions
Quote statuses explained
| Status | Meaning |
|---|---|
| Draft | Created by merchant (you), not yet sent |
| Requested by customer | Buyer submitted a request, waiting for merchant to send |
| Sent | Merchant sent quote to buyer |
| Under Negotiation | Messages exchanged; price discussion ongoing |
| Accepted | Buyer accepted quote → Draft Order auto-created |
| Declined | Buyer declined |
| Expired | Buyer didn’t respond before expiry date |
Search, filter, sort
- Search by customer name or email.
- Filter by Status, Customer, Created date.
- Sort by Requested time or Total value.
Create a quote (in-app)
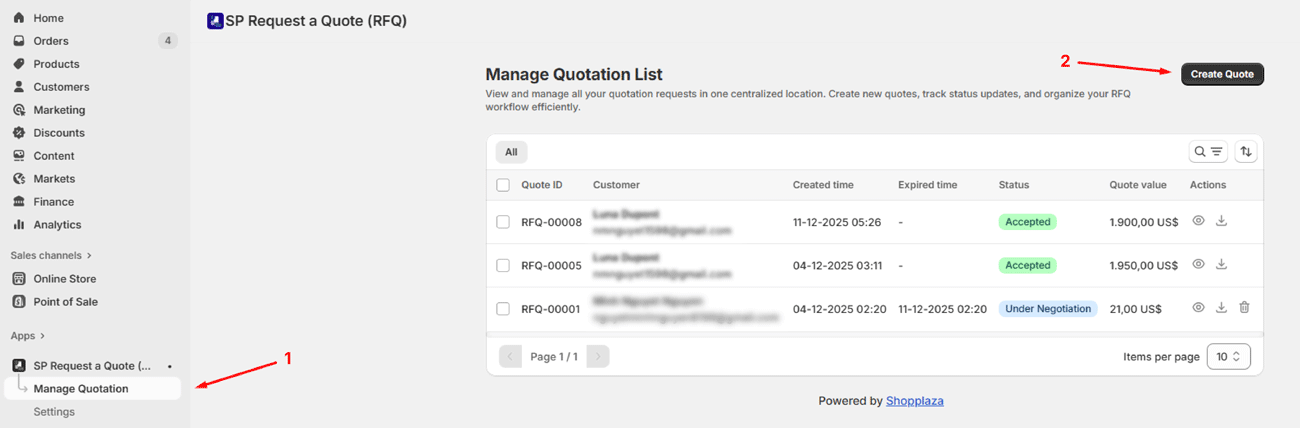
1/ Click Create Quote.
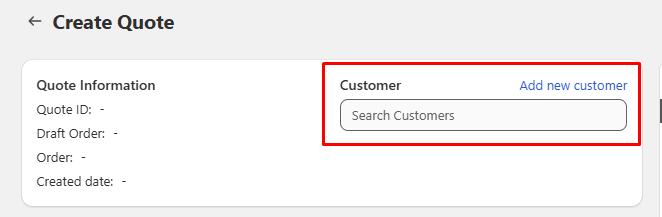
2/ In Customer, select customer from the list or Add new customer.
3/ In Quote Items:
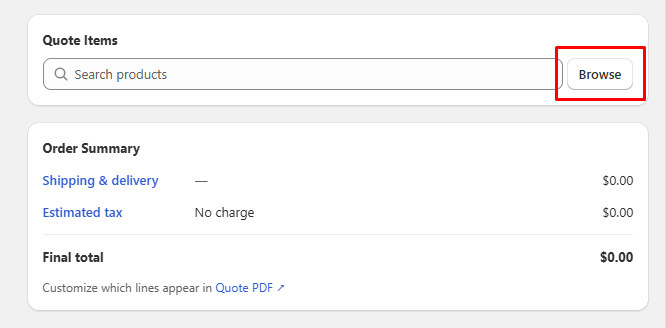
- Click Browse to pick products/variants. Out-of-stock variants are disabled for selection.
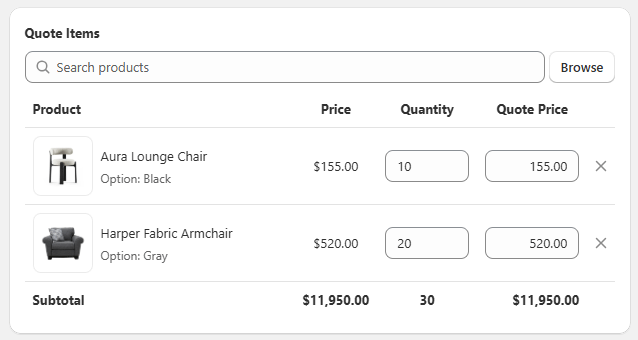
- Set Quantity and Quote Price per line. If a Minimum quote value is configured, the app auto-adjusts too-low entries.
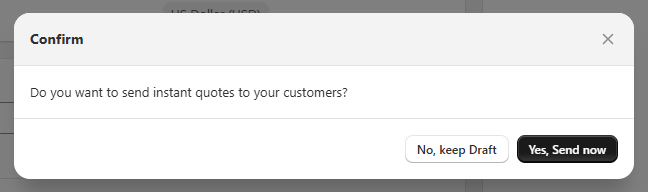
4/ Click Save.
- Choose Yes, Send now to send immediately (status becomes Sent), or
- No, keep Draft to keep working (status stays Draft).
Notes
-
Quote time displays in your store’s timezone in admin. Buyers see their local timezone on storefront emails and modals.
-
If the customer’s currency differs from your store’s display currency, the app shows a help message and converts prices for the quote using the store’s market settings.
Edit a quote
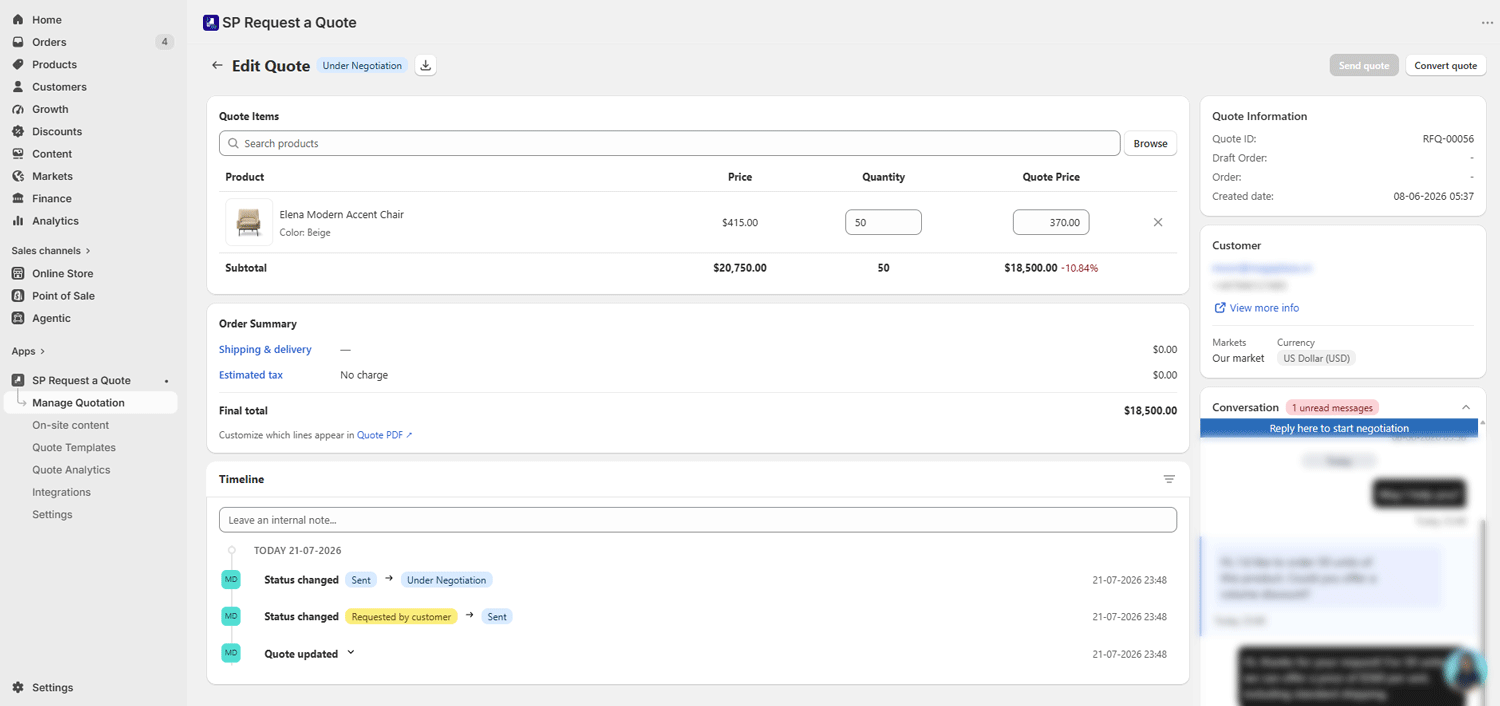
- In the grid, click a row or the View icon to open quote details.
- You can edit items and prices when the quote is in:
- Draft
- Requested by customer
- Under Negotiation
For quotes in Under Negotiation, the Send quote button is disabled until you make a change.
After editing quote items or prices, click Send quote to send the updated quote to the buyer.
Quote editing restrictions
You cannot edit quotes in Sent, Accepted, Declined, Expired.
You can Duplicate from Declined/Expired/Accepted to start a new Draft.
Add shipping, estimated tax & final total
The Order Summary card lets you review the full quote amount before sending it to the buyer.
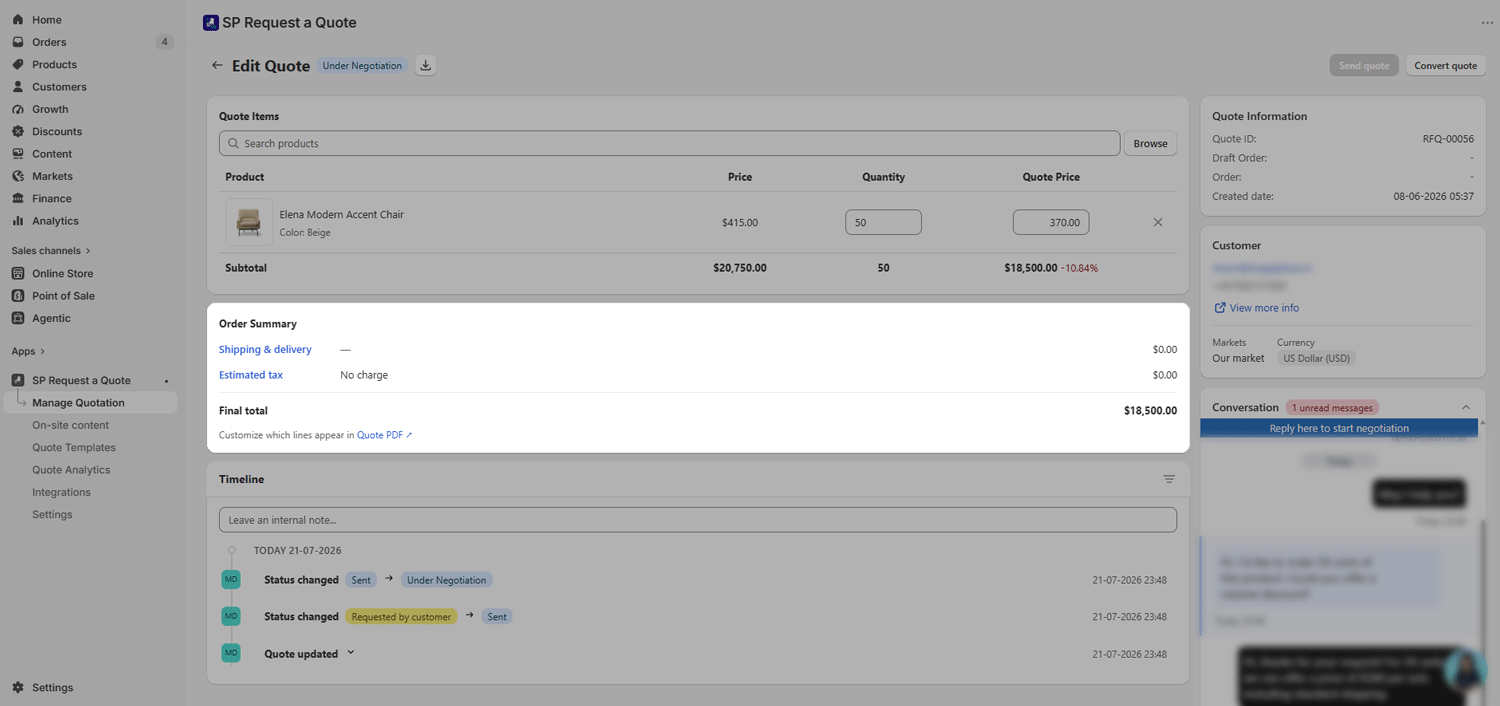
Shipping & delivery
Shipping & delivery can be loaded automatically when the quote has:
- At least 1 quote item
- A shipping address
If shipping options are available, click Shipping & delivery to select the shipping method you want to apply.
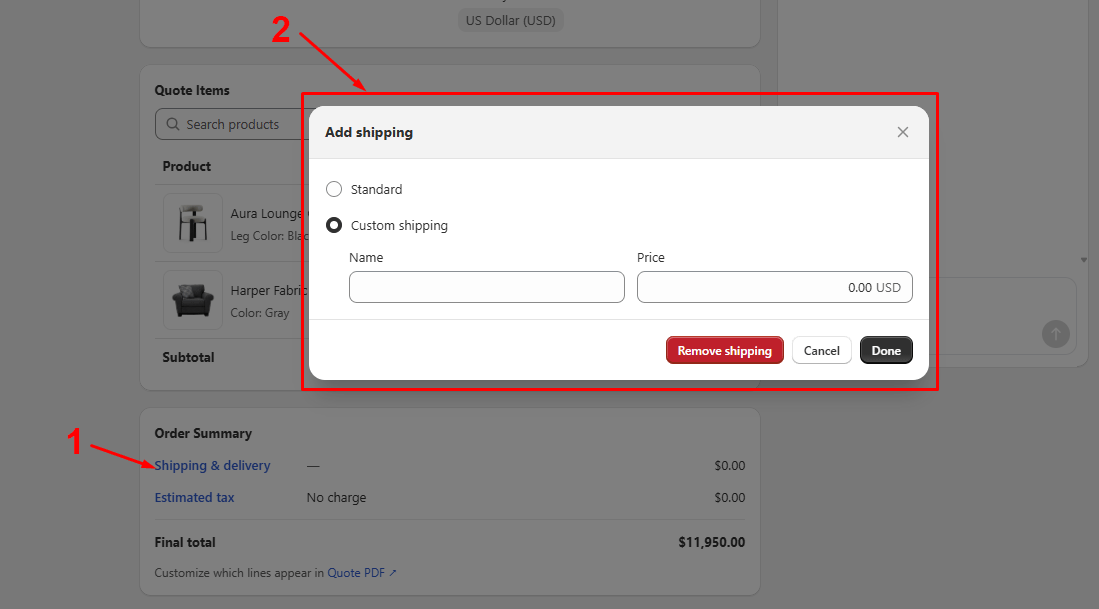
Estimated tax
Estimated tax is calculated based on the buyer’s shipping address and your current Shopify tax settings.
If the quote does not have enough address information, the app may not be able to calculate tax automatically.
1/ Click Estimated tax to review or update tax for the quote.
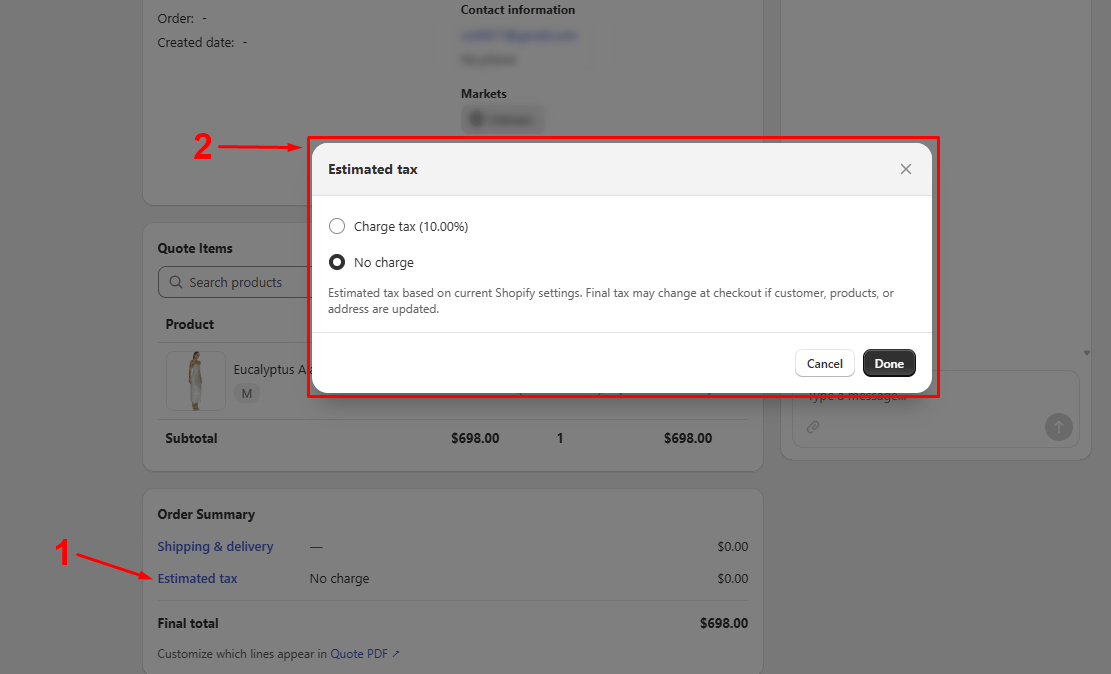
2/ You can choose:
- Charge tax: Apply the estimated tax rate based on your current Shopify tax settings.
- No charge: Do not add tax to this quote.
3/ Click Done to apply the selected option.
Note: If tax appears as a note instead of a number, your store may have Include sales tax in product price enabled in Shopify Settings → Taxes and duties.
Final total
The Final total is calculated automatically:
Final total = Subtotal + Shipping + Estimated tax
The Final total is read-only and updates based on the quote subtotal, selected shipping fee, and estimated tax.
Use Quote Timeline
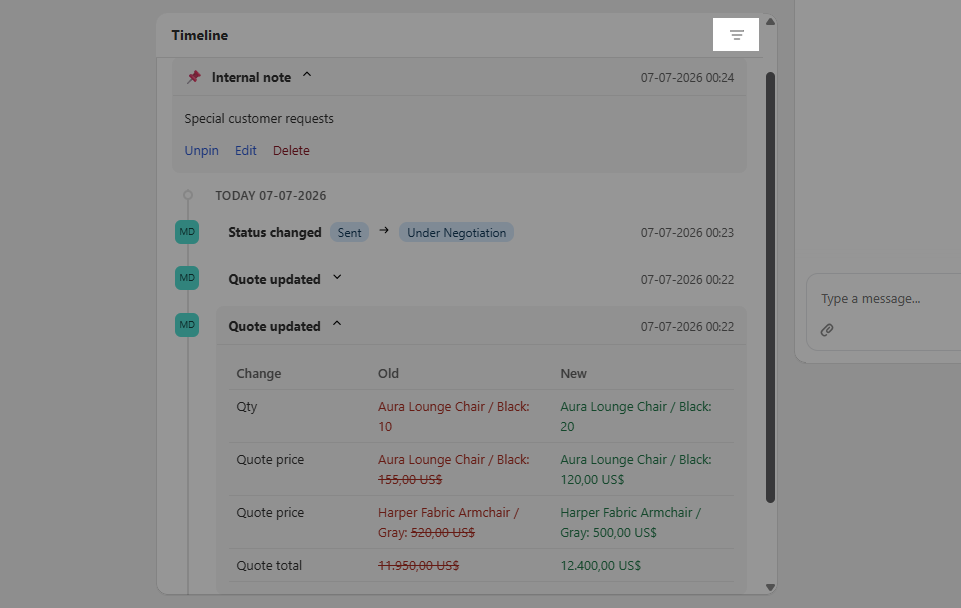
The Quote Timeline helps you track quote activity and internal notes directly from the Create/Edit Quote screen.
You can find the Timeline card below the Quote Items card.
Add internal notes
Use the Leave an internal note… field to add notes for your team.
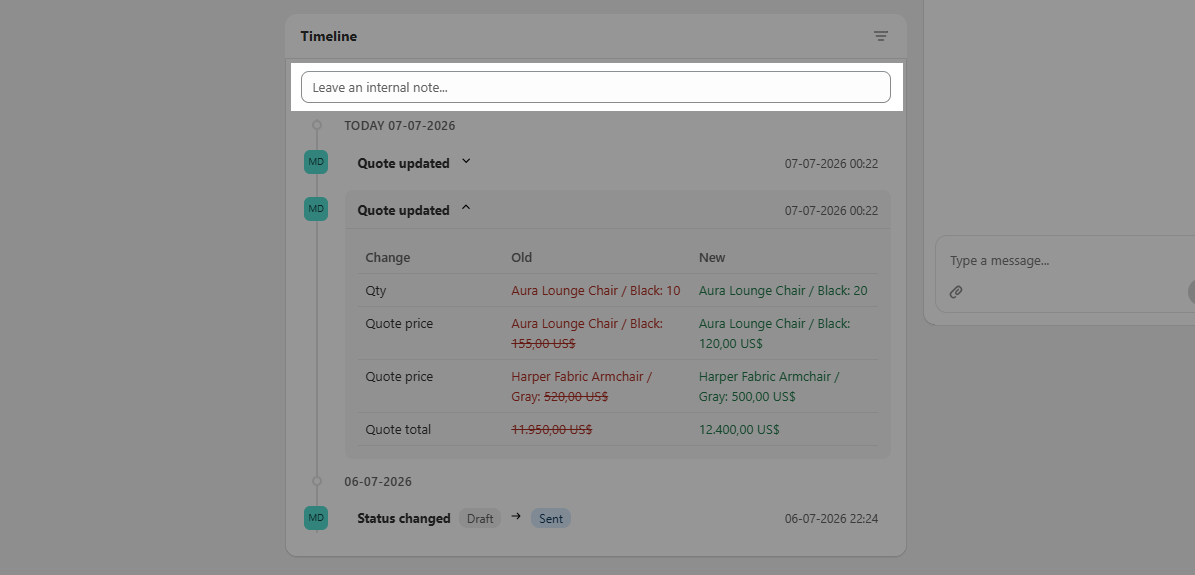
Internal notes are only visible inside the app. They are not shown to buyers in the storefront, emails, or PDF files.
You can use internal notes to record:
- Special customer requests
- Internal pricing discussions
- Follow-up reminders
- Approval notes
- Reasons for changing quote details or status
Click Post to save the note.
Pin important notes
Click Pin to pin an important internal note to the top of the Timeline.
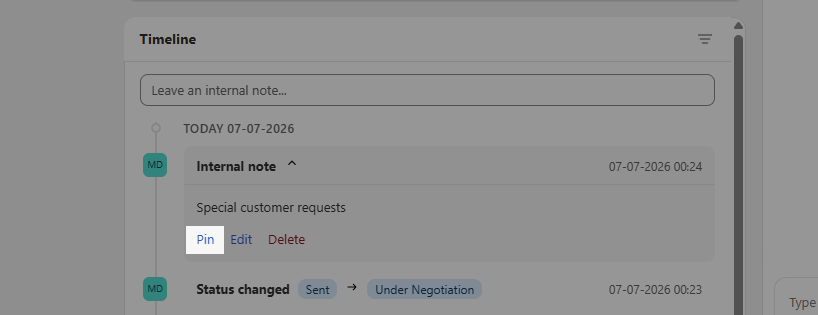
- Pinned notes are useful for information your team needs to see quickly when reviewing or editing a quote.
- You can pin up to 3 notes.
- Pinned notes are only visible inside the app.
View system logs
The Timeline also records system logs automatically when quote activity changes.
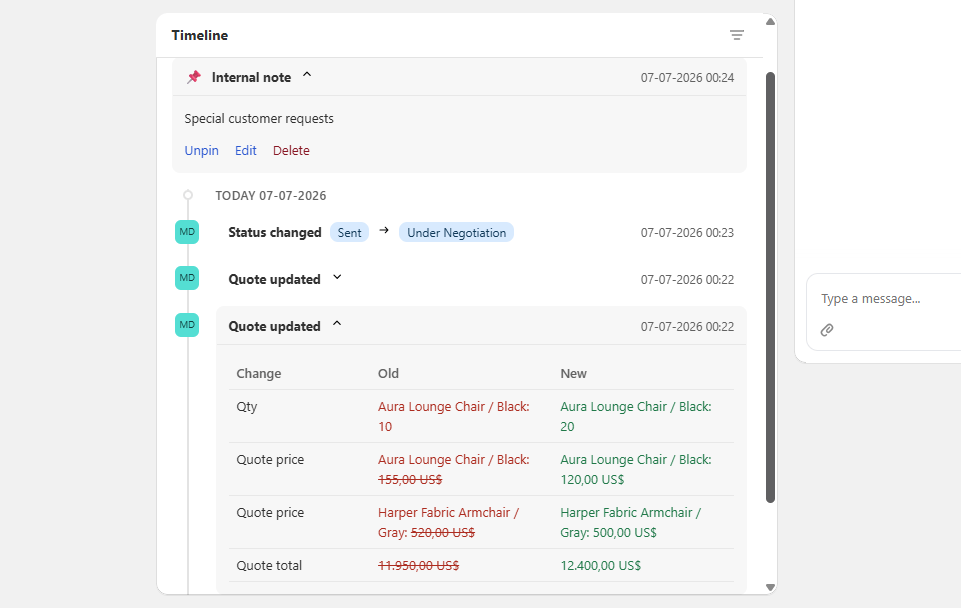
System logs may be created when:
- Quote details are updated
- Quote items are changed
- Quote status changes
System logs help your team understand what changed and when it happened.
Filter timeline entries
Use the Timeline filters to view specific entry types:
- All: Shows both internal notes and system logs
- Notes: Shows only internal notes
- System: Shows only system logs
Filtering happens on the current screen and does not reload the page.
Load more timeline entries
- By default, the Timeline shows the 5 newest entries.
- Click Show more to load 10 more entries.
Convert quote
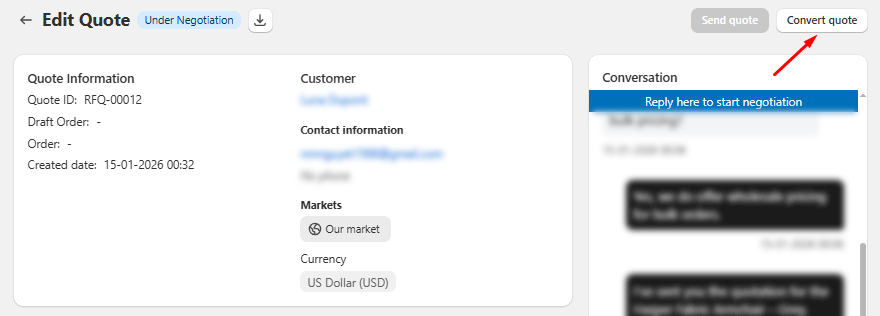
- Click Convert quote (available for Draft, Requested by Customer, and Under Negotiation)
- Confirm the action (required when selecting multiple quotes)
- The system will:
- Change status to Accepted
- Create a Shopify Draft Order
- Send an acceptance email to the customer
Notes: If Margin Protection is enabled, this action may be disabled until approval is granted.
What happens when a quote is accepted
When a quote is accepted, the app creates a Shopify Draft Order with the final quote details.
The Draft Order includes:
- Final items
- Quantities
- Negotiated prices
- Shipping fee
- Estimated tax, when available
The buyer receives a checkout link by email and in the conversation thread.
From the quote page in the app, you can open the Draft Order in Shopify Admin.
If Shopify’s API returns an error, the quote stays Accepted, and you will see the error message. Try again after fixing permissions or quote data.
Export quote
- Open a quote with status Sent, Under Negotiation, or Accepted
- Click the download icon in the top bar to save the quote as a PDF
- The PDF shows customer details, quote ID, products, quantities, pricing, and total amount
Notes: You can download a PDF directly from the list using the download icon in the Actions column