On-site Content
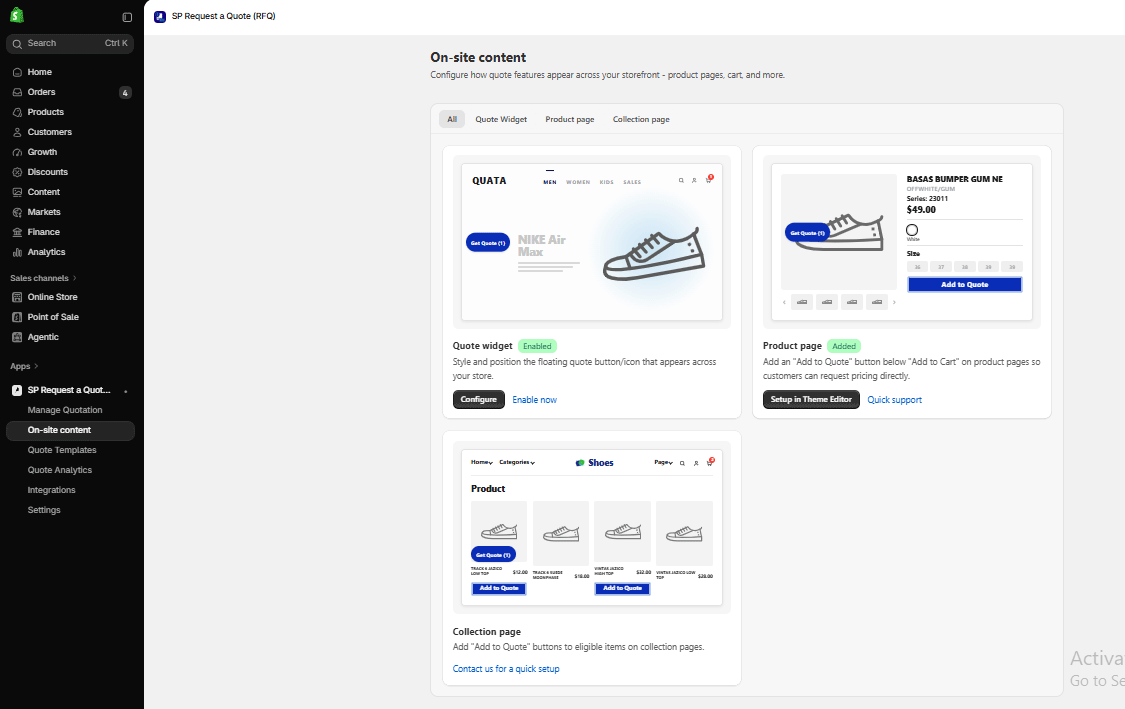
The On-site content screen lets you manage all quote request entry points across your Shopify storefront. You can configure floating quote widgets, add quote buttons to individual product pages, or enable bulk quote buttons directly on collection pages.
Overview
In your Shopify App Admin, navigate to On-site content( from the sidebar menu. You can use the top tabs (All, Quote Widget, Product page, Collection page) to quickly filter your configuration options:
- Quote Widget: Customize and position floating buttons or header icons across your site.
- Product Page: Enable “Add to Quote” buttons on individual product detail pages.
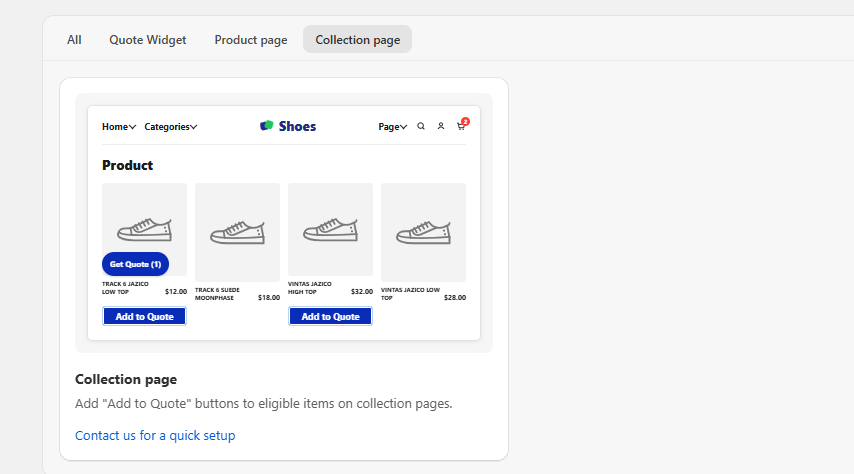
- Collection Page: Display “Add to Quote” buttons directly on product card grids in catalog views.
Quote Widget Setup
The Quote Widget provides quick, persistent access to the Quote Cart from anywhere on your store.
💡 Quick Tip:
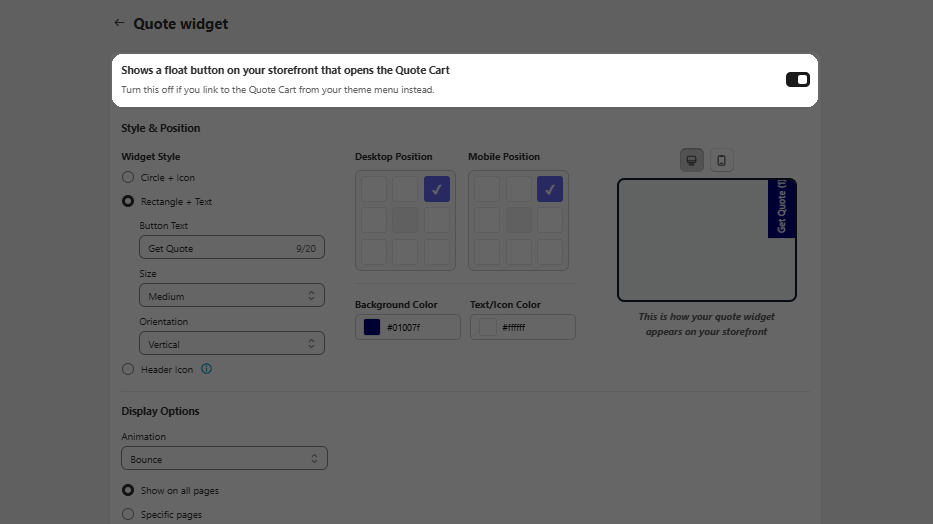
Use the master toggle switch in the top-right corner of the Quote Widget page to turn the floating widget on or off. Turn it off if you prefer to link to the Quote Cart solely via your main navigation menu.
Step 1: Choose Your Widget Style
Select one of three widget presentation styles to match your storefront layout:
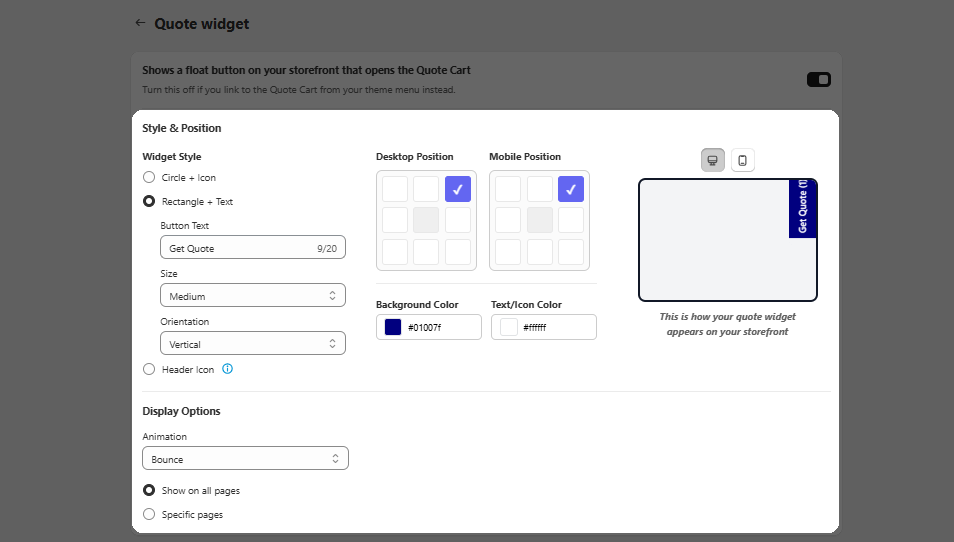
Circle + Icon or Rectangle + Text
These options create a stylish floating button that stays pinned as customers scroll through your store.
- Button Text: Enter your preferred label (up to 20 characters, e.g., Get Quote).
- Size: Choose between Small, Medium, or Large.
- Orientation: Select Horizontal or Vertical text alignment.
- Desktop & Mobile Position: Use the 3x3 interactive grid matrix to choose where the widget floats on screen (e.g., Bottom-Right, Top-Right, Center-Right). You can set different positions for desktop and mobile screens.
- Colors: Customize the Background Color (e.g., #01007f) and Text/Icon Color (e.g., #ffffff) to fit your store branding.
Header Icon
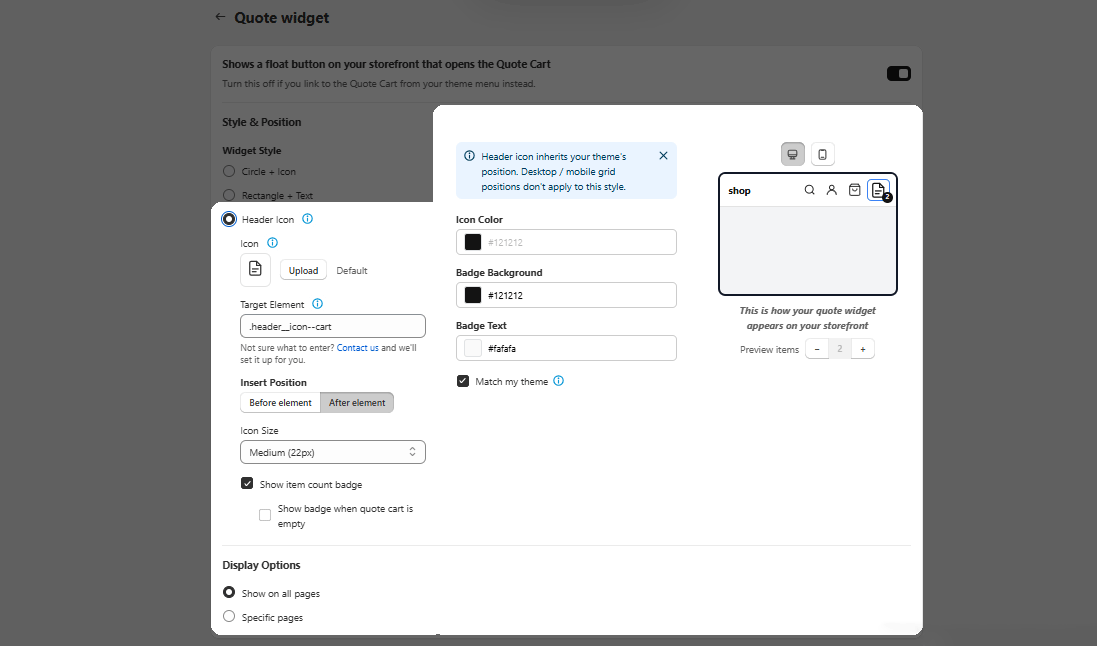
Integrate a quote cart icon directly into your store’s top header navigation alongside standard cart or search icons.
- Icon: Use the default icon or click Upload to upload a custom SVG or PNG file.
- Target Element: Enter the CSS selector of your reference header icon (e.g., ,.header__icon–cart). Click Contact us inside the settings card if you need support here.
- Insert Position: Choose whether to place the quote icon Before element or After element relative to the target.
- Icon Size: Select your rendering size (e.g., Medium (22px)).
- Item Count Badge Settings:
- Check Show item count badge to display the total number of items requested.
- Check Show badge when quote cart is empty if you want the badge visible at all times.
- Check Match my theme to automatically inherit header styling, or manually select your Badge Background and Badge Text colors.
Step 2: Configure Display & Animation Options
- Animation: Choose an eye-catching motion effect from the dropdown (e.g., Bounce or None).
- Page Visibility: Select Show on all pages to display the widget site-wide, or choose Specific pages to restrict its visibility.
Step 3: Configure Quote Cart Display & Behavior
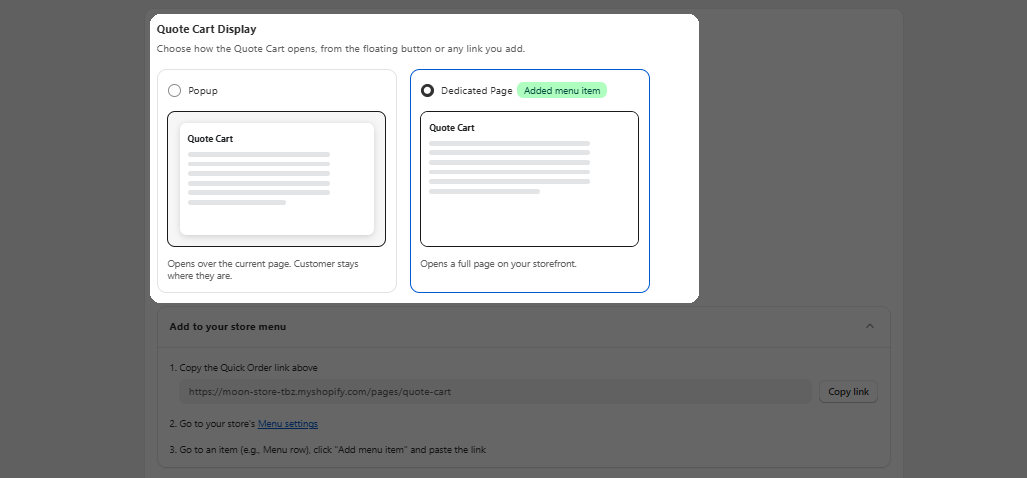
Quote Cart Display Layout
- Popup: Opens a sleek pop-up modal over the current page so customers never leave their browsing context.
- Dedicated Page: Directs customers to a full, standalone Quote Cart page on your storefront.
Adding the Dedicated Page to Your Navigation Menu
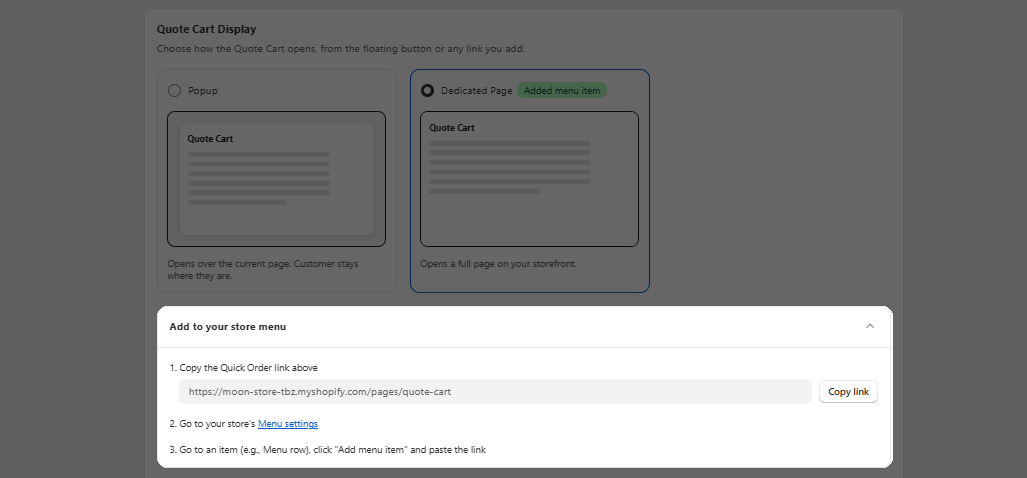
If you choose the Dedicated Page layout:
- Click Copy link next to your unique Quote Cart URL.
- Click Menu settings to jump straight to your Shopify Admin Navigation page.
- Select the menu you want to edit (e.g., Main Menu or Footer Menu).
- Click Add menu item, enter a name (e.g., Quote Cart), and paste the copied URL into the Link field.
- Click Save.
Quote Cart Behavior
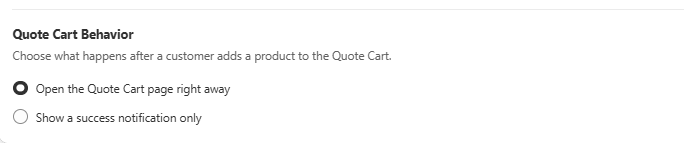
Control what happens immediately after a customer adds an item to their quote:
- Open the Quote Cart page right away: Automatically redirects the customer straight to the Quote Cart view.
- Show a success notification only: Keeps the customer on the current product page and displays a brief confirmation message.
Product Page Settings
Add an “Add to Quote” button to individual product details pages so customers can request custom pricing on specific items.
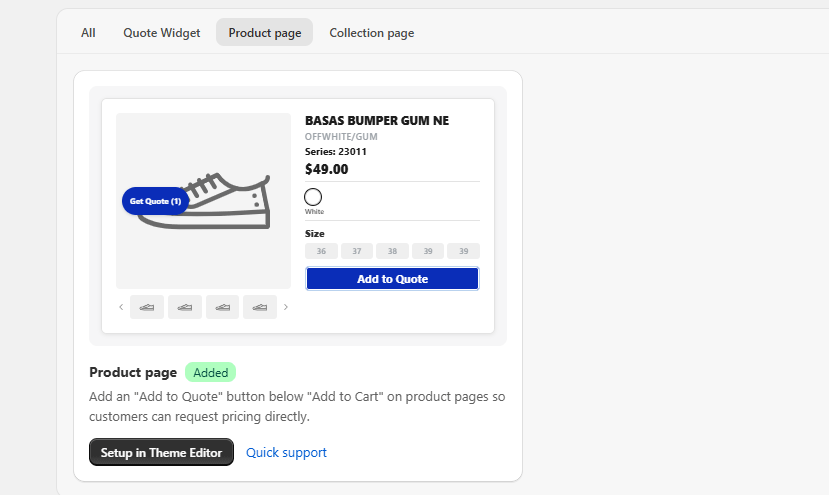
How to Enable on Product Pages:
- Click Setup in Theme Editor on the Product page card to launch Shopify’s Theme Customizer.
- Under the Product Information section of your main Product Template, click Add Block.
- Select SP Request a Quote from the list of Apps.
- Drag and reorder the block to place it right below or next to your standard “Add to Cart” or buy buttons.
- Click Save in the top right corner of the Theme Editor.
Need Custom Placement?
If your theme has a custom layout or the button isn’t displaying correctly, click Quick support inside the app dashboard for instant technical assistance.
Collection Page Settings
Enable Add to Quote buttons directly on product cards across collection grids and catalog pages. This makes it effortless for B2B and wholesale customers to request quotes for multiple items without opening each product page individually.
How to Enable on Collection Pages:
- Navigate to the Collection page tab in the On-Site Content dashboard.
- Click Contact us for a quick setup .
- Our technical team will map the quote action trigger directly to your theme’s collection grid structure to ensure seamless functionality.