What is the Tab feature?
The Tab feature allows you to organize size chart information into separate, easy-to-navigate sections, and helps customers quickly find relevant sizing information.
Adding Tabs to a Size Chart
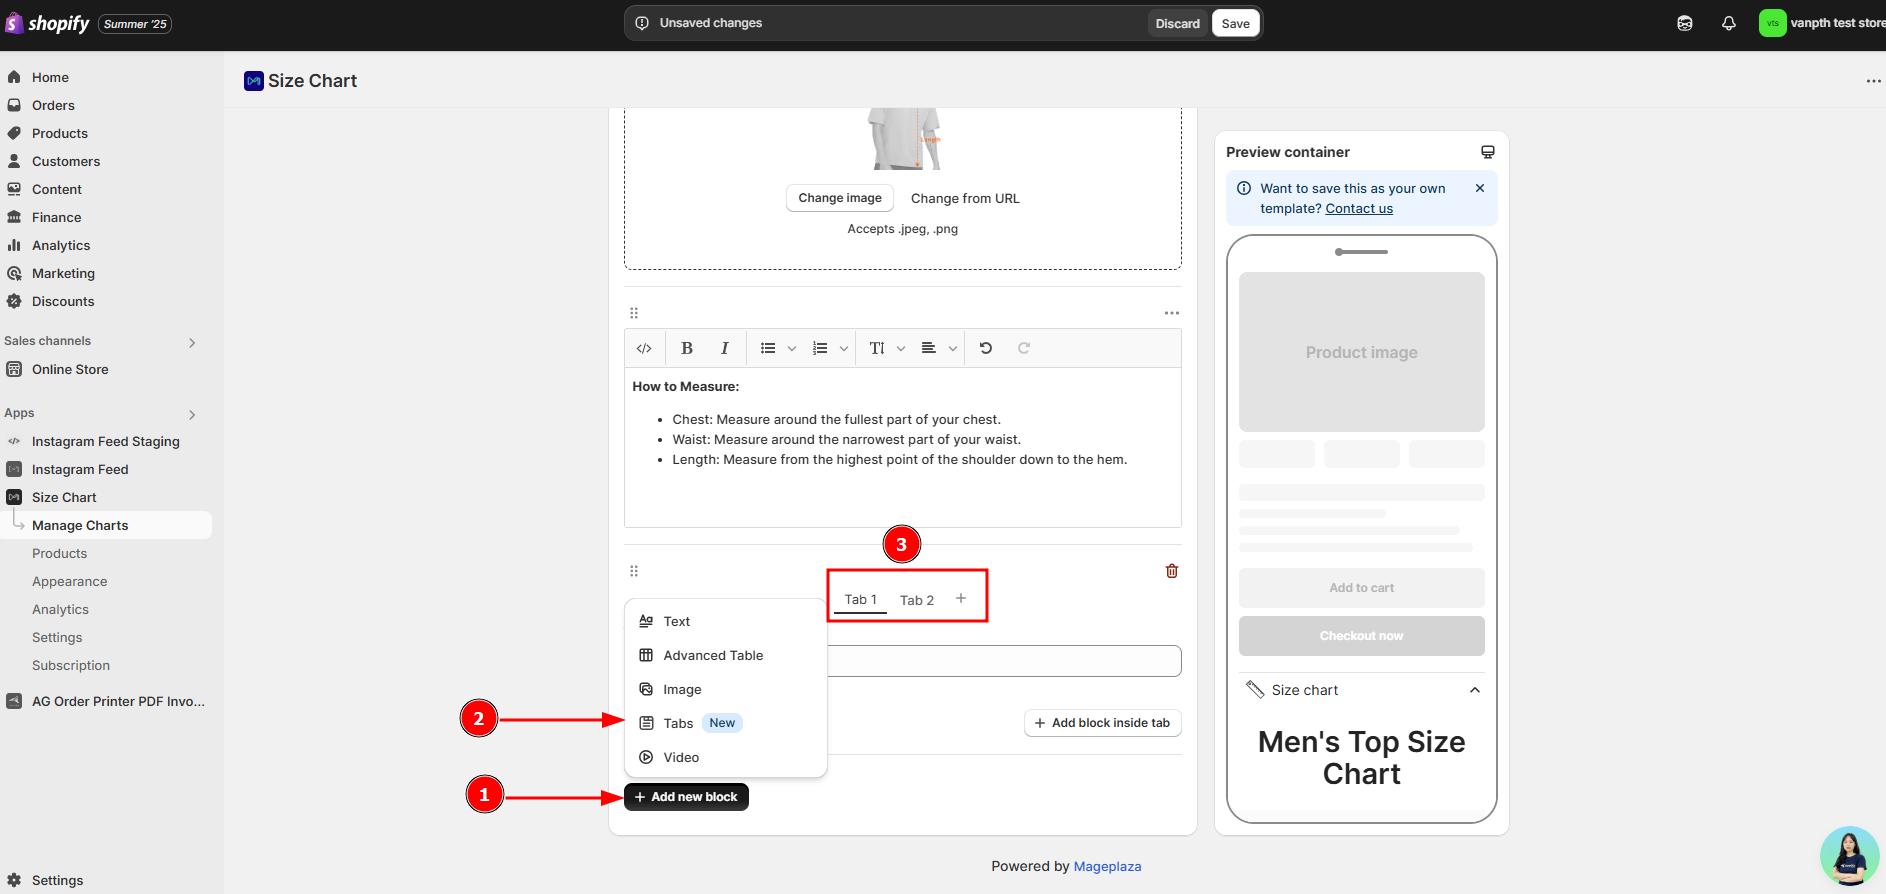
- From the Create chart or Edit chart screen, click ”+ Add new block”
- Select “Tabs” from the dropdown menu
- A new tab section with default “Tab 1” and “Tab 2” will be added
Customizing Tabs
Basic Tab Management
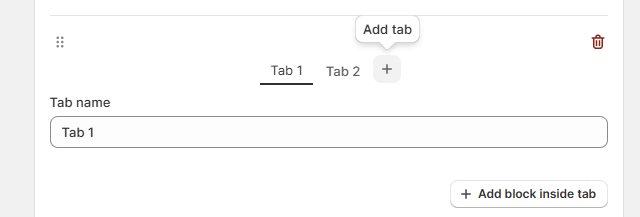
- Rename tabs: Edit the “Tab name” field directly
- Add tabs: Click the + icon (maximum 20 tabs)
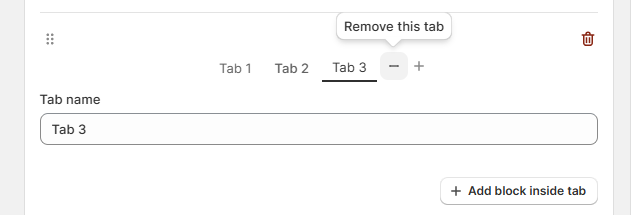
- Remove tabs: Click the - icon (minimum 2 tabs required)
- Delete entire tab section: Click the red delete icon in the top-right corner
Adding Content to Tabs
- Select the desired tab
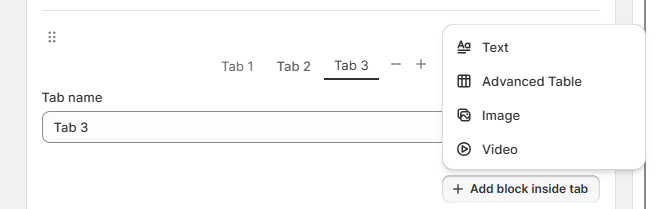
- Click “Add block inside tab” or simply drag and drop content into the tab
- Choose content type: Text, Advanced table, Image, or Video
- Customize your content
Rearranging
- Drag and drop the tab section to change its position relative to other chart elements
- Drag and drop content within a tab to rearrange
How Tabs Display:
Mobile/Tablet: When tabs exceed the screen width, users can swipe left or right to scroll through them horizontally.

Desktop: If the tabs take up more horizontal space than available, a scroll bar will appear below the tab list.
Best Practices
- Use clear, descriptive tab names
- Keep tab count manageable (2-5 tabs recommended)
- Organize tabs logically (by gender, age, product type)
- Customize tab colors to match your store’s theme