How to set up product tags
Product tags help you turn your Instagram and TikTok feeds into shoppable galleries, allowing you to display relevant products directly below each post and drive more conversions.
What you can do with product tags:
- Tag Shopify products on individual posts
- Automatically showcase product info, reviews, or prices
I. Product tagging posts
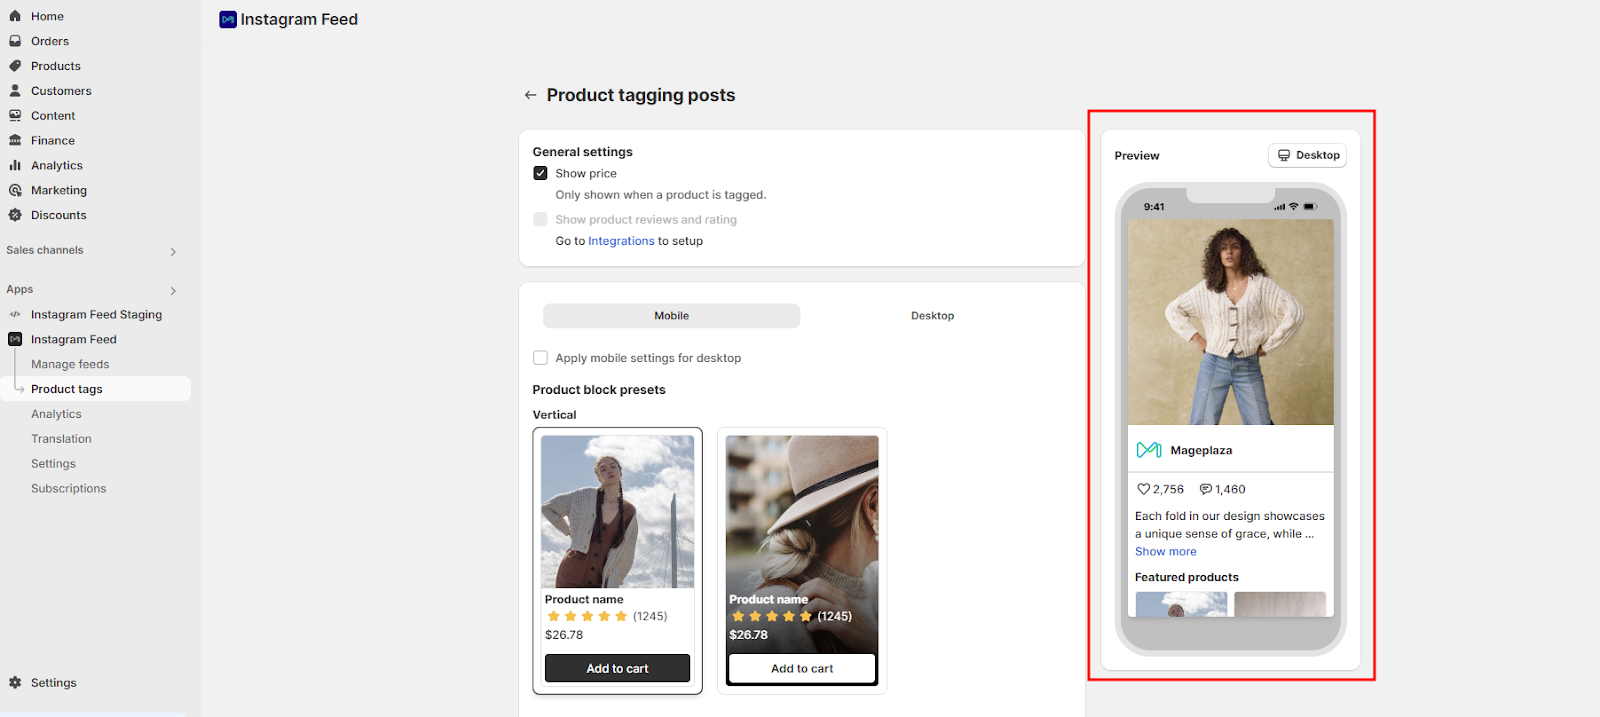
Go to Product Tags > Product tagging posts > Set up to get started.


General settings
-
Show price: Show product price when a product is tagged.
-
Show product reviews and rating: Show the review and rating number of tagged products. To enable this feature, you need to set up the integration with the Air Reviews app first by clicking the “Integrations” button.
Apply Mobile Settings for Desktop
- There are 2 settings for Mobile and Desktop, then check the configuration for respectively.
- Tick this checkbox if you want the desktop display to use the same settings as your mobile layout (no need for separate customization).
- Once selected, all styling and layout configurations from the mobile tab will be automatically applied to the desktop view.
Product block presets: Choose how your products are displayed within the feed using preset layouts. You can select from:
- Vertical layout
- Structure: Image on top, followed by product name, rating, price, and “Add to cart” button.
- Best for: Compact displays like mobile view or narrow feed sections.
- Horizontal layout
- Structure: Image on the left, and product info (name, rating, price, button) on the right.
- Best for: Wider screens or sections where images need to stay large without stacking.
General settings
- Background color: Set the background color of your section or component.
- Border radius: Adjust the corner roundness of the box.
- Border: This checkbox enables or disables the border. When checked (as shown), a border will be displayed around the component.
- Border color: Customize the border color.
Product info
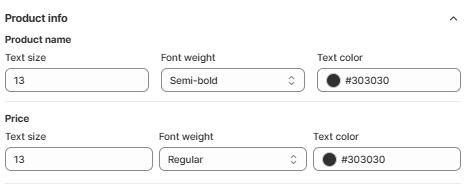
- Product name:
- Text size: Adjust the font size of the product name.
- Font weight: Choose how bold the text looks. Options include:
- Regular – Default text thickness; clean and easy to read.
- Medium – Slightly thicker than regular; adds mild emphasis.
- Semi-bold – Noticeably bold; great for drawing attention without overpowering.
- Bold – Strongest emphasis; ideal for headings or important info like prices or product names.
- Text color: Click the color dot or enter a hex code to set the text color.
- Price:
- Text size: Same functionality as above, but for the price text.
- Font weight: Choose how the price stands out
- Text color: Set a color to make the price pop or blend, based on your store’s design.
Add to cart button: Enable the add to cart button
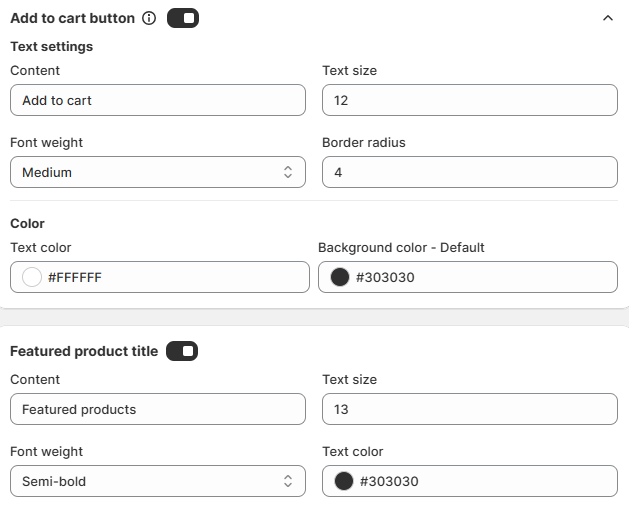
- Text settings
- Content: Fill in the title/subtitle text of the button.
- Text size: Set up the text size of the button.
- Font weight: Set up the font weight of the button.
- Border radius: Adjust the border radius of the button.
- Color:
- Text color: Select the text color to fit your theme.
- Background color - Default: Select the background color of the button.
Featured product title: Enable to show the featured product title
- Content: Fill in the title text.
- Text size: Set up the text size for the featured product title.
- Font weight: Set up the font weight for the featured product title.
- Text color: Select the text color for the featured product title.
Preview
This feature allows merchants to preview the results on both desktop and mobile, which are shown on the right side immediately after adjusting the settings on the left.
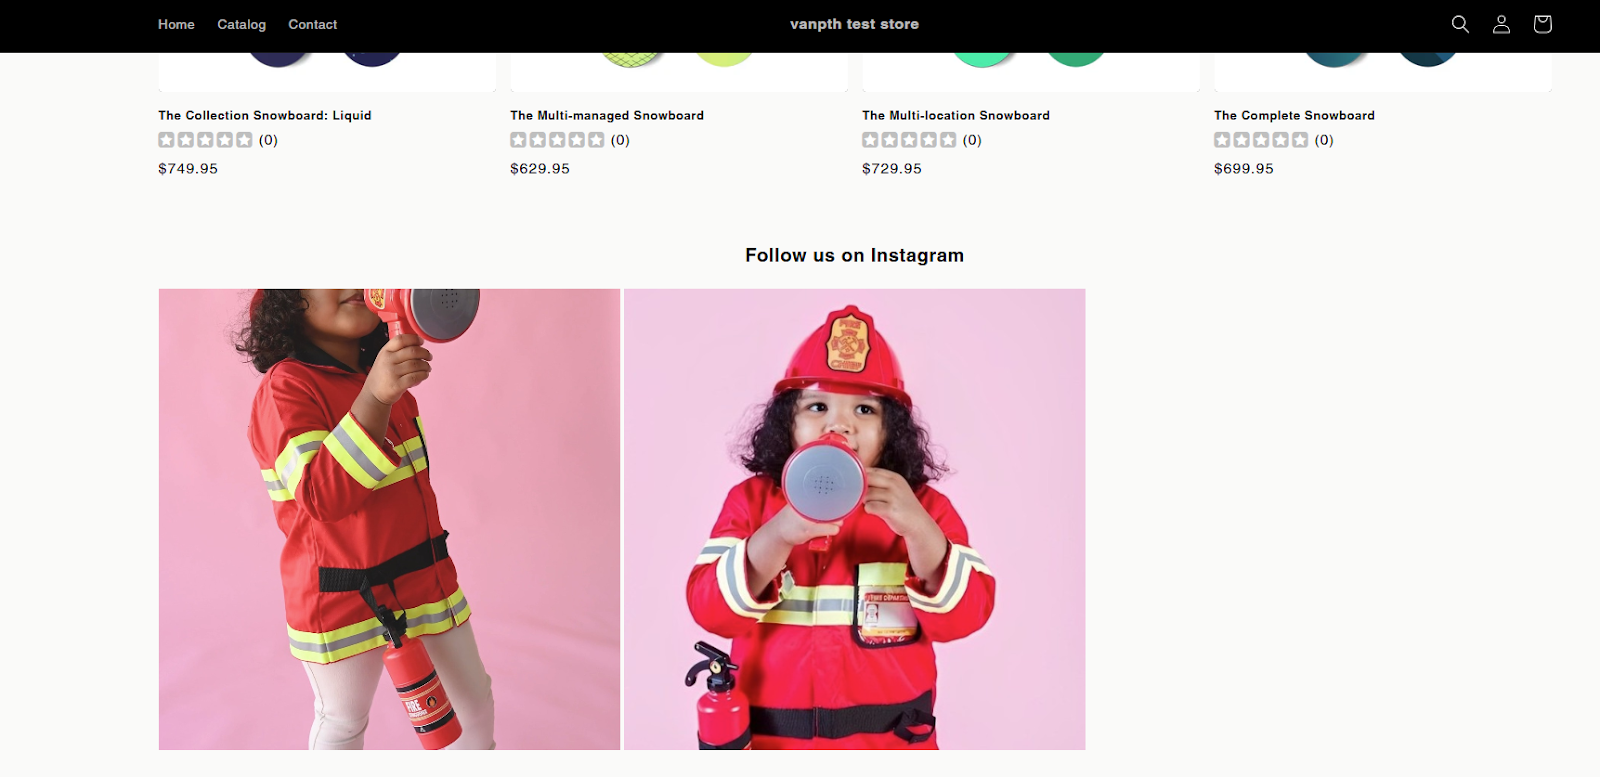
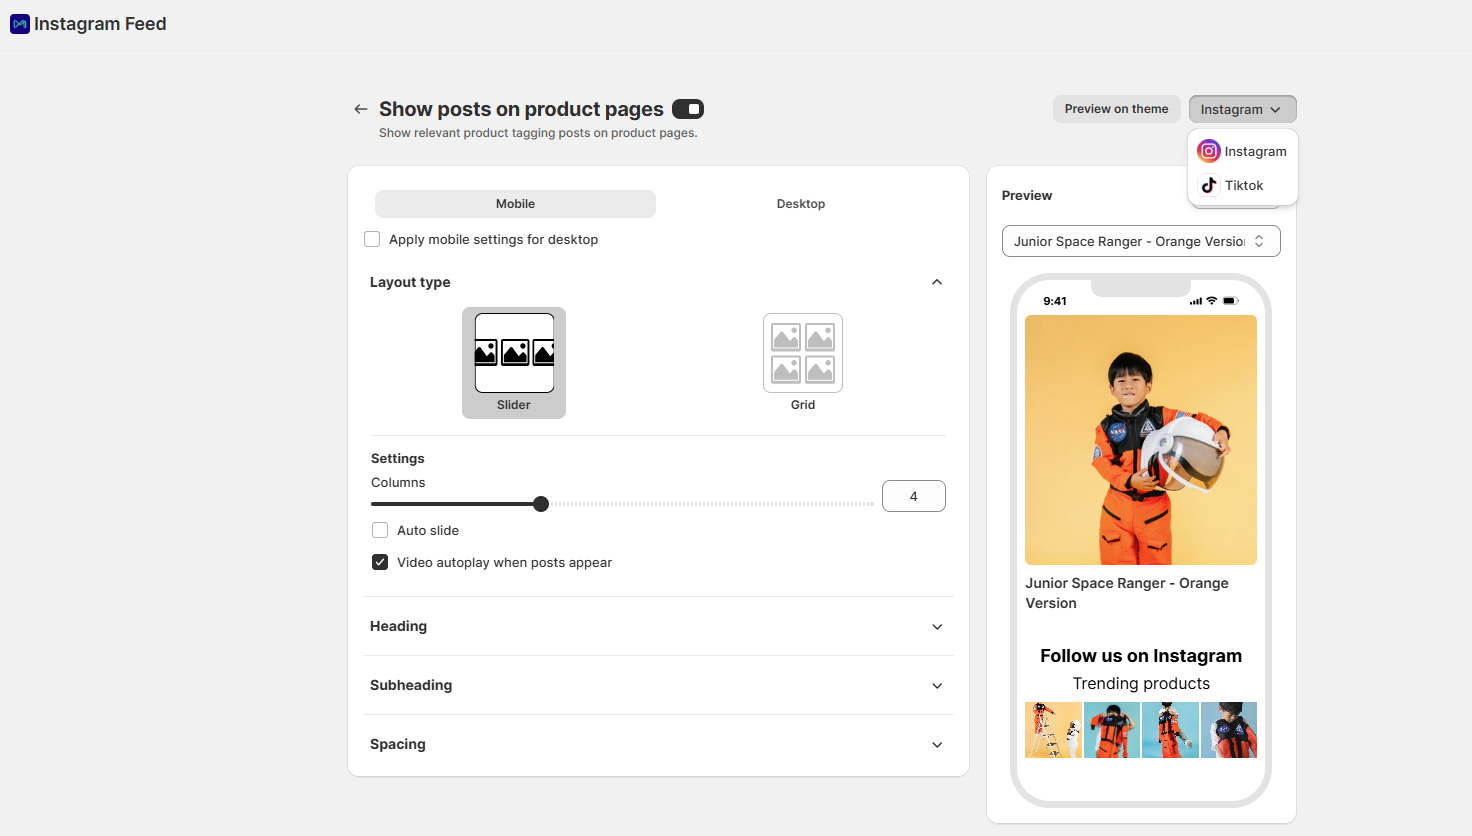
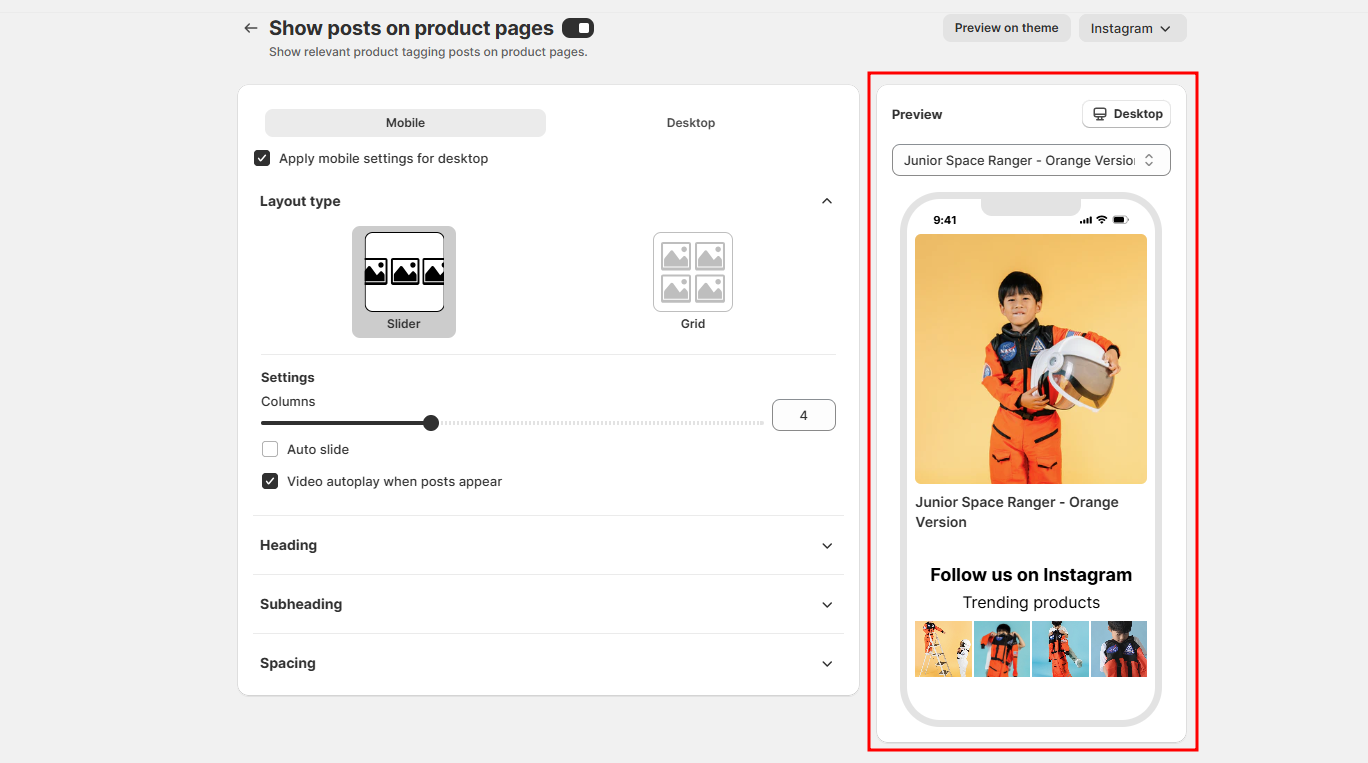
II. Show posts on product pages
The “Show posts on product pages” feature means that each product page will only show posts related to that exact product — not all posts tagged with any product. The main goal is to provide targeted social proof, helping customers see real-life usage or endorsements of the specific product they’re viewing.
Go to Product Tags > Show posts on product pages > Set up to get started.
You can customize the feed depending on your demand:
- There are 2 settings for Mobile and Desktop, then please check the configuration respectively.
- You can choose either Instagram or TikTok as the source to start setting up relevant product tagging posts on the product page at the top-right corner of the screen.
- Tick Apply mobile settings for desktop to apply all mobile settings to the desktop (no need for separate customization).
Here are 4 main sections to customize the feed:
- Layout type: Select the layout type for your Instagram feed.
- Heading: Set up the feed heading.
- Subheading: Set up the feed subheading.
- Spacing: Set up the feed spacing.
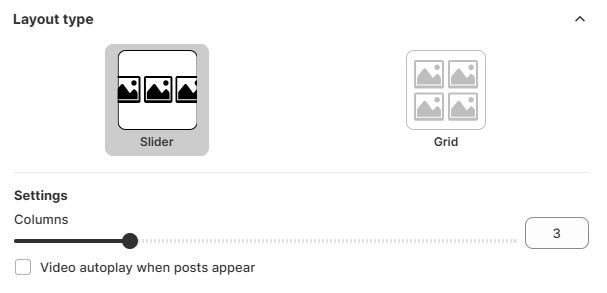
1. Layout type
Select the layout types to show the Instagram/TikTok posts on your store:
-
Grid: Images will be displayed in rows and columns.
-
Slider: Images will be displayed in a horizontal slider.
Settings
-
For slider layout (mobile)
- Columns: Choose the number of columns to display in the feed
- Video autoplay when posts appear (mobile): Tick to automatically play videos when posts appear.
-
For grid layout (mobile)
- Columns: Choose the number of columns to display in the feed
- Rows: Choose the number of rows to display in the feed
- Video autoplay when posts appear (mobile): Tick to play videos when posts appear automatically.

- Video autoplay (desktop)

- None: No autoplay
- When posts appear: Automatically play videos when posts appear.
- When hovering over a post: Automatically play a video when customers hover over a post.
2. Heading
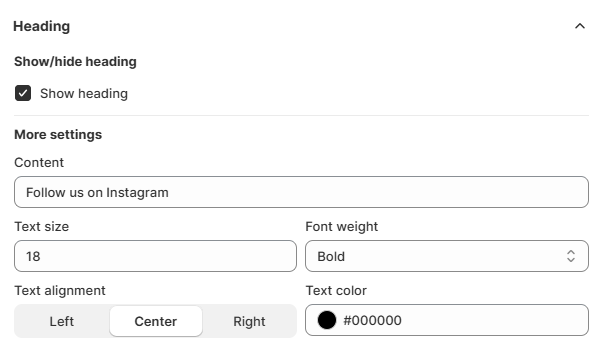
Show/hide heading: Tick to show the feed heading.
More settings:
-
Content: Fill in the text for the heading.
-
Text size: Set up the text size for the heading.
-
Font weight: Set up the font weight for the heading.
-
Text alignment: Select the text positioning for the heading.
-
Text color: Select the background color for the heading.
3. Subheading
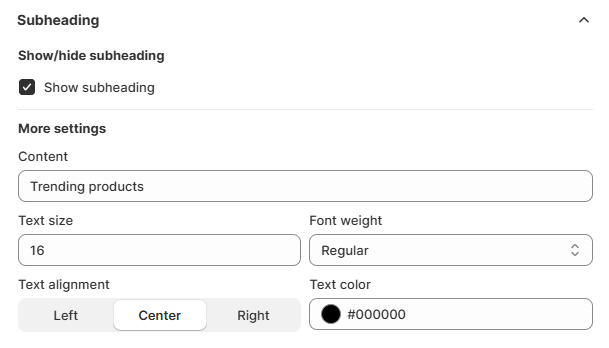
Show/hide subheading: Tick to show the feed subheading.
More settings:
-
Content: Fill in the text for the subheading.
-
Text size: Set up the text size for the subheading.
-
Font weight: Set up the font weight for the subheading.
-
Text alignment: Select the text positioning for the subheading.
-
Text color: Select the text color for the subheading.
4. Spacing
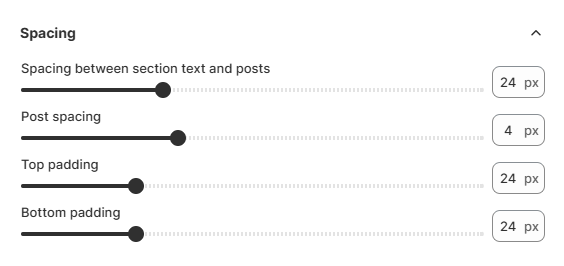
- Spacing between section text and posts: Adjust the gap between the section heading/subheading and the media feed.
- Post spacing: Control the space between each individual post (image or video).
- Top padding: Add space above the entire feed section.
- Bottom padding: Add space below the feed section.
Preview
With the Preview feature, merchants can select a product to preview its product page with the associated Instagram feed. You can also preview the results on both desktop and mobile views — instantly shown on the right side after adjusting the settings on the left side.
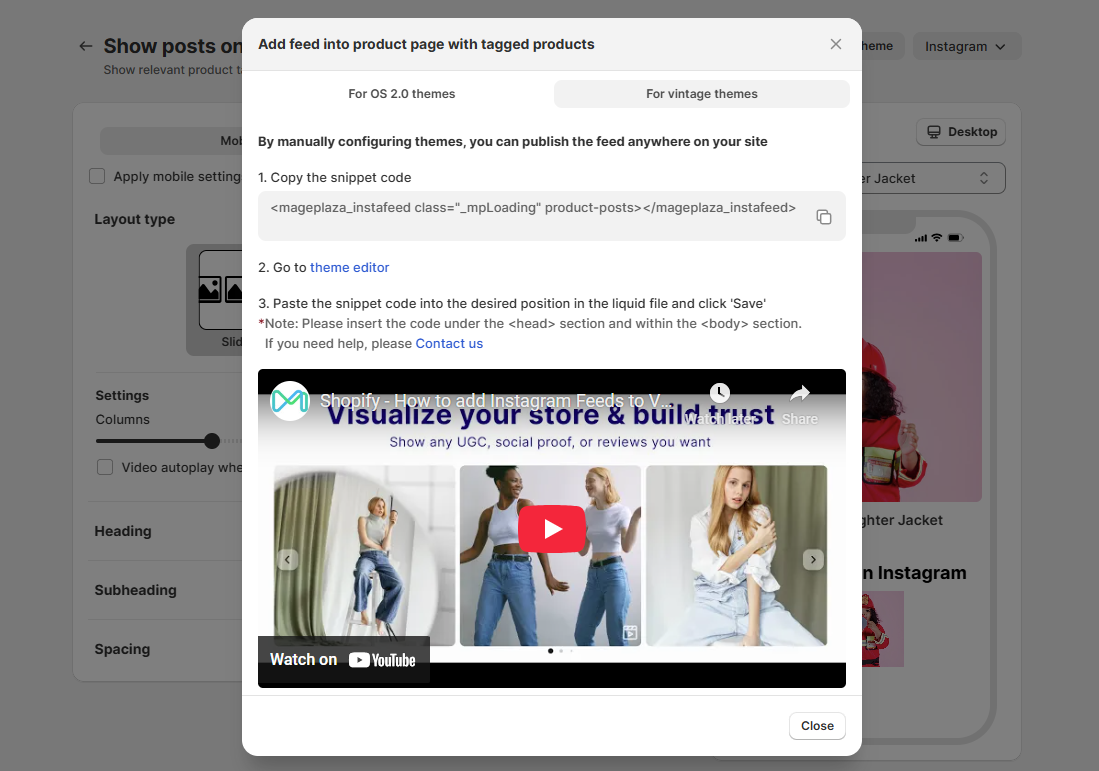
After that, click the Save button to save the feed customization. A popup will then show the feed information. Kindly select your theme type.
If you choose themes OS 2.0, please click Add to theme button.
If you choose vintage themes, please copy the snippet code and click go to theme editor.
After clicking Add to theme or Go to theme editor, you’ll be redirected to your store theme as shown in the image below. A notification will appear saying Feed on Product Page added — click Close, then scroll down to view the feed section.
Next, click Save.
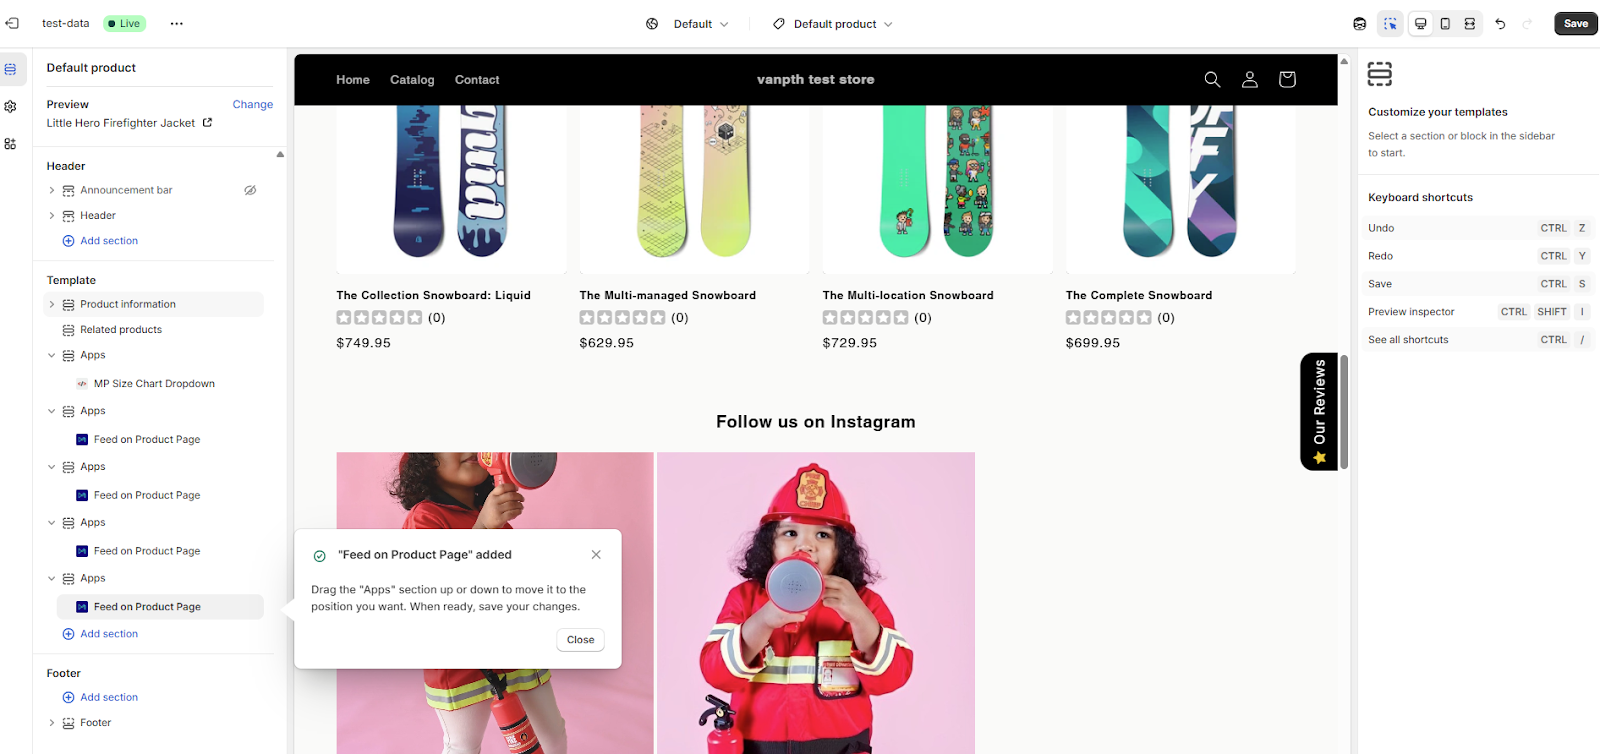
Finally, click View to see how the feed looks on your storefront.