How to create and edit a new size chart?
Store admins can easily create and manage size charts in the Manage Charts section.
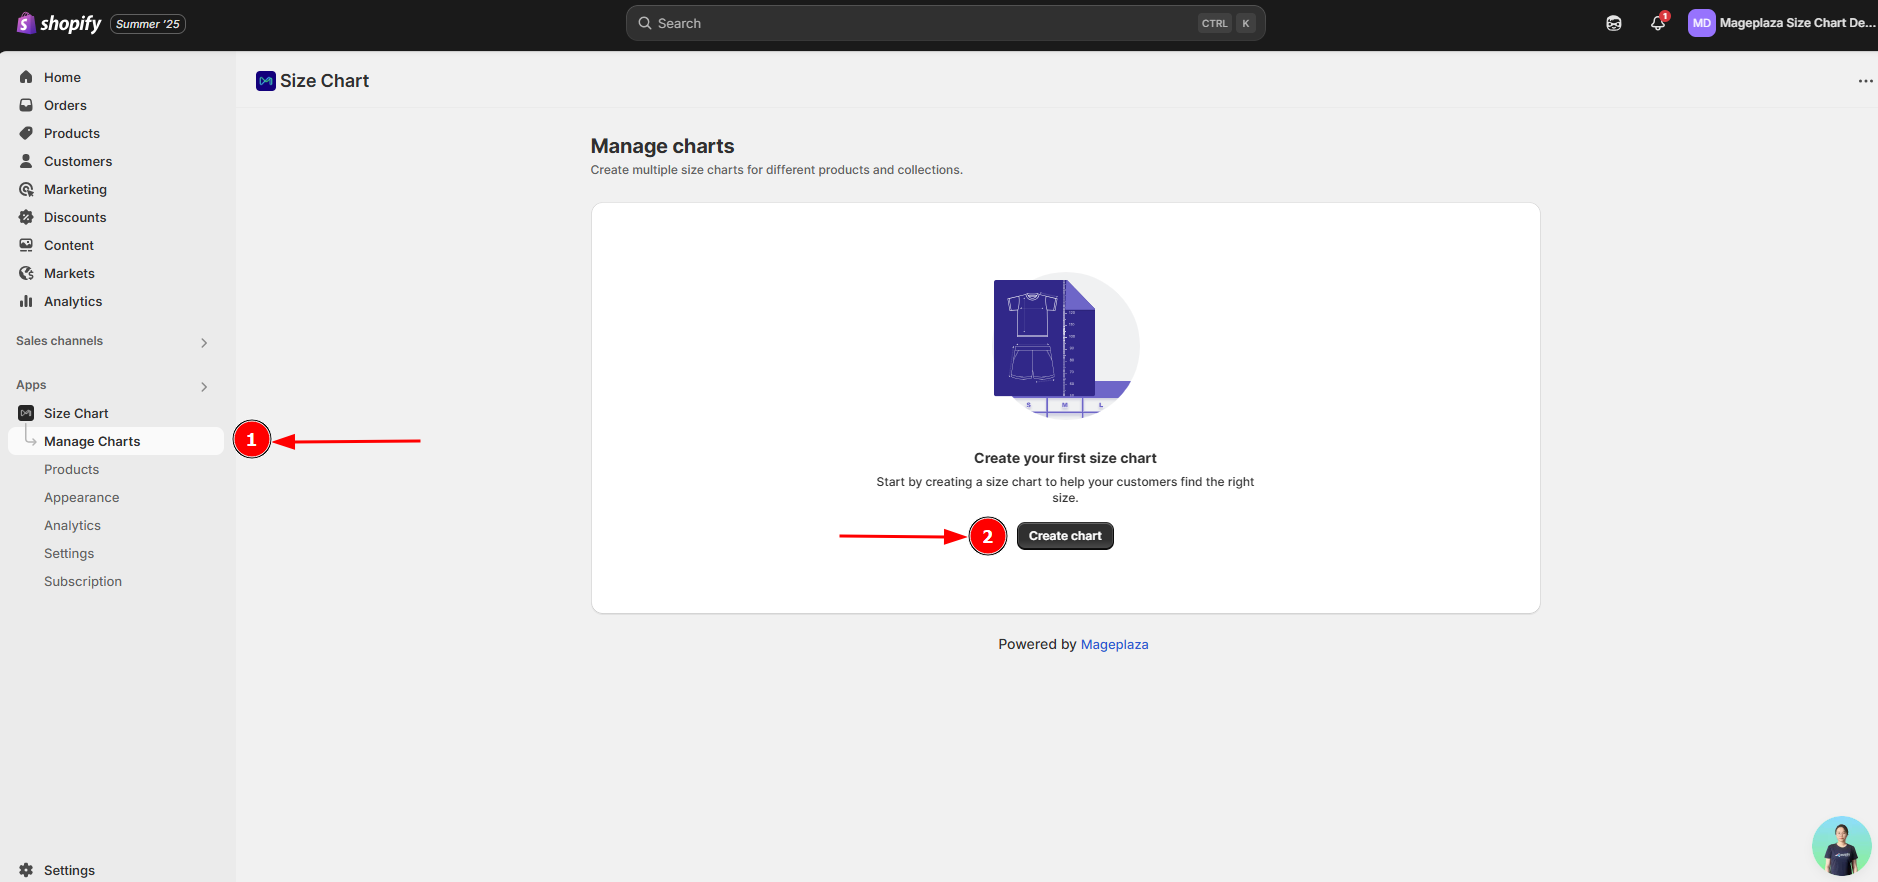
Action 1: Creating a new size chart
To create a new size chart:
1. Navigate to the Manage Charts section > click the Create chart button
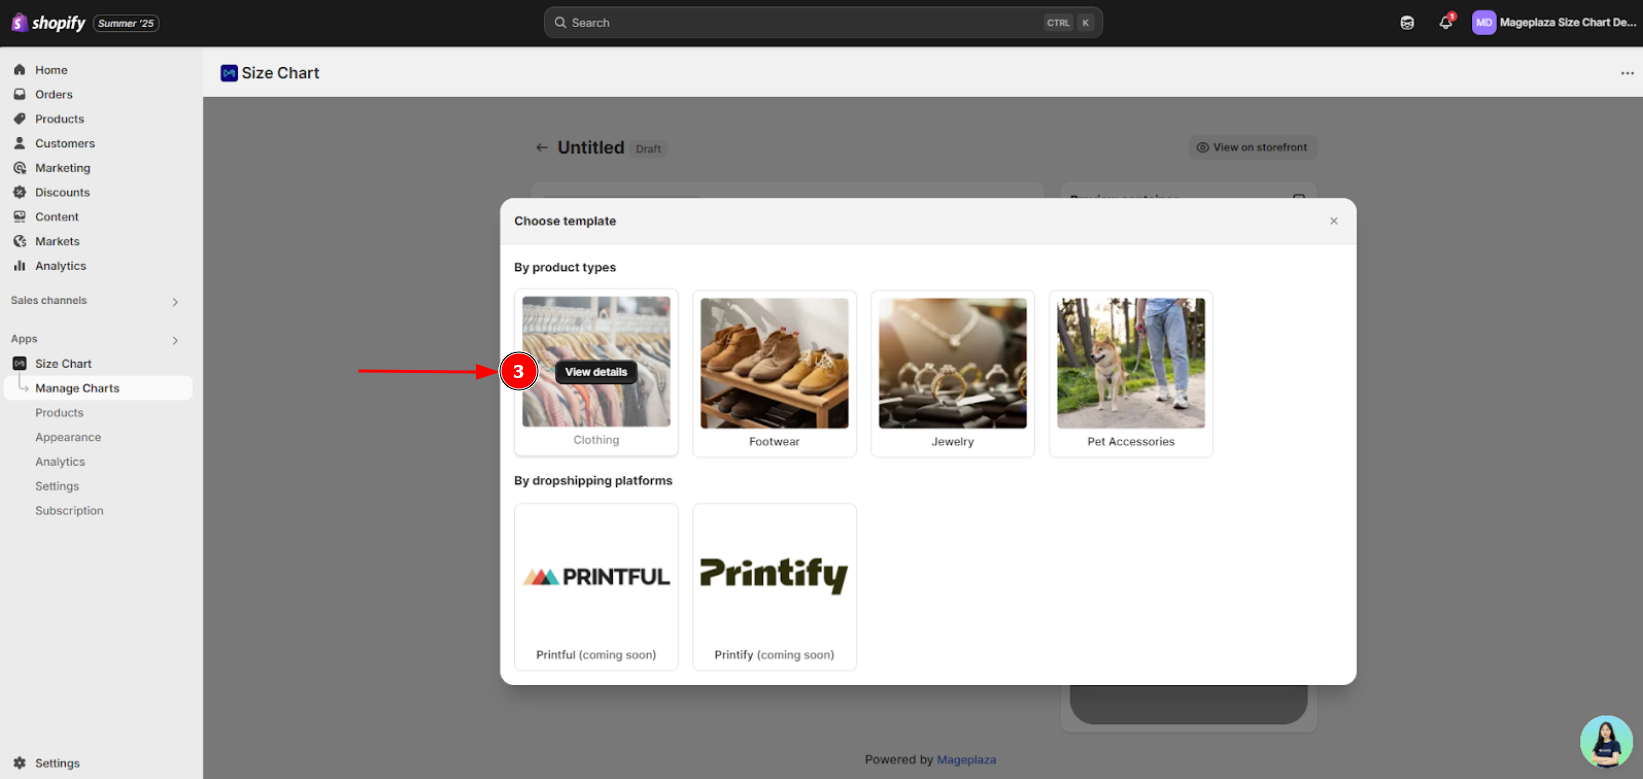
2. Choose a template
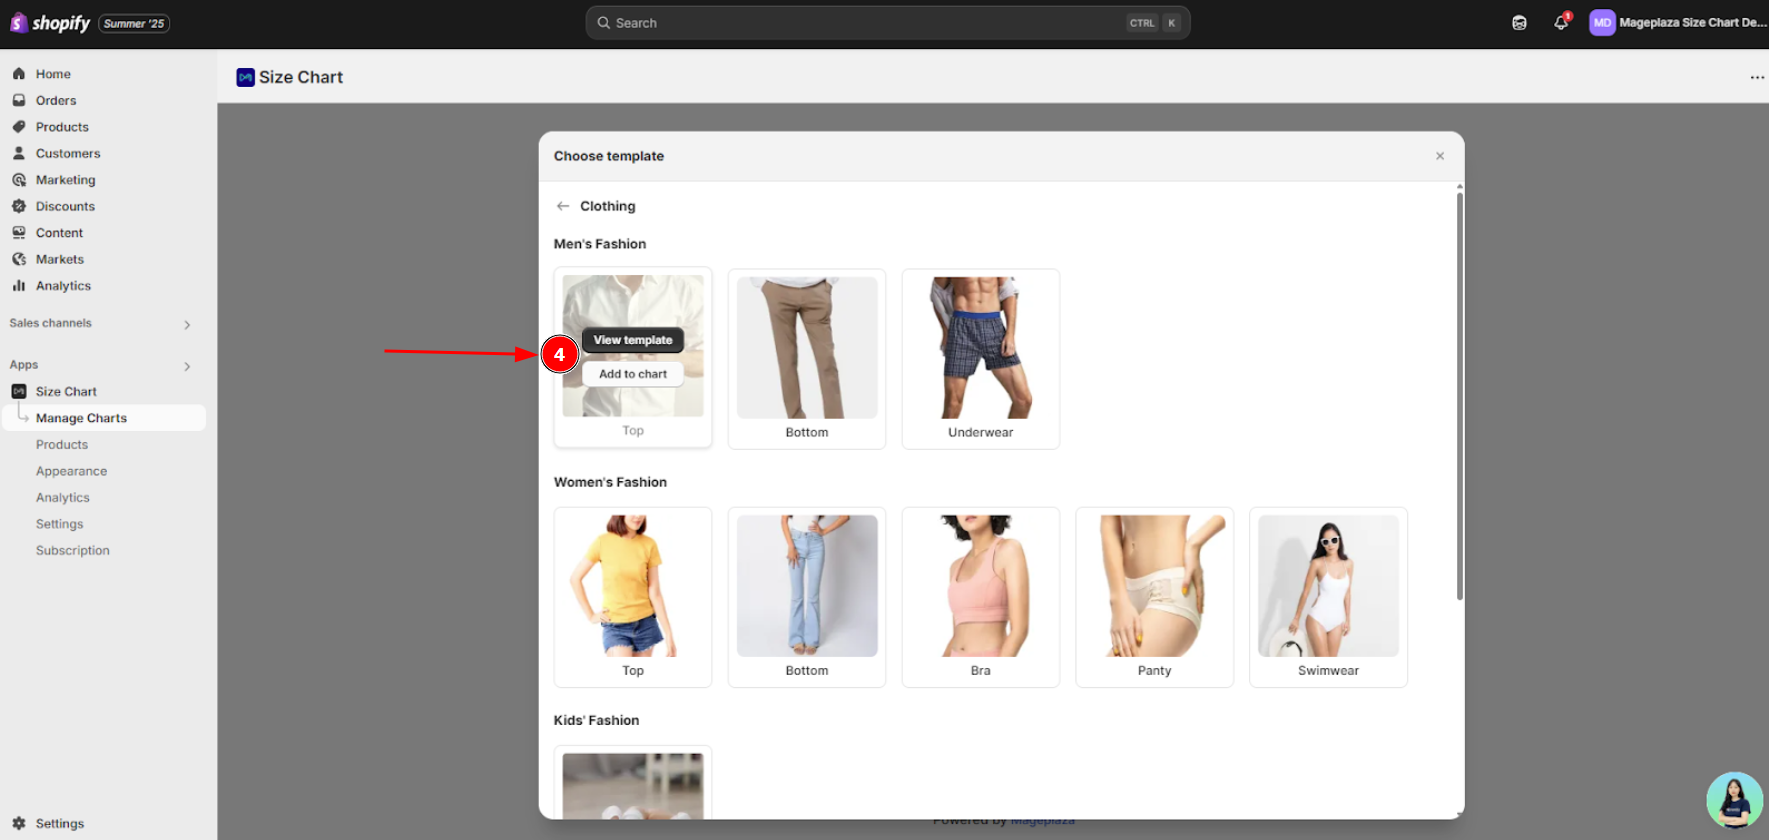
Select a predefined layout that fits your product category — for example: Clothing → Men’s Fashion → Top
This automatically loads a recommended table format and measurement guide for that product type.
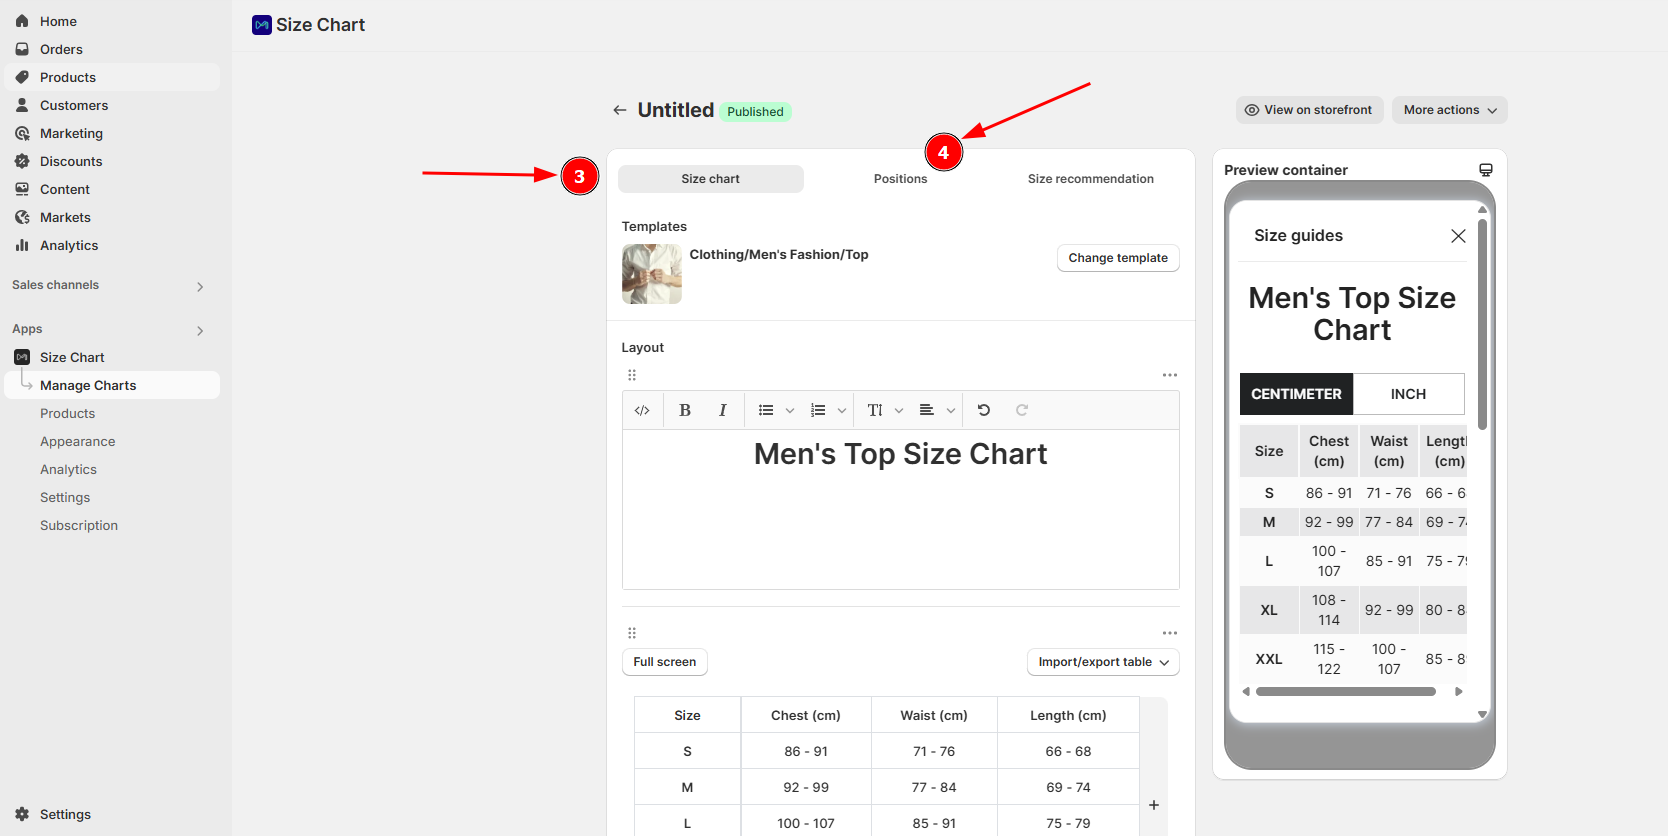
3. You’ll be taken to the chart creation page with two tabs
- Step 1: Size Chart - Where you design your size chart content
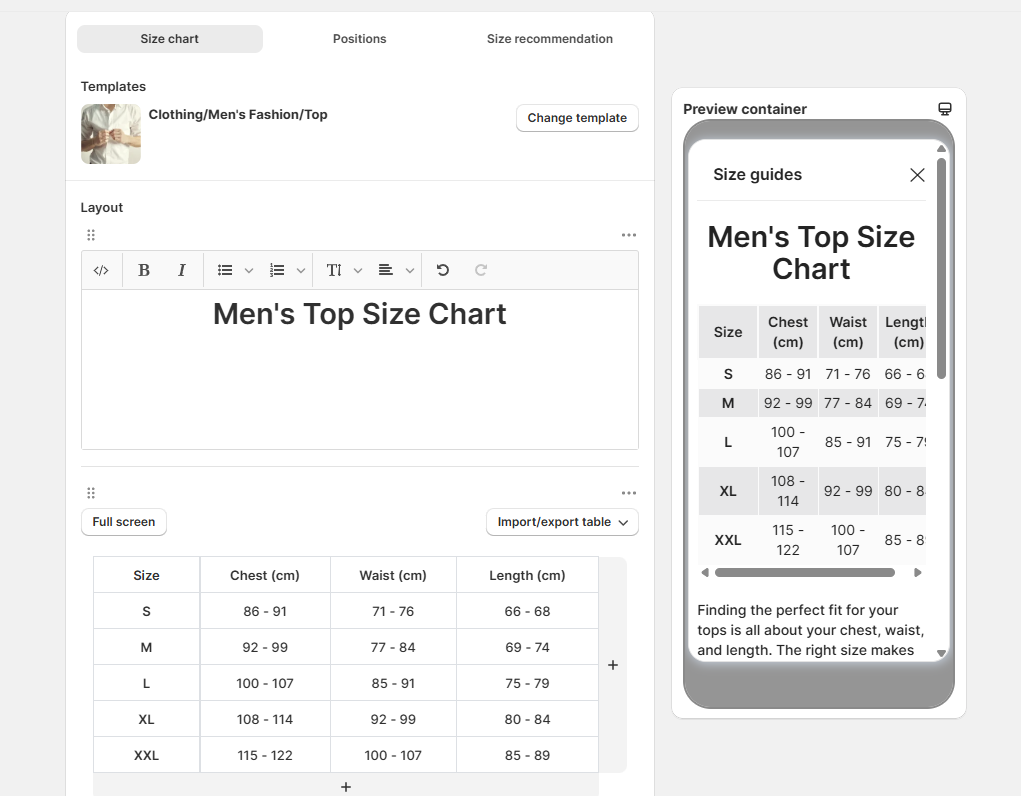
1.1. Change the template if you want
1.2. In the Size Chart box, you can:
- Add a title like “Men’s Top Size Chart”
- Include a short description or heading above your table
1.3. Create or edit the size table The table typically includes:
- Size (S, M, L…)
- Chest, Waist, Length (or other relevant measurements)
You can:
- Edit cells directly
- Add or remove rows/columns
- Use the “Import/export table” button to upload a prebuilt CSV or copy/paste from Excel
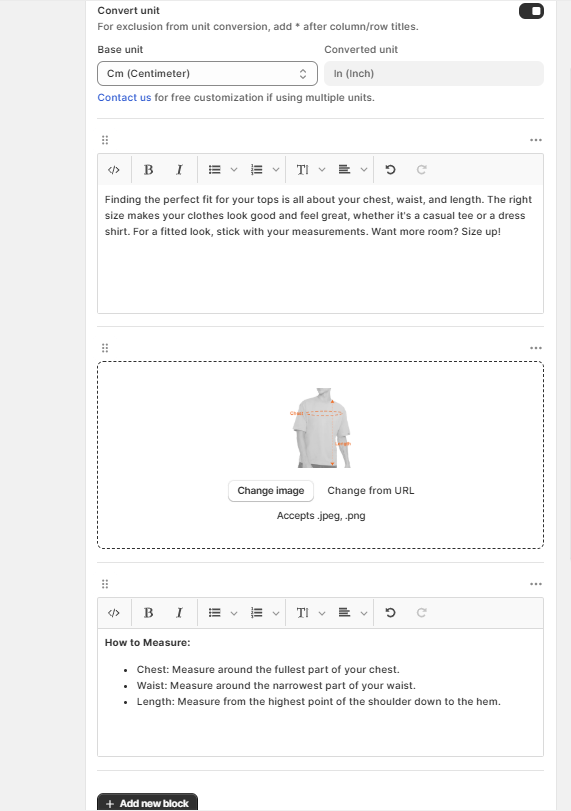
1.4. Enable unit conversion (optional)
If you want to show measurements in both cm and inches, toggle Convert unit:
- Base unit: cm, in, mm, kg, lbs
- Converted unit: inch
This helps international shoppers understand sizing better.
1.5 Add image (visual measurement guide)
Click Change Image to upload a visual guide showing how to measure.
1.6. Add measurement instructions (optional)
Use the text box under the image to explain how to measure each part of the body.
1.7. Add more content (Optional)
Click “+ Add new content” to add more images, text blocks, or even videos. You can customize this section to include styling tips, sizing advice, or FAQs.
- Step 2: Positions - Where you configure display settings

The right side of the screen shows a preview panel that updates in real-time as you make changes:
- View how your size chart will appear on mobile devices
- Click the desktop icon to see how it will look on larger screens
- Preview both float button and inline link display options
Action 2: Editing an existing size chart
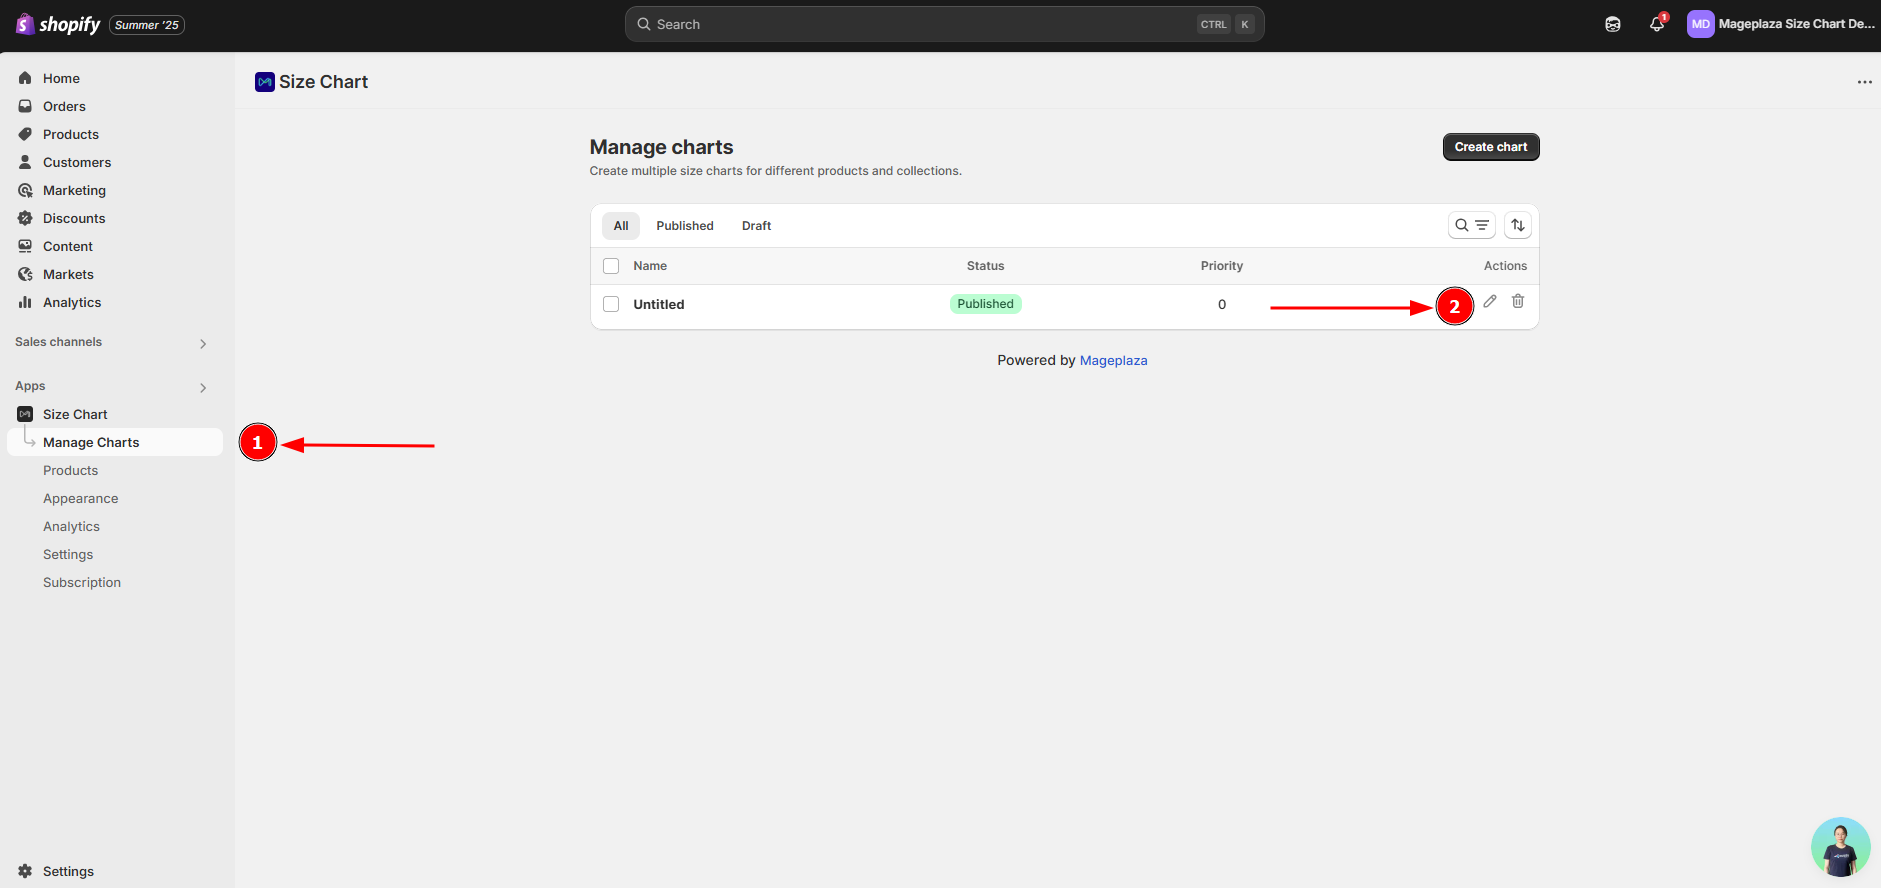
To edit a size chart:
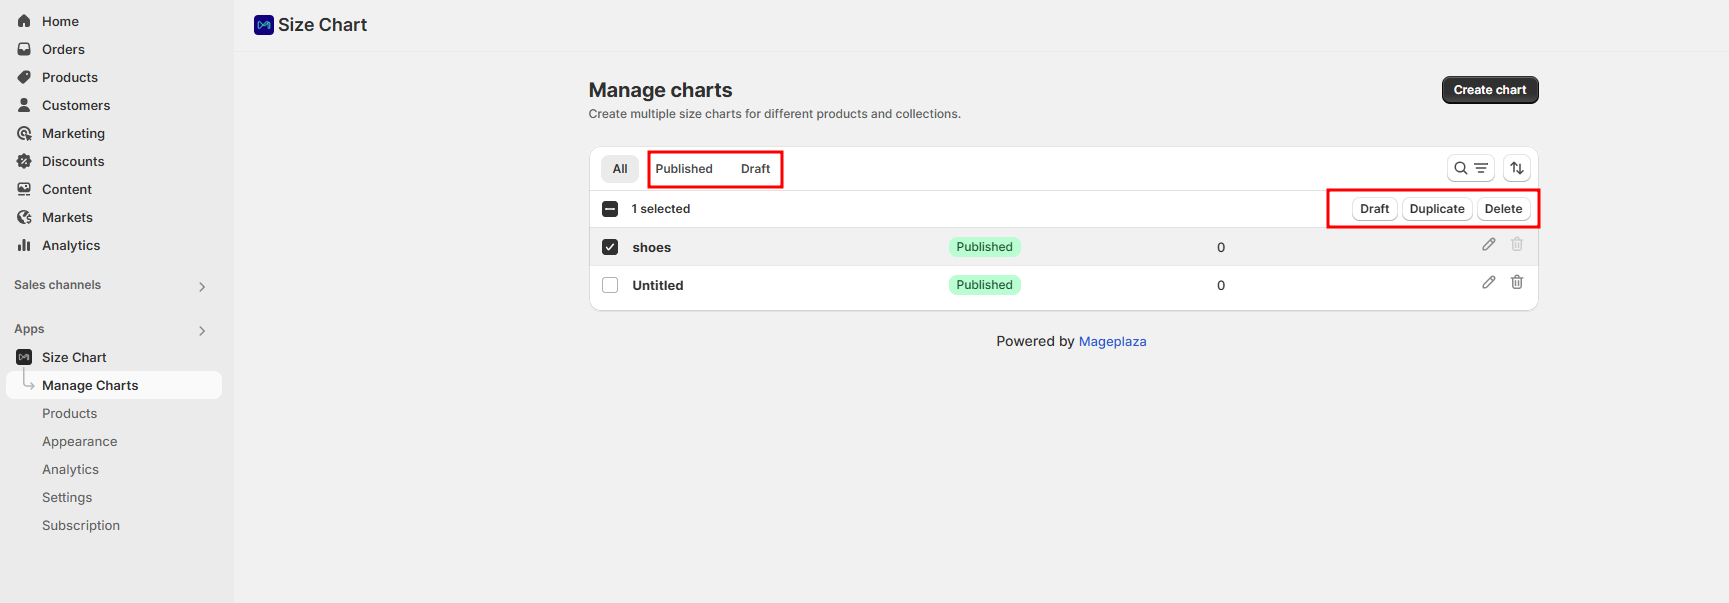
- Go to the Manage Charts section
- Click on the name of the chart you want to edit or click anywhere on that row
- This will open the edit page with the same layout as the creation page
Action 3: Additional management options
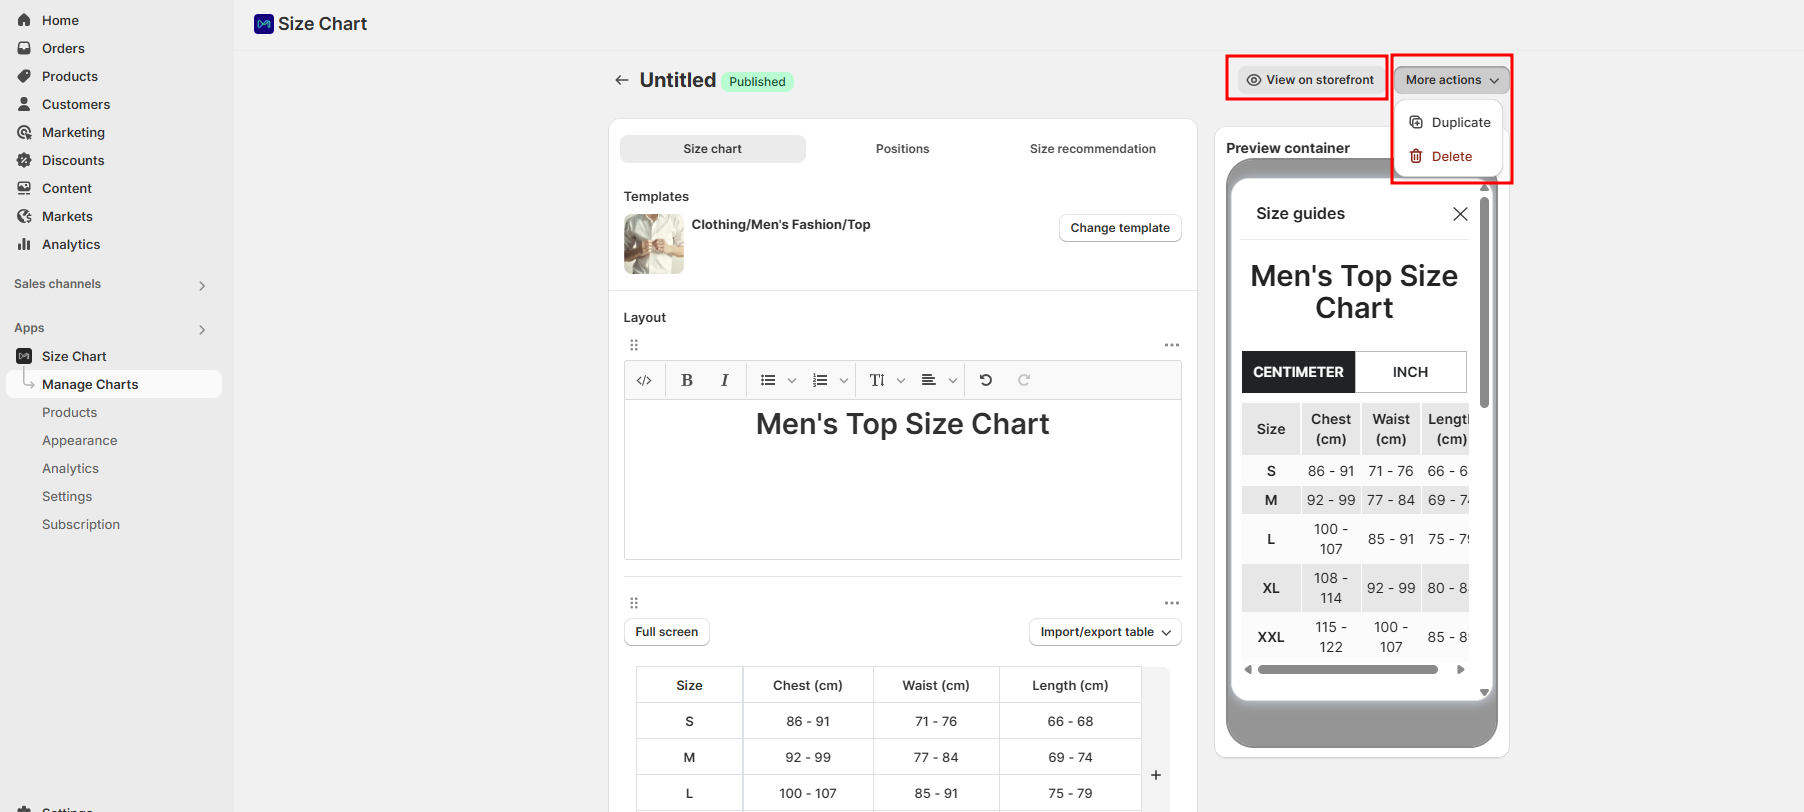
From the edit page, you can access additional options by clicking the “Action” button in the top-right corner:
- View on your storefront - See how the chart appears on your live store
- Click on “More actions”:
- Duplicate - Create a copy of the current chart
- Delete - Remove the chart (requires confirmation)
Action 4: Managing chart status
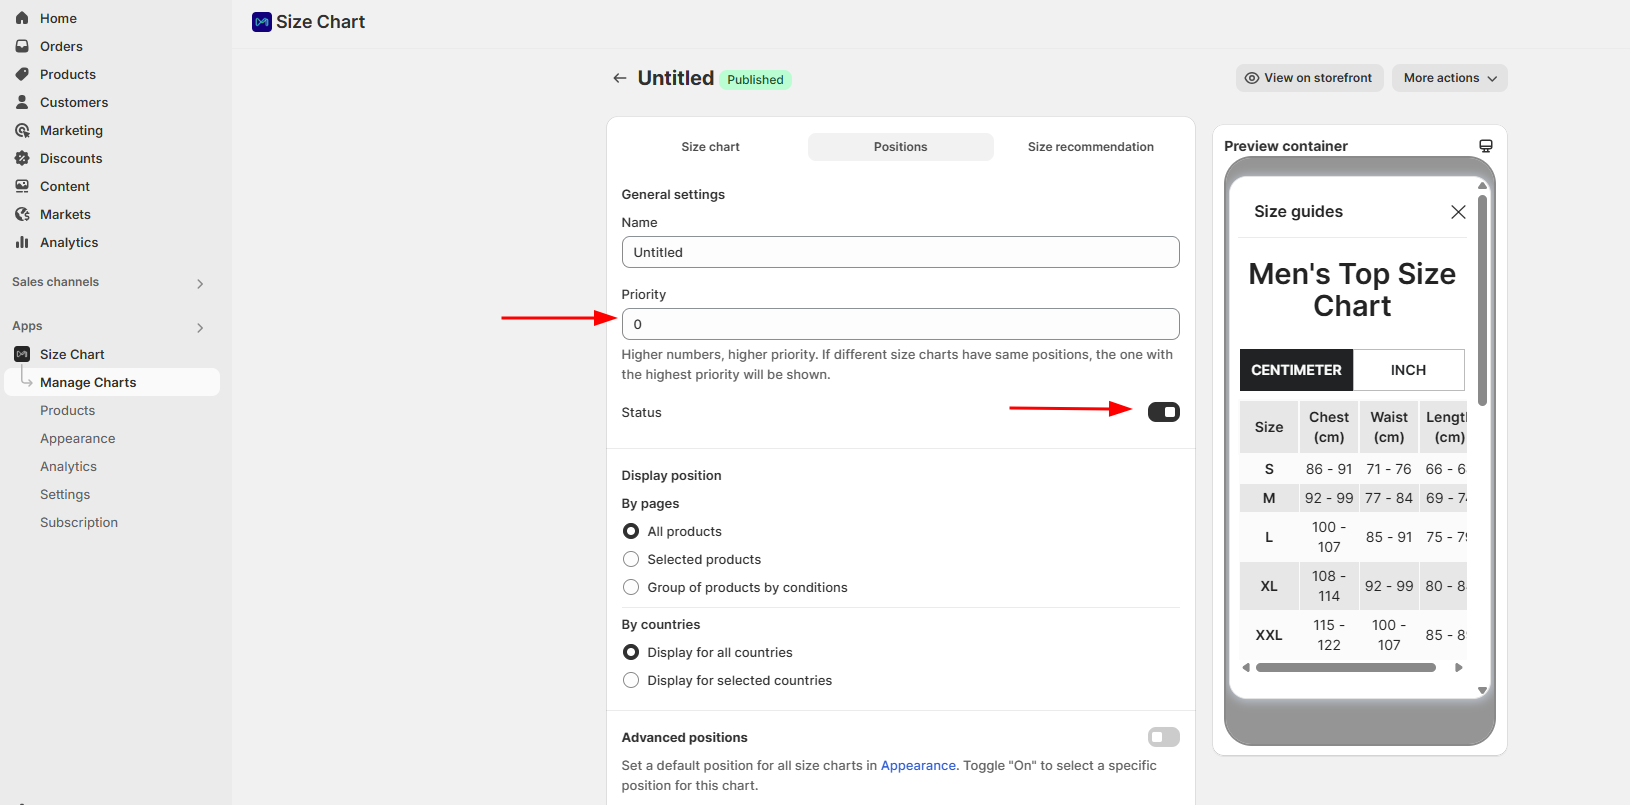
You can easily control the visibility of your size charts:
- Status - Toggle the status switch next to the chart name to enable/disable it
- Priority - Set priority levels to control which chart displays when multiple charts match the same product
This flexible management system allows you to create, test, and implement size charts for different product categories with ease.