How to create an Access Control rule
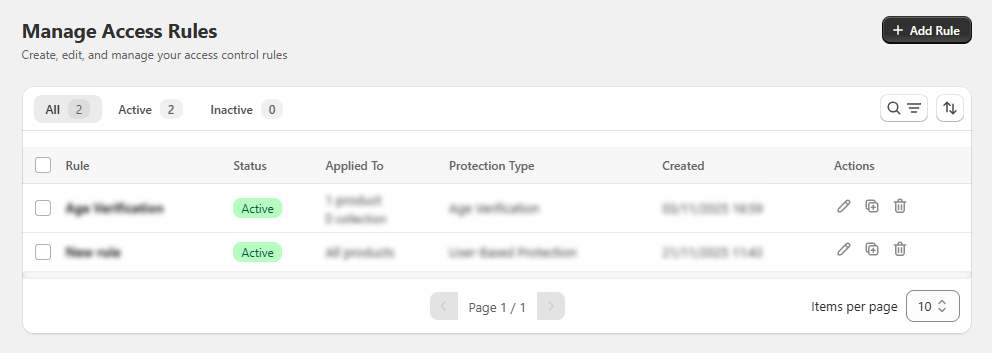
1. Navigate to Access Rules
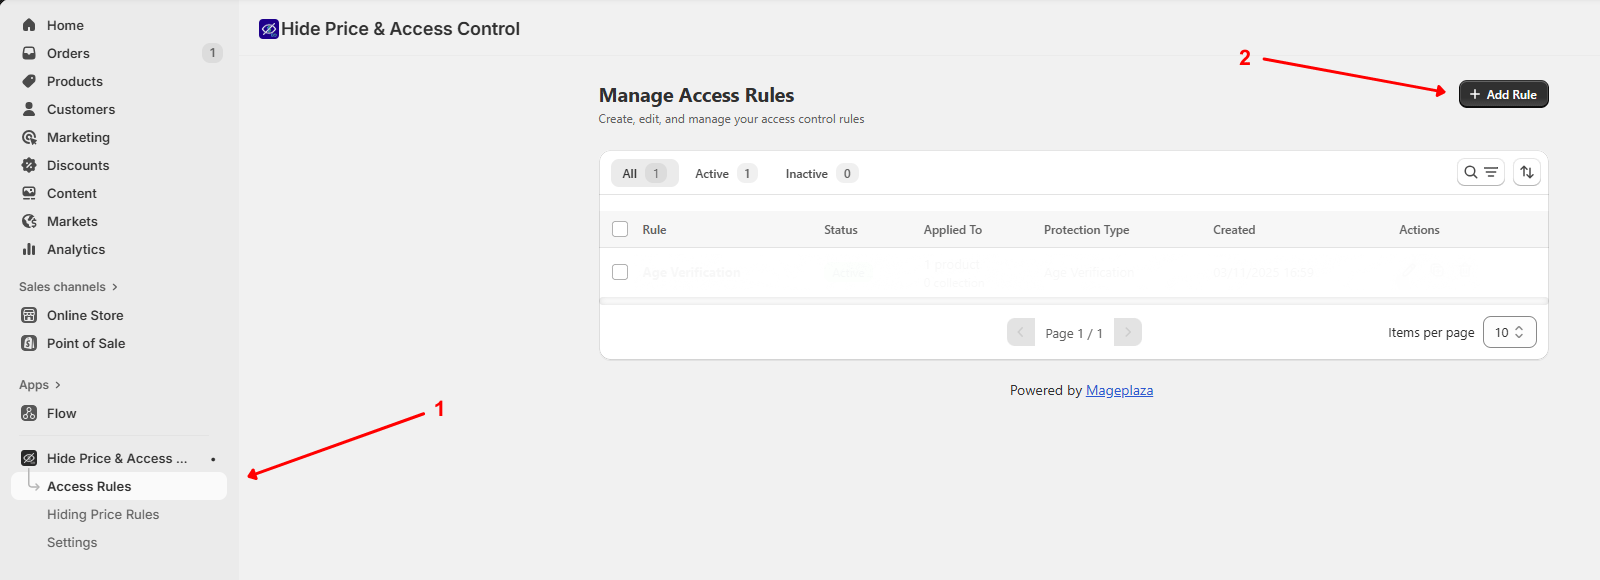
- Open the Hide Price & Access Control app in your Shopify admin.
- Go to Access Rules.
- Here, you’ll see a list of existing rules with their status (Active/Inactive), applied items, and actions (edit, copy, delete).
- Click the + Add Rule button in the top-right corner to create a new rule.
2. General setup
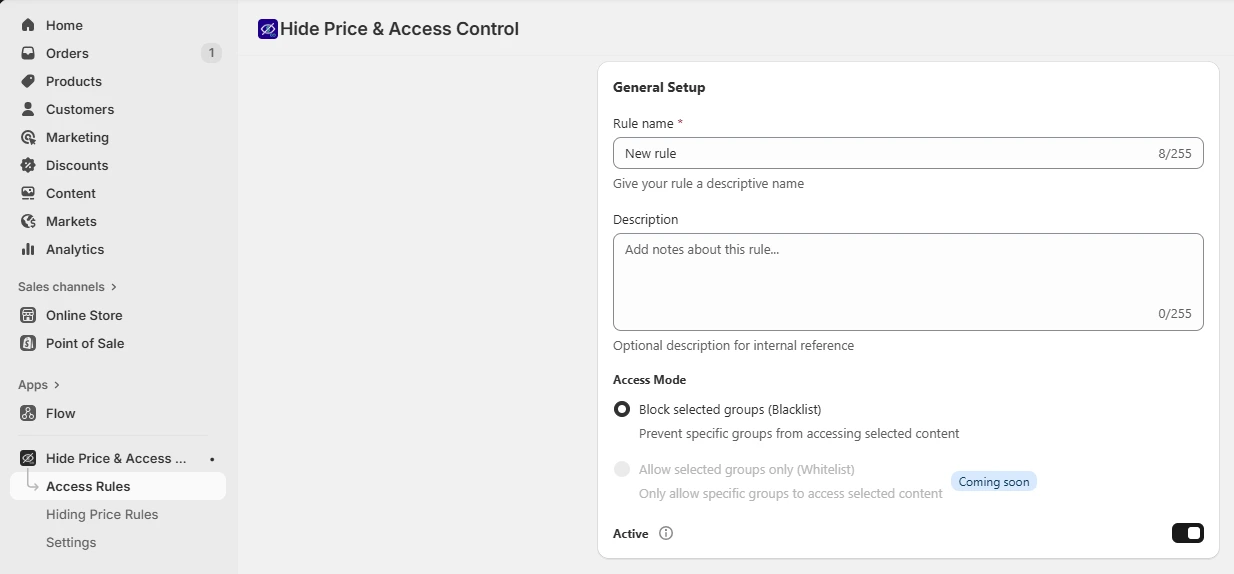
- Rule name: Enter a descriptive name (e.g., Wholesale Only, VIP Products).
- Description: Optionally add notes for internal reference.
- Access Mode:
- Block selected groups (Blacklist): Prevent specific groups (e.g., guests) from viewing content.
- (Whitelist option will be available soon.)
- Status: Toggle ON to activate this rule after setup.
3. Define what to protect
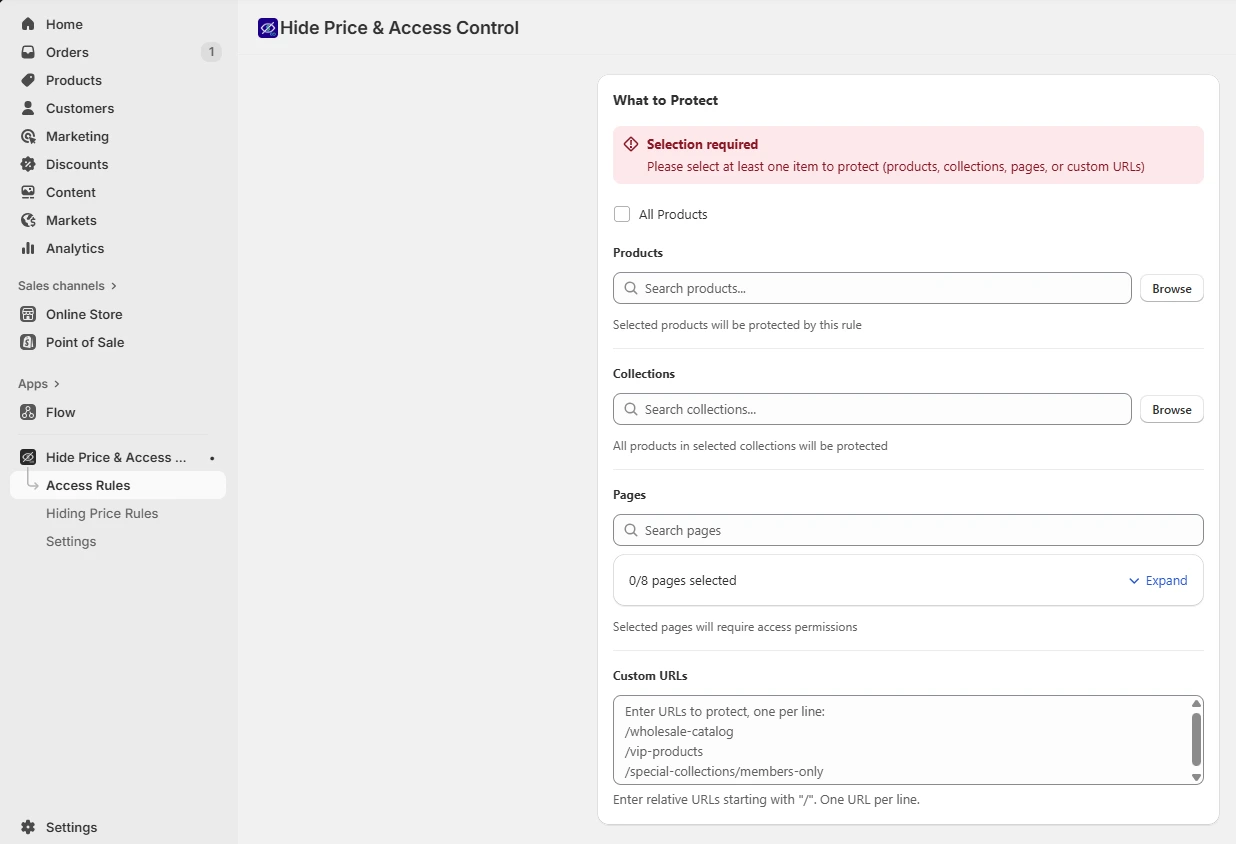
- All Products: Check this box to apply restrictions to all products in your store. You can also uncheck the box and choose specific products/collections to be protected.
- Pages: Search and select specific pages to protect.
- Custom URLs: Enter relative URLs (starting with
/) or full URLs, one per line.
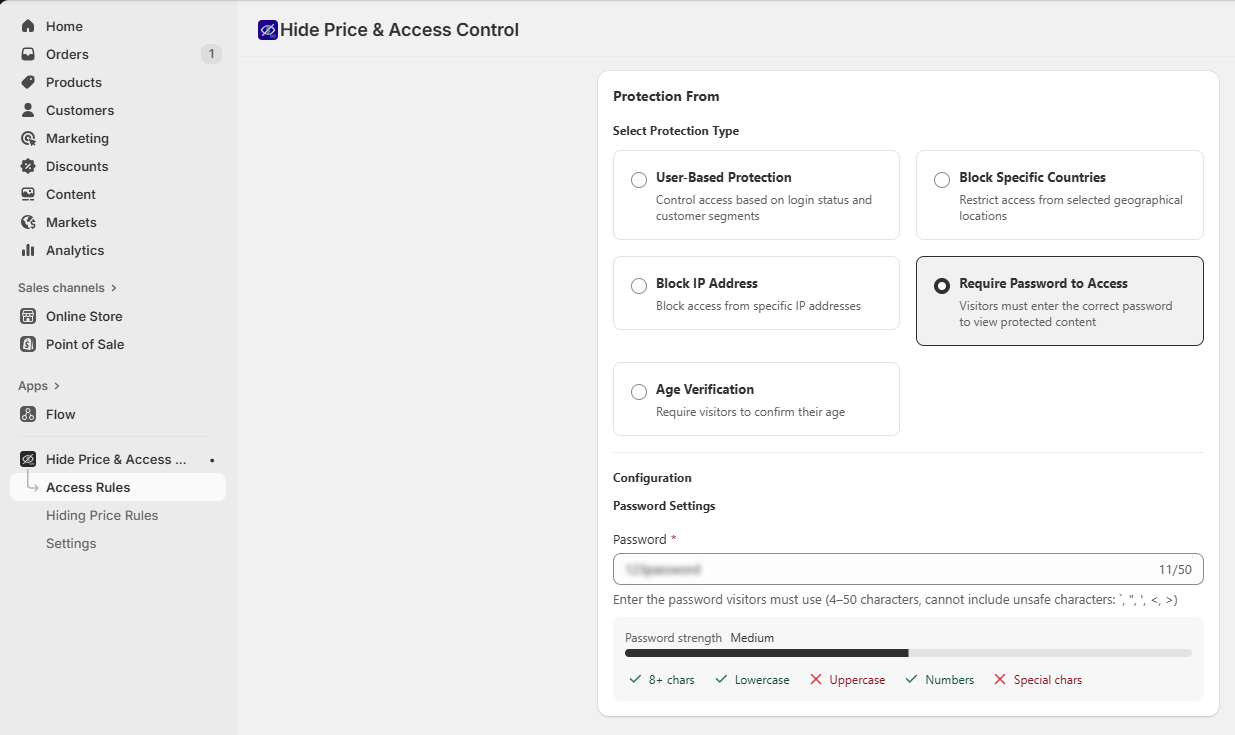
4. Set up your protection rules
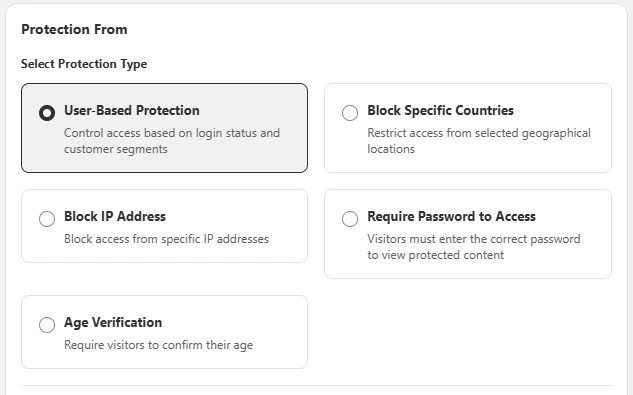
In the Protection From section, select the protection type you want to apply. Each option controls access in a different way. Once selected, the app will show the required configuration settings.
You can choose from 5 protection types:
- User-based protection
- Block specific countries
- Block IP address
- Require password to access
- Age verification
4.1. User-based protection
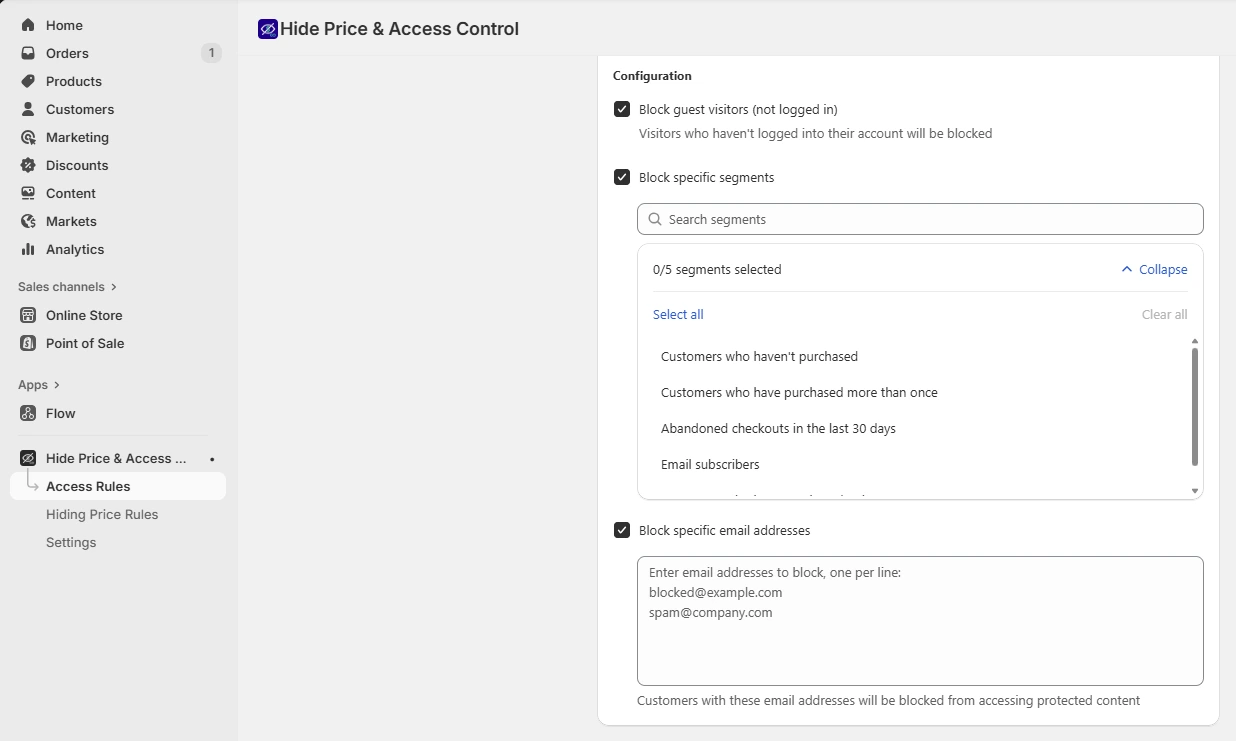
In the Configuration section, choose who will be restricted:
- Block guest visitors (not logged in) – Recommended for B2B/wholesale.
- Block specific segments – Restrict based on customer tags or segments.
- Block specific email addresses – Restrict individual emails.
You can turn on any option individually or combine multiple options, depending on how you want to limit access.
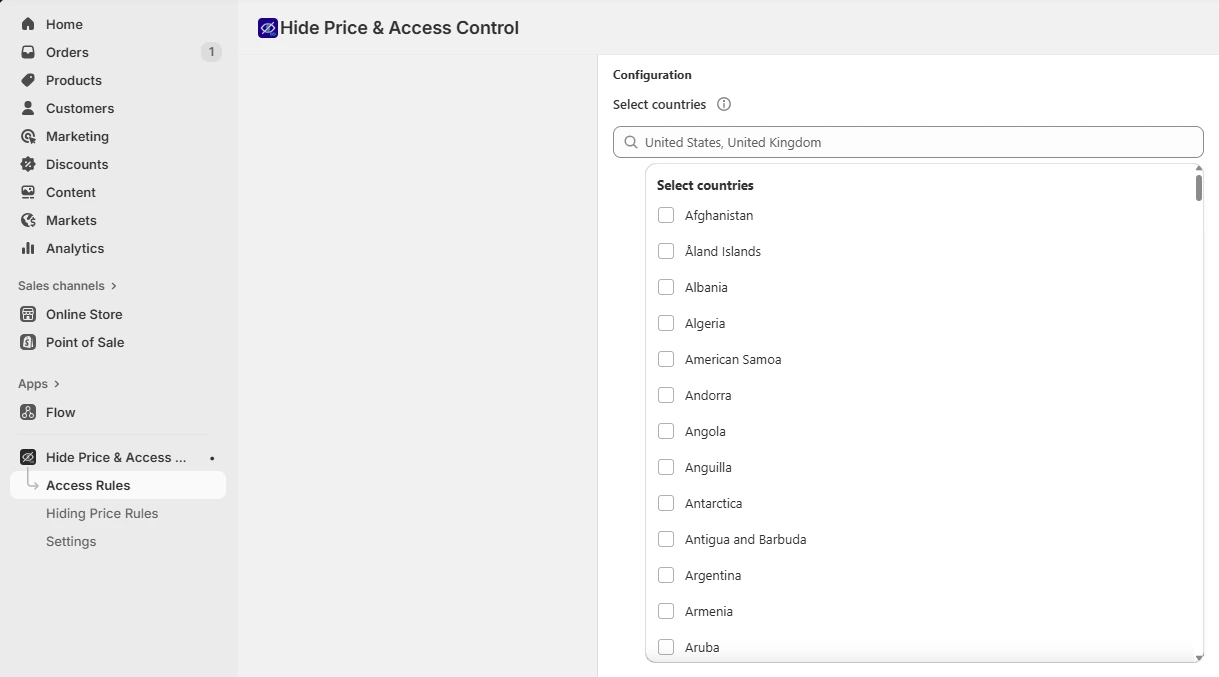
4.2. Block specific countries
In the Select countries field, choose one or multiple countries you want to block. Visitors from these selected locations will not be able to access the protected content.
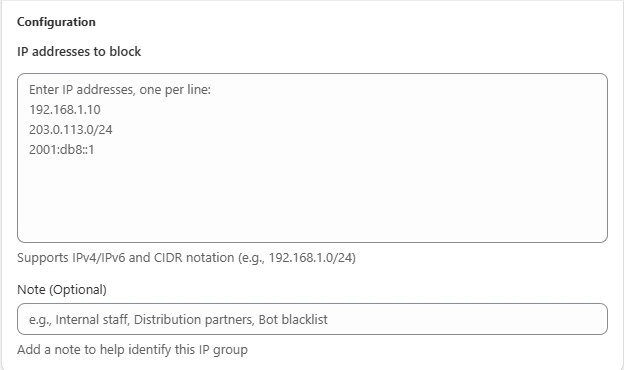
4.3. Block IP address
- IP entry: Enter the IP addresses you want to restrict (one IP per line).
- Note: Write a short note to remind yourself who this IP group is (optional).
4.4. Require password to access
- Password creation: Create the password visitors must enter (4–50 characters).
- Password strength: See if the password is strong enough.
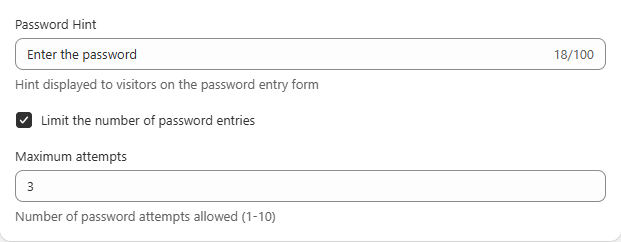
- Password hint: Give visitors a small clue.
- Attempt limit: Choose how many times a visitor can try (1–10 attempts).
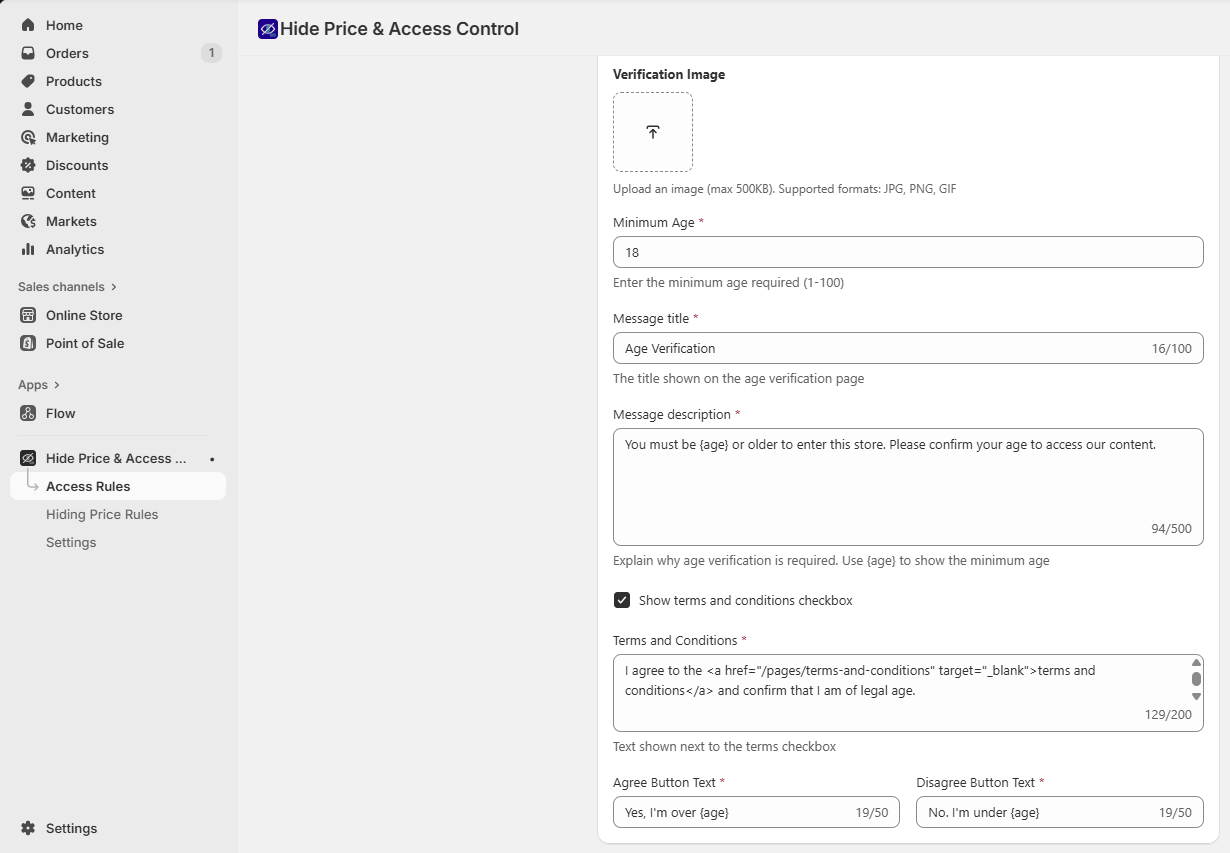
4.5. Age verification
- Minimum age: Choose the required age visitors must meet (1–100).
- Message customization: Edit the title and description shown on the age verification screen.
- Verification image: Upload an optional image (JPG, PNG, GIF).
- Terms checkbox: Turn on a terms and conditions checkbox if needed.
- Button text: Customize both agree and disagree button text.
5. Redirect & message settings
- Redirect destination: Choose where blocked visitors are sent:
- Login page
- 404 Not Found
- Registration page
- Homepage
- Custom URL (enter a full link or relative path)
-
Auto redirect timer: Set how many seconds before visitors are redirected. (e.g., 5 seconds)
- Message customization:
- Title: Enter a headline (e.g., Access Restricted).
- Description: Explain why content is blocked (e.g., You need to log in to view this page).
- Button text & style: Customize the call-to-action (e.g., Login Now).
👉 A live Quick Preview is shown on the right side, so you can see exactly how the restriction message will look to blocked visitors.

6. Save & manage rules
- Click Save to create the rule.
- Go back to Manage Access Rules to view all rules.
- Here you can Edit, Duplicate, or Delete any rule.
- The Status toggle allows quick activation/deactivation.